The LEMP stack is a web development platform for hosting static and dynamic websites. It is a combination of free and open-source software including Linux, Nginx, MySQL, and PHP. It is an alternative to the highly popular LAMP stack, the only difference being having Nginx as a web server instead of Apache.
Table of Contents
Requirements:
- For the purposes of this tutorial, we will be using an Ubuntu 18.04 VPS.
- Full SSH root access or a user with sudo privileges is also required.
1. Log in via SSH and Update the System
Log in to your Ubuntu 18.04 VPS with SSH as root or a user with sudo privileges:
ssh root@IP_Address -p Port_number
You can check whether you have the proper Ubuntu version installed on your server with the following command:
$ lsb_release -a
You should get this output:
Distributor ID: Ubuntu
Description:    Ubuntu 18.04.1 LTS
Release:        18.04
Codename:       bionic
Once you are logged in, run the following command to update all installed packages to the latest available version:
$ sudo apt-get update && apt upgrade
2. Install Nginx
To install Nginx on your Ubuntu 18.04 server, you need to execute the following command:
$ sudo apt-get install nginx
After the installation is completed, start Nginx and enable it to start automatically after a reboot with these two commands:
$ sudo systemctl start nginx
$ sudo systemctl enable nginx
To check and verify whether Nginx is currently running on your server, execute the following command:
$ sudo systemctl status nginx
Output:
● nginx.service - A high performance web server and a reverse proxy server
   Loaded: loaded (/lib/systemd/system/nginx.service; enabled; vendor preset: enabled)
   Active: active (running)
     Docs: man:nginx(8)
  Process: 2133 ExecStart=/usr/sbin/nginx -g daemon on; master_process on; (code=exited, status=0/SUCCESS)
  Process: 2121 ExecStartPre=/usr/sbin/nginx -t -q -g daemon on; master_process on; (code=exited, status=0/SUCCESS)
 Main PID: 2135 (nginx)
    Tasks: 3 (limit: 2292)
   CGroup: /system.slice/nginx.service
           ├─2135 nginx: master process /usr/sbin/nginx -g daemon on; master_process on;
           ├─2139 nginx: worker process
           └─2140 nginx: worker process
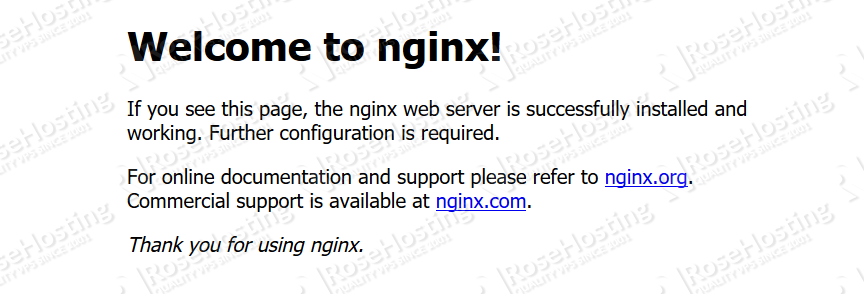
Also, you can verify that Nginx is running by opening a web browser and visiting your server IP address (http://server_ip). You should get the Nginx welcome page – it should look similar to the one below:
3. Install MySQL
Next, we need to install the MySQL server. The following command will install the latest MySQL 5.7 server from the official Ubuntu repositories:
$ sudo apt install mysql-server
When the installation is complete, run the following commands to start and enable the MySQL service :
$ sudo systemctl start mysql
$ sudo systemctl enable mysql
We can check to see if the MySQL service is running:
$ sudo service mysql status
If running, you will see a green Active status, like this:
● mysql.service - MySQL Community Server
   Loaded: loaded (/lib/systemd/system/mysql.service; enabled; vendor preset: enabled)
   Active: active (running)
 Main PID: 2538 (mysqld)
    Tasks: 27 (limit: 2292)
   CGroup: /system.slice/mysql.service
           └─2538 /usr/sbin/mysqld --daemonize --pid-file=/run/mysqld/mysqld.pid
Once the installation is complete, issue the following command to secure your installation:
$ sudo mysql_secure_installation
Then, answer every prompt with Yes to improve the security of your MySQL server.
4. Install PHP
The last step of our LEMP stack setup is the PHP installation. Currently, the default PHP version available from the official Ubuntu repository is PHP 7.2.
Unlike Apache, Nginx does not contain native PHP processing. For that, we have to install PHP-FPM (FastCGI Process Manager). FPM is an alternative PHP FastCGI implementation with some additional features useful for sites with high load.
$ sudo apt-get install php-fpm php-mysql
To verify if PHP has been properly installed, you can run the following command:
$ php -v
Output:
PHP 7.2.15-0ubuntu0.18.04.1 (cli) (built: Feb  8 2019 14:54:22) ( NTS )
Copyright (c) 1997-2018 The PHP Group
Zend Engine v3.2.0, Copyright (c) 1998-2018 Zend Technologies
    with Zend OPcache v7.2.15-0ubuntu0.18.04.1, Copyright (c) 1999-2018, by Zend Technologies
5. Configure Nginx for PHP
The next step you that need to complete is to modify the Nginx configuration file. The command below does exactly that:
$ cd /etc/nginx/sites-available/
$ sudo nano /etc/nginx/sites-available/your_domain.com.conf
Now that you have a new default file opened, paste the following content:
server {
listen 80;
root /var/www/html;
index index.php index.html index.htm index.nginx-debian.html;
server_name your_domain.com;

location / {
try_files $uri $uri/ =404;
}

location ~ \.php$ {
include snippets/fastcgi-php.conf;
fastcgi_pass unix:/var/run/php/php7.2-fpm.sock;
}

location ~ /\.ht {
deny all;
}
}
To enable the server configuration that we just created, run the following command:
$ sudo ln -s /etc/nginx/sites-available/your_domain.com.conf /etc/nginx/sites-enabled/your_domain.com.conf
Now, check the config file to make sure that there are no syntax errors. Any errors could crash the web server on restart.
$ sudo nginx -t
Output:
nginx: the configuration file /etc/nginx/nginx.conf syntax is ok
nginx: configuration file /etc/nginx/nginx.conf test is successful
If there are no errors, you can reload the Nginx config.
$ sudo service nginx reload
6. Test PHP
To see if PHP is working correctly on Ubuntu 18.04, let’s a create a new PHP file called info.php in the document root directory. By default, this is located in /var/www/html/.
$ sudo nano /var/www/html/info.php
Paste the following into the file:
<?php
phpinfo();
?>
Restart Nginx for the changes to take effect:
$ sudo systemctl restart nginx
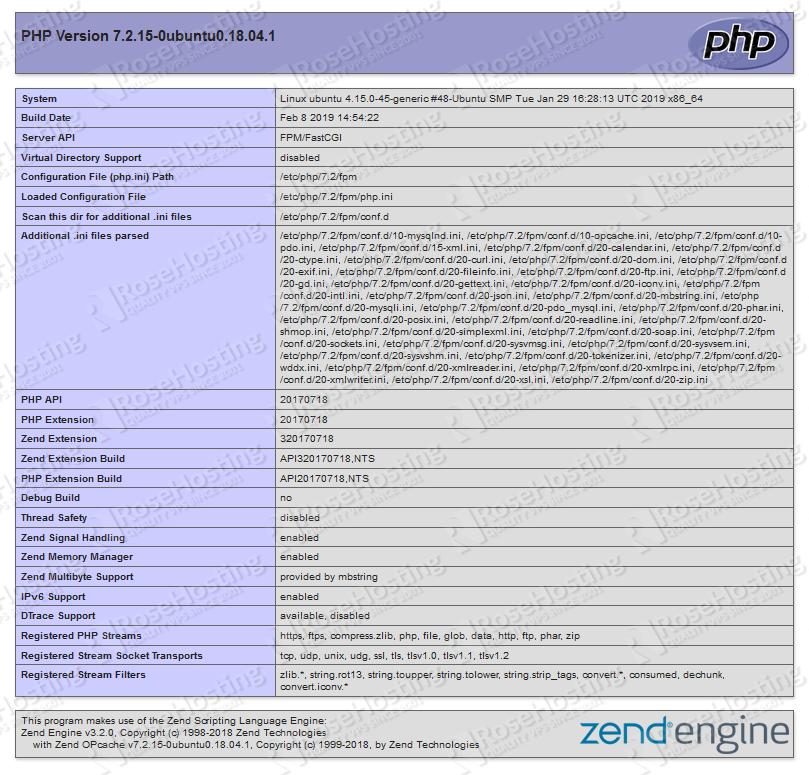
Now, open your preferred web browser and navigate to http://your_server_ip_address/info.php . You will be welcomed by a web page similar to the one below:

That’s it – you have successfully installed the LEMP stack on your Ubuntu 18.04 VPS.
Of course, you don’t have to do any of this if you use one of our Linux VPS Hosting services, in which case you can simply ask our expert Linux admins to install the LEMP stack for you. They are available 24×7 and will take care of your request immediately. For more updates, you can also check our guide on How to Install WordPress with a LEMP Stack on Ubuntu 18.04.
PS. If you liked this post, please share it with your friends on the social networks using the buttons below, or simply leave a comment in the comments section. Thanks.

