In this tutorial, we will explain how to install YetiForce on your Ubuntu 18.04 VPS.

Table of Contents
Prerequisites:
-
A server running Ubuntu 18.04.
-
A registered domain name is set up to work with your server.
-
Access to the root account or to a user account with root privileges.
Step 1: Getting Started
Before starting, you will need to update your system with the latest version. You can update it by running the following command:
apt-get update -y

apt-get upgrade -y
Once the update is completed, restart your system to apply all the updates.
Step 2: Install LAMP Server
First, you will need to install Apache web server, MariaDB server, PHP and other libraries on your server. You can install all of them with the following command:
apt-get install apache2 mariadb-server php7.2 php7.2 libapache2-mod-php7.2 php7.2-common php7.2-sqlite3 php7.2-json php7.2-curl php7.2-intl php7.2-mbstring php7.2-xmlrpc php7.2-mysql php7.2-gd php7.2-xml php7.2-cli php7.2-zip php7.2-soap php7.2-imap wget unzip -y
Once all of the packages are installed, open the php.ini file and make some changes:
nano /etc/php/7.2/apache2/php.ini
Change the following lines:
memory_limit = 256M

upload_max_filesize = 100M

post_max_size = 100M

max_execution_time = 60

max_input_vars = 1500

cgi.fix_pathinfo=0

date.timezone = Europe/London
#example timezone, change to your local timezone
Save and close the file when you are finished.
Step 3: Configure MariaDB
By default, MariaDB is not secure. Before continuing, we recommend going through a short program that helps secure your MariaDB server. You can secure it with the following command:
mysql_secure_installation
Answer all the questions as shown below:
 Enter current password for root (enter for none):
 Set root password? [Y/n]: Y
 Remove anonymous users? [Y/n]: Y
 Disallow root login remotely? [Y/n]: Y
 Remove test database and access to it? [Y/n]: Y
 Reload privilege tables now? [Y/n]: Y
Once MariaDB has been secured, log in to the MariaDB shell with the following command:
mysql -u root -p
Provide your MariaDB root password that you set earlier. Then create a database and user for YetiForce with the following commands:
MariaDB [(none)]> CREATE DATABASE yetiforce;

MariaDB [(none)]> GRANT ALL PRIVILEGES ON yetiforce.* TO 'yetiforce'@'localhost' IDENTIFIED BY 'password';
Don’t forget to replace ‘password‘ with an actual strong password. After running those two commands, flush the privileges and exit from the MariaDB shell with the following commands:
MariaDB [(none)]> FLUSH PRIVILEGES;

MariaDB [(none)]> \q
Step 4: Install YetiForce
First, download the latest version of YetiForce (at the time of writing) with the following command:
wget https://excellmedia.dl.sourceforge.net/project/yetiforce/YetiForce%20CRM%205.x.x/5.1.0/YetiForceCRM-5.1.0-complete.zip
Once the download is completed, unzip the downloaded file to the Apache root directory with the following command:
mkdir /var/www/html/yetiforce
unzip YetiForceCRM-5.1.0-complete.zip -d /var/www/html/yetiforce
Next, assign the proper permissions to the yetiforce directory with the following command:
chown -R www-data:www-data /var/www/html/yetiforce
chmod -R 755 /var/www/html/yetiforce
Step 5: Configure Apache for YetiForce
Next, you will need to create an Apache virtual host file for YetiForce. You can create it with the following command:
nano /etc/apache2/sites-available/yetiforce
Add the following lines:
<VirtualHost *:80>
 ServerAdmin admin@your_domain.com
 DocumentRoot /var/www/html/yetiforce
 ServerName your_domain.com www.your_domain.com

 <Directory /var/www/html/yetiforce/>
 Options FollowSymlinks
 AllowOverride All
 Require all granted
 </Directory>

 ErrorLog ${APACHE_LOG_DIR}/error.log
 CustomLog ${APACHE_LOG_DIR}/access.log combined
</VirtualHost>
Don’t forget to replace ‘your_domain.com‘ with your registered domain name. Save and close the file. Then, enable the YetiForce virtual host file and disable the default virtual host file with the following commands:
a2ensite yetiforce.conf
a2dissite 000-default
Next, enable the Apache rewrite module and restart the Apache service with the following command:
a2enmod rewrite
systemctl restart apache2
Step 6: Access the YetiForce Web Interface
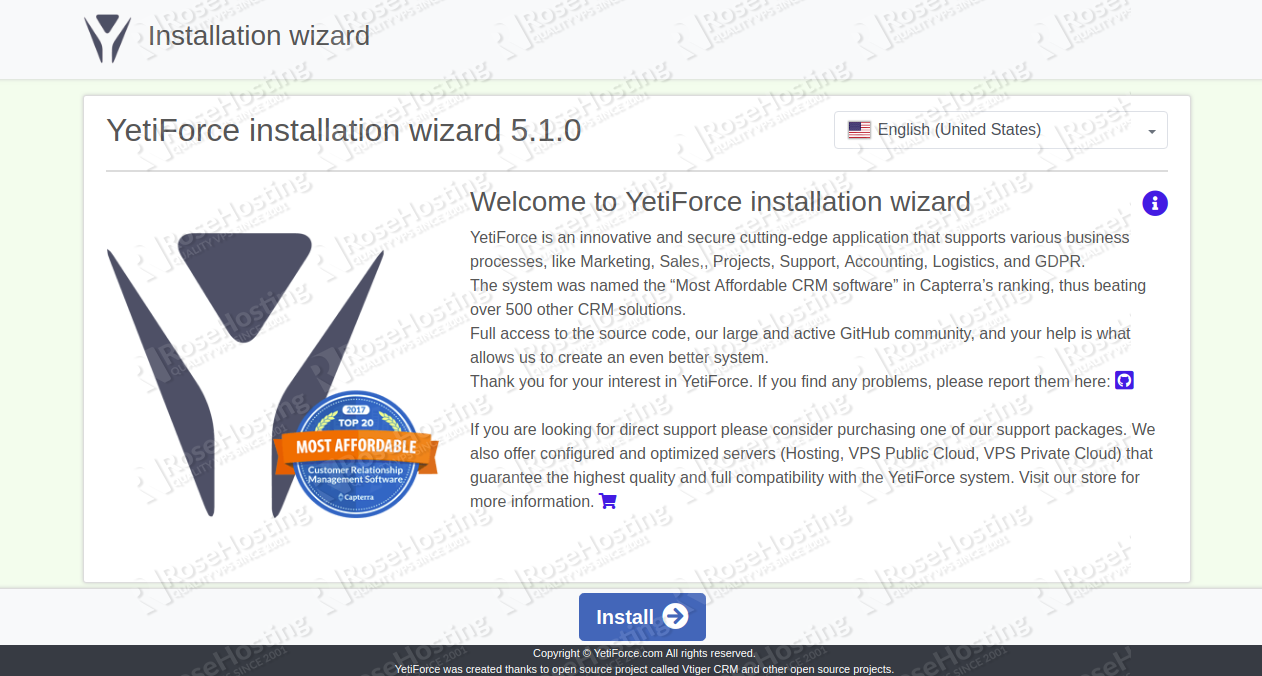
Now, open your web browser and type the URL http://your_domain.com. You should be redirected to the YetiForce welcome page:
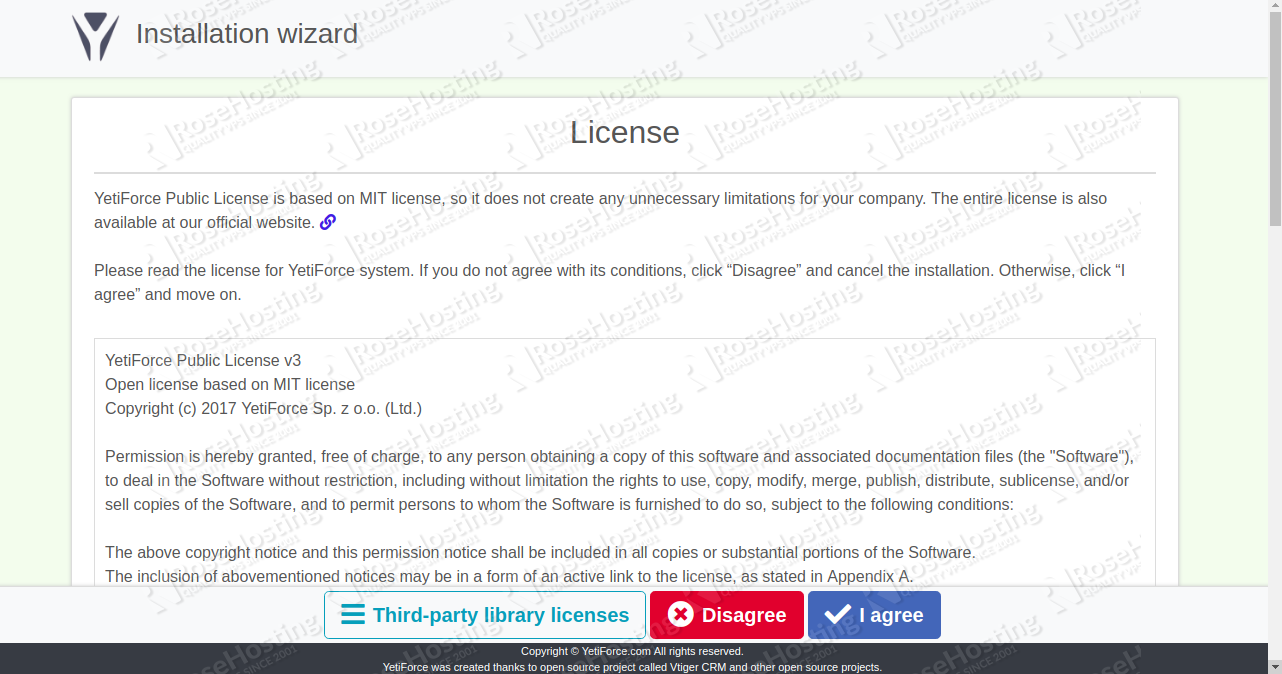
Now click on the Install button. You should see the License agreement page:
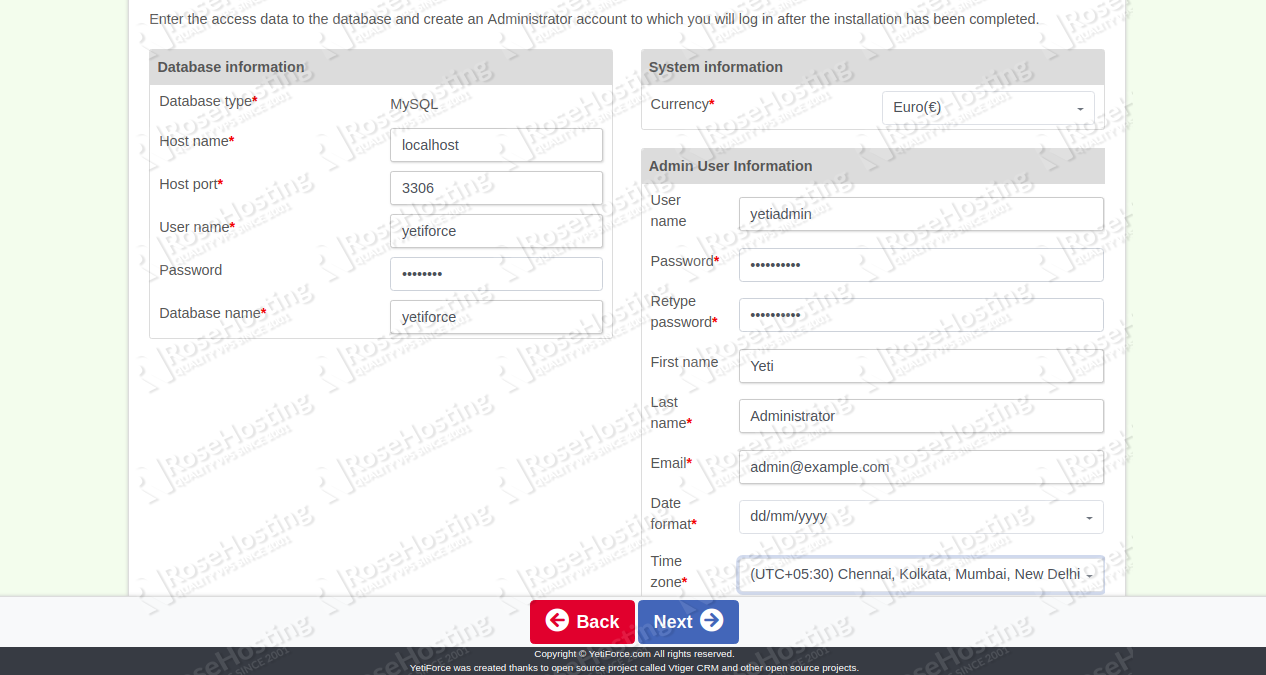
Next is to accept the License agreement and click on the I agree button. You should see the following page:
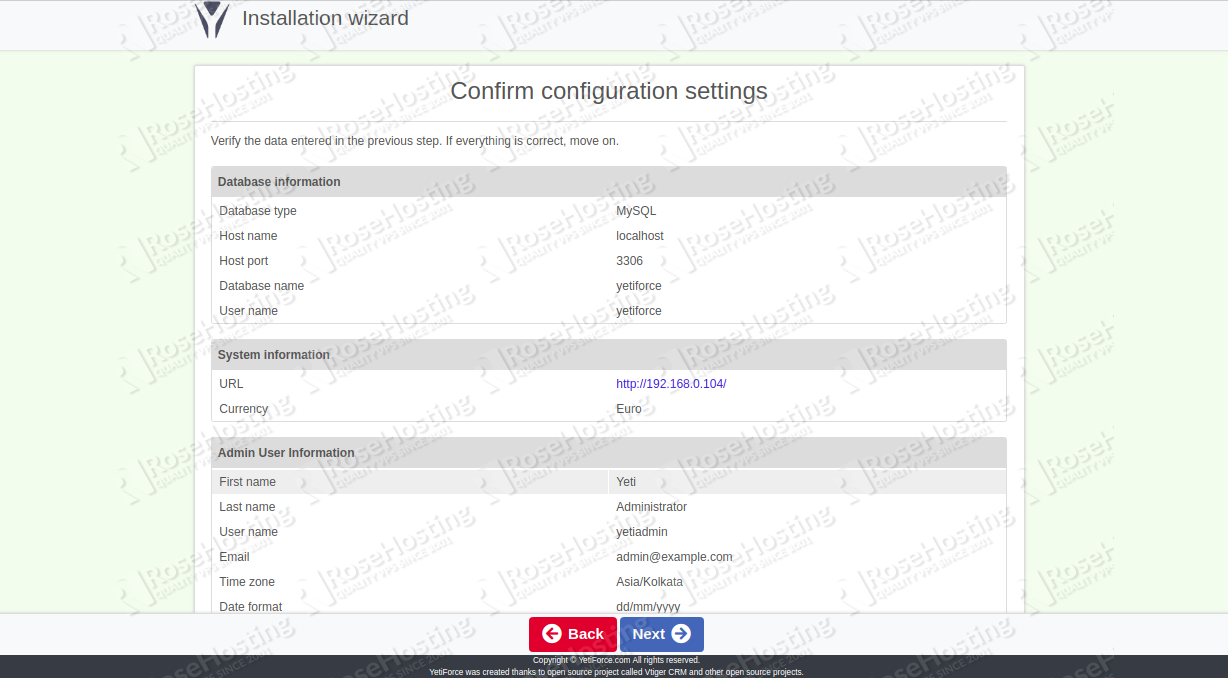
Now you’ll need to provide your database details that we created earlier. This is also where you create the administrator account. Once done with this, click on the Next button. You should see the following page:
Click on the Next button to confirm all of the settings. Then click on the Next button. You should see the following page:
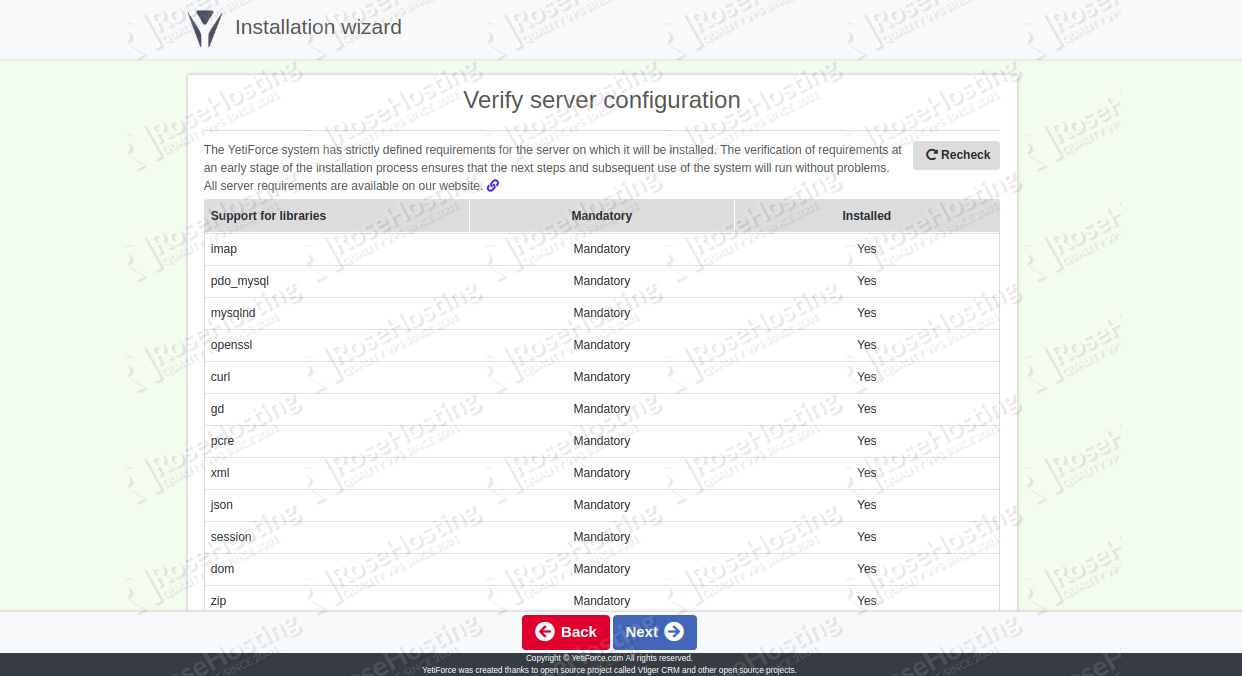
We now need to verify the server configuration and click on the Next button. You should see the following page:
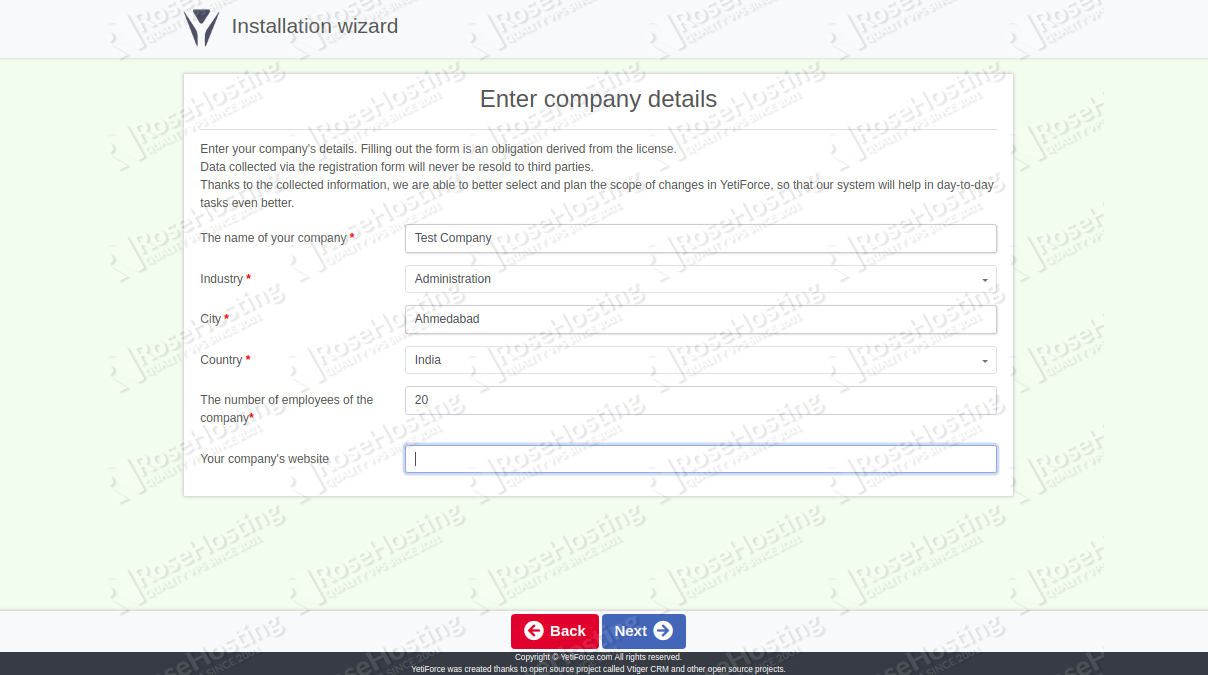
Lastly, provide your Company details and click on the Next button. You will be redirected to the YetiForce default dashboard in the following page:
That’s It! You now have a working copy of YetiForce on your Ubuntu VPS.

PS. If you enjoy reading this blog post on installing YetiForce on Ubuntu 18.04, feel free to share it on social networks using the share shortcuts below, or simply leave a comment down in the comments section. Thank you.
