
In this tutorial, we will show you how to install Odoo 14 on a CentOS 8 VPS. Odoo is one of the most popular Open Source ERP business management platforms ever made. Thanks to its modular design with over ten thousand modules (or apps) available, Odoo can adapt to your business’s needs and enhance your team’s productivity. It is built using Python and is utilizing PostgreSQL for its database.

The latest Odoo 14 update comes with plenty of new exciting features, including a brand new Website Builder, a new Business Intelligence Tool, new and improved menus for Inventory and MRP, and much more. Let’s get started.
Table of Contents
Requirements
- A CentOS 8 VPS with root access enabled (our VPSes already come with full root access) or a user with sudo privileges.
- At least 2 GB of RAM
Log in via SSH and Update your Server
First, you will need to log in to your CentOS 8 VPS by using SSH as the root user:
Replace IP_ADRRESS and PORT_NUMBER with the correct server IP address and SSH port number. The default port number is 22, but your server may have a unique one set.
Next, run the following commands to upgrade all installed packages on your VPS:
Once all of the packages are updated, restart your system to apply any changes that require a reboot. This ensures a clean slate on which we’ll be installing our Odoo 14 instance.
Install the Required Dependencies
Before you begin with the Odoo installation, you will need to install Python 3 and some other Odoo dependencies onto your system. You can install all of them using the following command:
Once all the packages are installed, you will also need to install the wkhtmltopdf package in your system. Wkhtmltopdf is an open-source tool that can be used to convert the HTML format to a PDF, that way Odoo can export PDF reports.
You can install it by running the following command:
Verify that wkhtmltopdf is installed on your server:
Once this is done, you can proceed to the next step.
Install and Configure PostgreSQL
Odoo uses PostgreSQL to store its data. You can install the PostgreSQL server with the following command:
Once the installation is completed, initialize the database with the following command:
To start the PostgreSQL service and enable it to automatically start after every server reboot, run the following commands:
Next, log in to the PostgreSQL shell and create a new PostgreSQL user for your Odoo database, with the following command. The name we used is odoo14, but you can use any name you like. KEEP IN MIND that the username you set here has to be identical to the system user that you’re going to create in the next step:
Install and Configure Odoo 14 on CentOS 8
In this section, we will download Odoo 14 from the official Git repository and install it in a Python virtual environment.
First, we need to create a new system user for our Odoo installation. Make sure the username is the same as the PostgreSQL user we created in the previous step:
Next, log in as the newly created odoo14 user and download Odoo 14 from the official Git repository:
Once the download is complete, create a new Python virtual environment for the Odoo 14 installation with the following command:
Activate the virtual environment with the following command:
You can now install the required python modules using the pip3 command, as shown below:
Once all the required modules are installed successfully, deactivate the virtual environment and switch back to the sudo or root user with the following command:
Next, create a separate directory for Odoo’s custom addons/apps. The best practice is to install custom Odoo modules in a separate directory. This ensures that if some custom module doesn’t work, it can easily be removed without risking the removal of default modules that come included with the regular installation.
The following commands will create a log file for the new Odoo 14 installation:
You can now create a configuration file for your Odoo installation:
Open that file and enter the following information:
Make sure you set a strong and difficult to guess master_password.
After you are done, save and close the file.
Create a Systemd Unit File for Odoo 14
We will now create a systemd unit file so that we can run our Odoo 14 instance as a service.
You can create the service with the following command:
Once you open the file, add the following lines:
Save and close the file, then reload the systemd daemon list with the following command:
You can now start the Odoo 14 service and enable it to start at boot with the following commands:
You can now verify the status of your Odoo 14 service with:
Configure Nginx as a Reverse Proxy
Your Odoo 14 install is complete and is now accessible at your CentOS 8 server’s public IP with the post number 8069. However, if you want to access your Odoo application using a domain name instead of typing the IP address and the port number in the URL, you will have to configure a reverse proxy on your server.
We will show you how to implement the reverse proxy configuration using the Nginx web server. Nginx is a powerful and high-performance web server that focuses on customization and performance.
First, install Nginx with the following command:
Once installed, create a new Nginx virtual host configuration file. Replace yourdomain.com with your registered domain name:
Add the following lines:
Make sure to replace yourdomain.com with your registered domain name.
You can now start the Nginx service and enable it to start at boot with the following commands:
You will also need to configure your Odoo to use the proxy. You can do it by editing the Odoo configuration file:
And add the following line to the end of the file:
Save and close the file, then restart the Odoo 14 service to implement the changes:
Access the Odoo 14 Instance
You should now be able to access the Odoo 14 instance with your domain name at http://yourdomain.com.
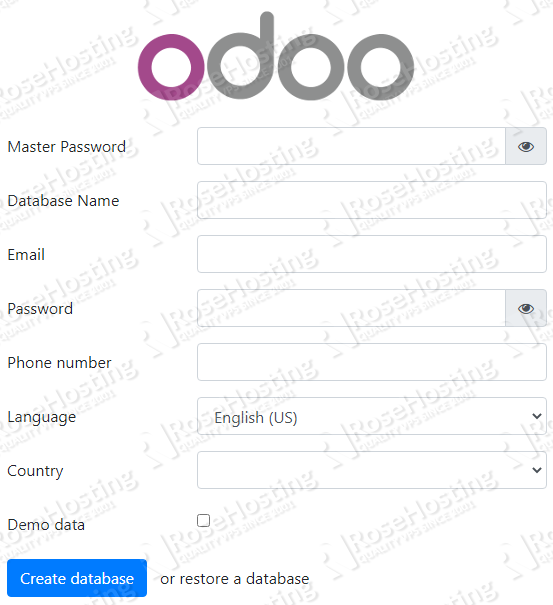
Congratulations, if you carefully followed our instructions in this tutorial, you have successfully installed the latest Odoo 14 on your CentOS 8 VPS. You can create your first database and start using the latest version of Odoo.

Odoo can help you improve your business’s efficiency, but you still spend time maintaining your server and your Odoo instance. However, if you use our managed Odoo hosting, we can handle all of the maintenance and labor for you. We can upgrade and maintain your server, install and configure addons, optimize your server for maximum performance, and more.
We would appreciate you sharing your thoughts and questions by leaving a comment in our comments section. You can also share this post on social media with our share shortcuts if you want your followers to set up Odoo 14 for their businesses as well. Thank you.
Hi Jeff, I am currently presenting the following problem in my installation, can you please tell me what I can do:
(odoo14-venv) [odoo14@OdooERP ~]$ pip3 install -r odoo14/requirements.txt
Could not open requirements file: [Errno 2] No such file or directory: ‘odoo14/requirements.txt’
You are using pip version 9.0.3, however version 20.2.3 is available.
You should consider upgrading via the ‘pip install –upgrade pip’ command.
Make sure you are in the correct directory when executing the command.
If you are not sure, you can also use the full path to the requirements.txt file. For example:
pip3 install -r /opt/odoo/odoo14/requirements.txtMy server is CentOS 8 and plesk 18.0. How to configure the server to access my Odoo application using a domain name? Thanks.
You need to create a reverse proxy. If you have Apache installed on your server, you may find the following tutorial useful https://www.rosehosting.com/blog/install-odoo-10-on-centos-7-with-apache-as-a-reverse-proxy