
In this tutorial, we will show you how to install PHP 8.0 with Apache on Ubuntu 20.04. PHP is a free, open-source, and most popular server-side programming language used by many CMS including, Drupal, WordPress, Magento, and many more. PHP 8.0 is a major update of the PHP language that contains new features and optimizations including named arguments, union types, attributes, constructor property promotion, match expression, null safe operator, JIT, and improvements in the type system, error handling, and consistency. Let’s get started with the installation of PHP 8 on Ubuntu 20.04.
Table of Contents
1. Prerequisites
- An Ubuntu 20.04 VPS (we’ll be using our SSD 2 VPS plan)
- Access to the root user account (or access to an admin account with root privileges)
2. Log in to the Server & Update the Server OS Packages
First, log in to your Ubuntu 20.04 server via SSH as the root user:
ssh root@IP_Address -p Port_number
You will need to replace ‘IP_Address‘ and ‘Port_number‘ with your server’s respective IP address and SSH port number. Additionally, replace ‘root’ with the username of the admin account if necessary.
Before starting, you have to make sure that all Ubuntu OS packages installed on the server are up to date. You can do this by running the following commands:
apt-get update -y
apt-get upgrade -y
3. Add PHP Repository
By default, the PHP 8.0 is not included in the Ubuntu 20.04 default repository. So you will need to add the ondrej/php PPA repository to your system.
First, install the required dependencies using the following command:
apt-get install software-properties-common -y
Next, add the ondrej/php PPA repository with the following command:
add-apt-repository ppa:ondrej/php
Once the repository is added, you can update it with the following command:
apt-get update -y

4. Install PHP 8.0 with Apache
You can install the Apache web server with PHP 8.0 by running the following command:
apt-get install apache2 php8.0 libapache2-mod-php8.0 -y
Once the installation is completed, restart the Apache service to load the PHP.
systemctl restart apache2
You can also install the most commonly used PHP extensions using the following command:
apt-get install php8.0-common php8.0-mysql php8.0-xml php8.0-curl php8.0-gd php8.0-imagick php8.0-cli php8.0-dev php8.0-imap php8.0-mbstring php8.0-opcache php8.0-soap php8.0-zip -y
5. Install PHP 8 FPM for Apache
If you want to use PHP-FPM with Apache, you can install it with the following command:
apt-get install php8.0-fpm libapache2-mod-fcgid -y
Once the PHP-FPM is installed, you will need to enable it for Apache. You can enable it with the following command:
a2enmod proxy_fcgi setenvif
a2enconf php8.0-fpm
Next, restart the Apache service to apply the changes:
systemctl restart apache2
6. Configure PHP 8 for Apache
You can configure PHP 8 for Apache by editing the file php.ini. By default, it is located inside the directory /etc/php/8.0/apache2/.
nano /etc/php/8.0/apache2/php.ini
Change the following values for better performance:
upload_max_filesize = 32M
post_max_size = 64M
memory_limit = 512M
max_execution_time = 300
date.timezone = America/Chicago
Save and close the file then restart the Apache service to apply the changes.
systemctl restart apache2
7. Verify PHP Installation
Create a new info.php file inside the Apache default document root directory to test whether the PHP is configured properly for Apache.
nano /var/www/html/info.php
Add the following line:
<?php
phpinfo();
?>
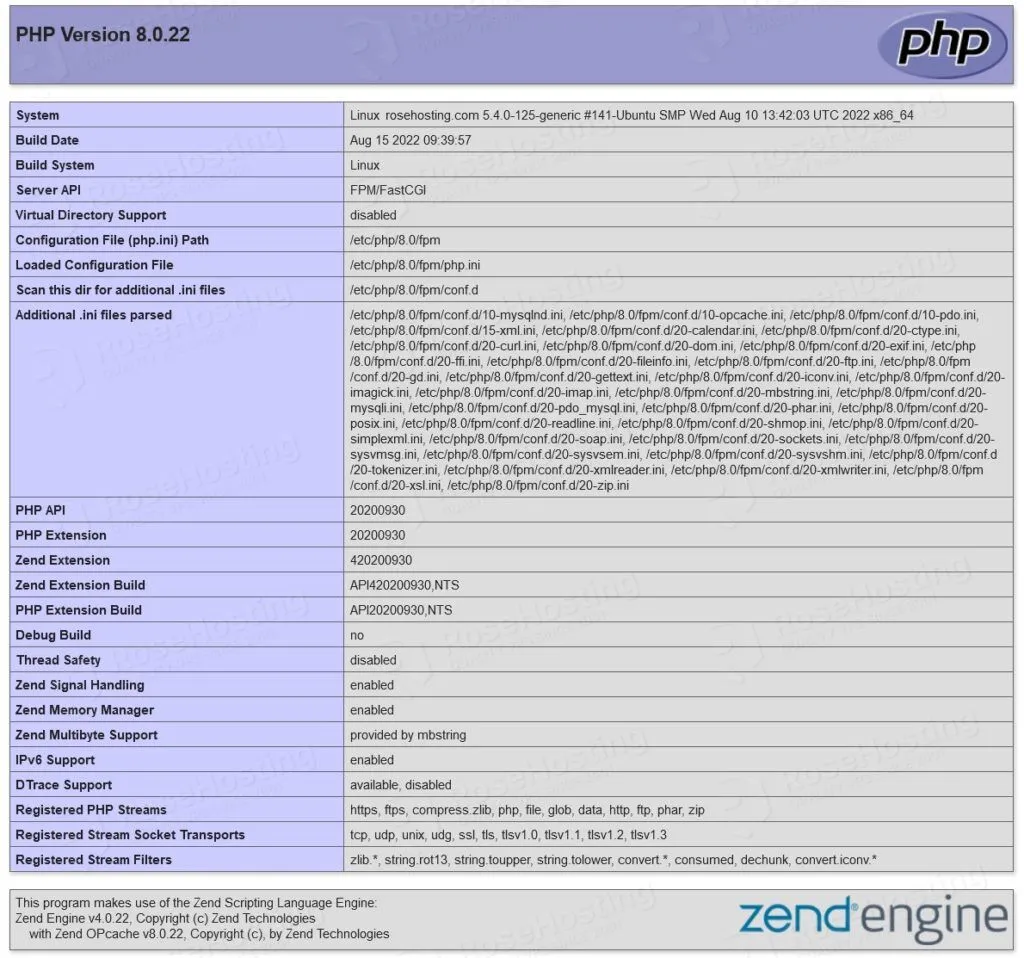
Save and close the file then open your web browser and type the URL http://your-server-ip/info.php.
You should see your PHP information page in the following screen:

Congratulations! you have successfully installed PHP 8.0 with Apache on Ubuntu 20.04 server.

Of course, you don’t have to do any of this if you use our PHP 8 VPS Hosting, in which case you can simply ask our expert Linux admins to setup this for you. They are available 24×7 and will take care of your request immediately.