
The Apache Hadoop or also known as Hadoop is an open-source, Java-based framework that allows for the distributed processing of large data sets across computers. It is used to store and process large datasets. It allows clustering multiple computers to store and process data more quickly instead of using a single large computer. Hadoop consists of four main modules:
– HDFS (Hadoop Distributed File System)
– YARN (Yet Another Resource Negotiator)
– MapReduce
– Hadoop Common
In this tutorial, we will explain how to install Hadoop on Debian 11.
Table of Contents
Prerequisites
- Debian 11
- SSH root access or a normal system user with sudo privileges
Step 1. Login to the server
First, log in to your Debian 11 server through SSH as the root user:
ssh root@IP_Address -p Port_number
Replace “root” with a user that has sudo privileges if necessary. Additionally, replace “IP_Address” and “Port_Number” with your server’s respective IP address and SSH port number.
You can check whether you have the proper Debian version installed on your server with the following command:
$ lsb_release -a
You should get this output:
No LSB modules are available.
Distributor ID: Debian
Description: Debian GNU/Linux 11 (bullseye)
Release: 11
Codename: bullseye
Before starting, you have to make sure that all Ubuntu OS packages installed on the server are up to date.
You can do this by running the following commands:
$ sudo apt update -y
$ sudo apt upgrade -y
Step 2. Create a System User and Generate SSH Key
It is not a good idea to run Hadoop as root, so for security reasons, we will create a new system user:
$ sudo useradd -r hadoop -m -d /opt/hadoop --shell /bin/bash
A user ‘hadoop’ has been created, let’s log in as the user.
$ su - hadoop
Hadoop requires ssh access to manage its nodes, whether remote or local nodes. To access the nodes without a password, we can generate SSH key and copy the public key to the ~/.ssh/authorized_keys file.
$ ssh-keygen -t rsa
You will get an output like this.
hadoop@debian11:~$ ssh-keygen -t rsa
Generating public/private rsa key pair.
Enter file in which to save the key (/opt/hadoop/.ssh/id_rsa):
Created directory '/opt/hadoop/.ssh'.
Enter passphrase (empty for no passphrase):
Enter same passphrase again:
Your identification has been saved in /opt/hadoop/.ssh/id_rsa
Your public key has been saved in /opt/hadoop/.ssh/id_rsa.pub
The key fingerprint is:
SHA256:QYHlb6Is9n05OtnR+6i71t4MZeN9gVqGVCoa28aiUXg hadoop@debian11.rosehosting.com
The key's randomart image is:
+---[RSA 3072]----+
| o+. . |
| oo o |
| . Eo. o |
| o *oo . . |
| . +S+oo ++. |
| .o.oo. =+ o.|
| o.o o =... o|
| . o .o * o= .|
| . o=+*o.+ |
+----[SHA256]-----+
Next, let’s add hadoop’s public key to the authorized key file, to allow user ‘hadoop’ to log in to the system without a password and only use the SSH key.
$ cat ~/.ssh/id_rsa.pub > ~/.ssh/authorized_keys
Log in to the system through SSH now.
$ ssh localhost
You should be able to log in to SSH without a password now.
Let’s exit from user ‘hadoop’ and then continue to the next step.
$ exit
Step 3. Install Java
Hadoop is written in Java, so we require Java in our system to be able to run Hadoop. Let’s run this command below to install the default JDK for Java from the repository.
$ sudo apt install default-jdk default-jre -y
Java should be installed now, you can check and verify it by invoking this command:
$ sudo java -version
Step 4. Download and Install Hadoop
At the time of writing this article, the latest stable version of Hadoop is version 3.3.2. You can go to their download page at https://hadoop.apache.org/releases.html to check the more recent version if any.
Let’s log in as user ‘hadoop’ to download and extract it, so we do not need to change the file and directory permission.
$ su - hadoop
$ wget https://dlcdn.apache.org/hadoop/common/hadoop-3.2.3/hadoop-3.2.3.tar.gz -O hadoop-3.2.3.tar.gz
$ tar -xzvf hadoop-3.2.3.tar.gz -C /opt/hadoop --strip-components=1
Before continuing to the next steps, make sure JAVA_HOME is pointing to the correct directory, you can check this by listing /usr/lib/jvm
$ ls /var/lib/jvm
![]()
Now, let’s edit /opt/hadoop/.bashrc
$ nano /opt/hadoop/.bashrc
Insert the following lines into the file.
export JAVA_HOME=/usr/lib/jvm/java-11-openjdk-amd64
export HADOOP_HOME=/opt/hadoop
export PATH=$PATH:$HADOOP_HOME/bin
export PATH=$PATH:$HADOOP_HOME/sbin
export HADOOP_MAPRED_HOME=$HADOOP_HOME
export HADOOP_COMMON_HOME=$HADOOP_HOME
export HADOOP_HDFS_HOME=$HADOOP_HOME
export YARN_HOME=$HADOOP_HOME
export HADOOP_COMMON_LIB_NATIVE_DIR=$HADOOP_HOME/lib/native
export HADOOP_OPTS="-Djava.library.path=$HADOOP_HOME/lib"
Save the file and exit, then run the command below to activate the newly added environment variables.
$ source ~/.bashrc
Step 5. Configure Hadoop
Hadoop can be configured to run in a single node or multi-node cluster. In this tutorial, we will show you how to set up Hadoop single node cluster or pseudo-distributed mode. There are some files we need to modify in this step, now let’s edit the Hadoop environment file first.
$ nano /opt/hadoop/etc/hadoop/hadoop-env.sh
Add the following line to the file.
export JAVA_HOME=/usr/lib/jvm/java-11-openjdk-amd64
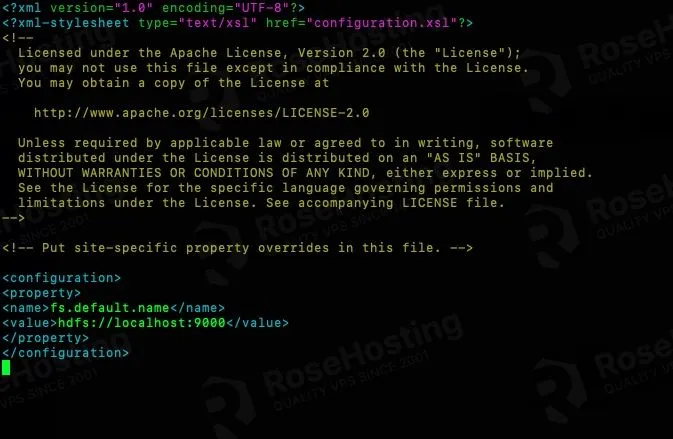
Edit core-site.xml file.
$ nano /opt/hadoop/etc/hadoop/core-site.xml
Add these lines to the configuration tag.
<property>
<name>fs.default.name</name>
<value>hdfs://localhost:9000</value>
</property>
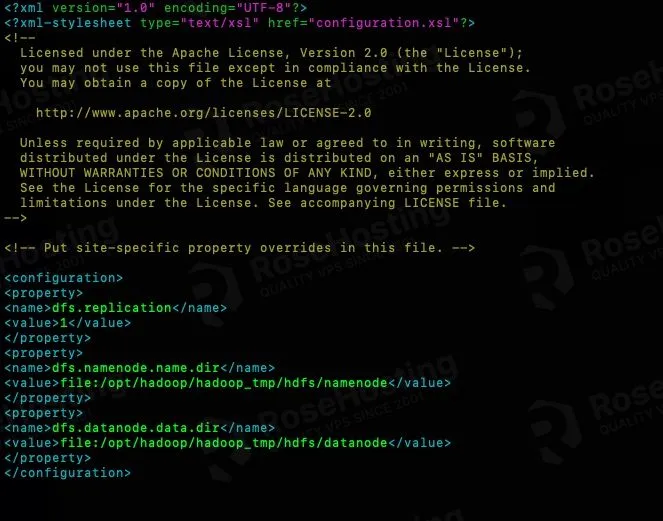
Edit hdfs-site.xml file
$ nano /opt/hadoop/etc/hadoop/hdfs-site.xml
Add these lines to the configuration tag.
<property>
<name>dfs.replication</name>
<value>1</value>
</property>
<property>
<name>dfs.namenode.name.dir</name>
<value>file:/opt/hadoop/hadoop_tmp/hdfs/namenode</value>
</property>
<property>
<name>dfs.datanode.data.dir</name>
<value>file:/opt/hadoop/hadoop_tmp/hdfs/datanode</value>
</property>
Save the file by pressing CTRL + O and exit with CTRL + X
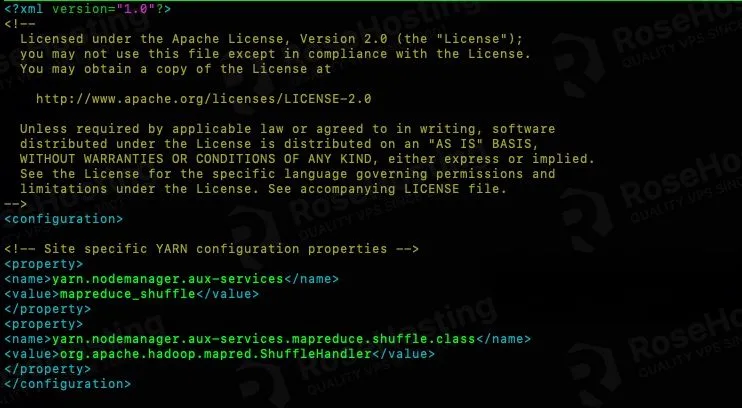
Edit yarn-site.xml file
$ nano /opt/hadoop/etc/hadoop/yarn-site.xml
Add these lines to the configuration tag.
<property>
<name>yarn.nodemanager.aux-services</name>
<value>mapreduce_shuffle</value>
</property>
<property>
<name>yarn.nodemanager.aux-services.mapreduce.shuffle.class</name>
<value>org.apache.hadoop.mapred.ShuffleHandler</value>
</property>
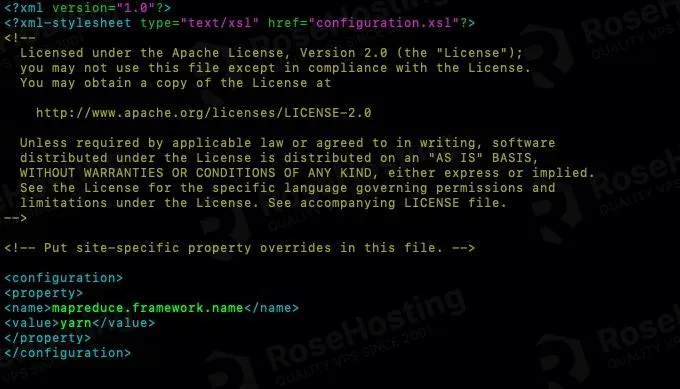
The last file to modify is the mapred-site.xml.
$ nano /opt/hadoop/etc/hadoop/mapred-site.xml
Add these lines to the configuration tag.
<property>
<name>mapreduce.framework.name</name>
<value>yarn</value>
</property>
Do not forget to save the file and then exit from the nano editor.
The files above have been modified, we need to create some directories, run this command:
$ mkdir -p /opt/hadoop/hadoop_tmp/hdfs/{namenode,datanode}
Prior to starting Hadoop services for the first time, we need to format the namenode.
$ hdfs namenode -format
Start namenode and datanode
$ start-dfs.sh
If you see this warning message:
Unable to load native-hadoop library for your platform... using builtin-java classes where applicable
It means your server OS is 64bit, but Hadoop native library is 32bit. This is expected and you can ignore the warning. If you are not comfortable with it, you can download Hadoop source file then compile it to get the 64bit shared library.
Now let’s start the YARN resource and node managers.
$ start-yarn.sh
The last one, run this command:
$ jps
You will get an output like this:
106129 SecondaryNameNode
108050 Jps
105877 NameNode
106375 ResourceManager
105960 DataNode
106458 NodeManager

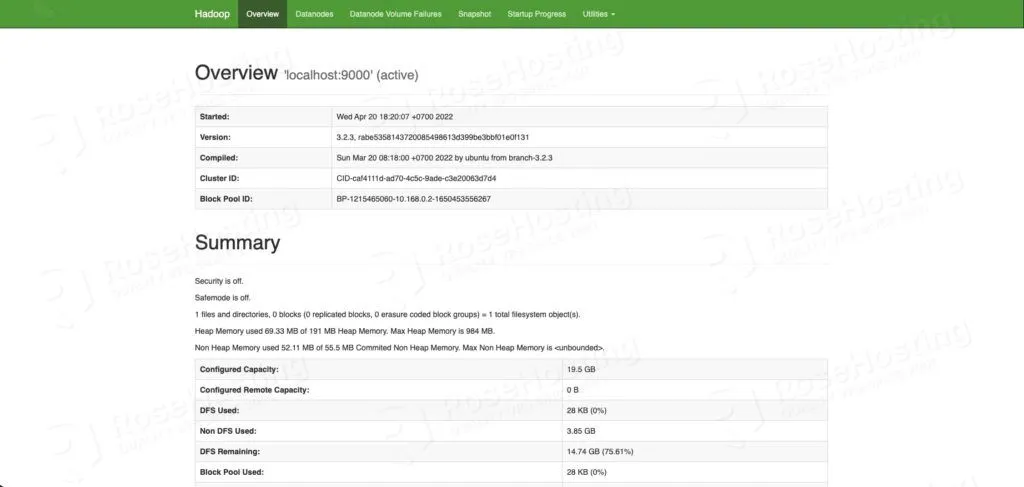
Now. you can go to http://YOUR_SERVER_IP_ADDRESS:9870/ and see the namenode, datanode, etc.
To check the YARN web portal, you can navigate to http://YOUR_SERVER_IP_ADDRESS:8088/

That’s it. You have successfully installed and configured Hadoop on Debian 11 VPS.
Of course, you don’t have to install Hadoop on Debian 11 if you have a Managed Debian Server with us. You can simply ask our support team to install Hadoop on Debian 11 for you. They are available 24/7 and will be able to help you with the installation.
PS. If you enjoyed reading this blog post on how to install Hadoop on Debian 11, feel free to share it on social networks or simply leave a comment in the comments section. Thanks.