In this tutorial, we will explain how to install Jitsi on Debian 12 OS. Jitsi is a free and open-source multiplatform voice, video conferencing, and messaging application written in Java and compatible with multiple operating systems, such as Windows, MacOS, and Linux. It offers various features, such as multi-language support, end-to-end encryption, recording, and video bridge with TLS encryption.
Installing Jitsi is a straightforward process that may take up to 15 minutes. Let’s get started!
Table of Contents
Prerequisites
- A server running Debian 12 OS with a minimum of 4GB of RAM
- A valid domain pointed to the server IP address
- User privileges: root or non-root user with sudo privileges
Step 1. Update the System
Before we start with the Jitsi installation, updating the system packages to their latest versions is recommended. To do that, execute the command below:
sudo apt update -y && sudo apt upgrade -y
Step 2. Add Key and Repository
The Jitsi repository is not added to the default Debian 12 repo by default. Before we add the repository, we need to add the GPG key with the command below:
curl -fsSL https://download.jitsi.org/jitsi-key.gpg.key -o /etc/apt/keyrings/jitsi-key.gpg.key
Once the key is added, we can add the repository with the following command:
echo "deb [signed-by=/etc/apt/keyrings/jitsi-key.gpg.key] https://download.jitsi.org stable/" | tee /etc/apt/sources.list.d/jitsi.list
Update the system and go to the next step to install Jitsi.
sudo apt update -y
Step 3. Install Jitsi
In the following paragraphs, we will install Jitsi with its requirements. Execute the following command:
sudo apt install jitsi-meet -y
Once the prerequisites are installed, you will be asked to enter the application domain:
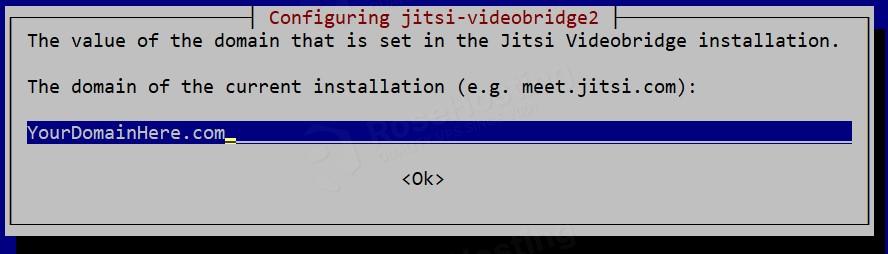
Once you add the domain, hit the Tab button. The OK button will be selected, and you must press Enter to proceed.
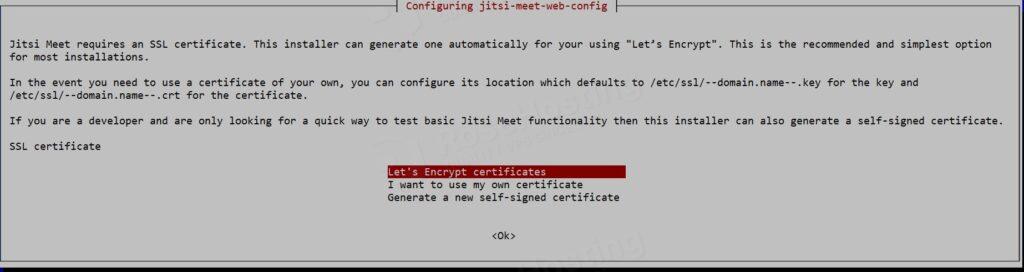
The next window will ask you to choose what type of certificate you want to use. We will select Let’s Encrypt.
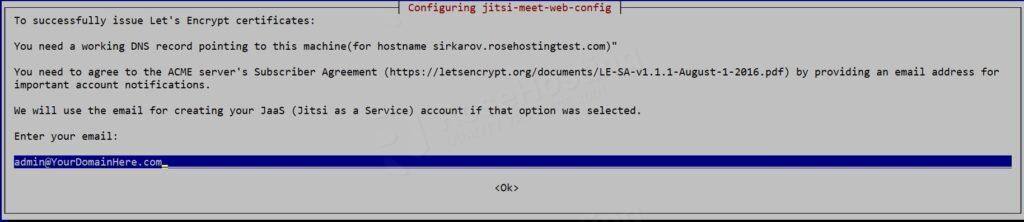
Once the certificate is selected, enter your email address in the next window.
The final window is to choose whether you want to add dial-in support to your meetings. In this post, we will select the default “No” option without dial support.

Step 4. Create Jitsi Meet Video
Once the installation is completed, we can create a Jitsi channel or room for our meetings. To do that, access your Jitsi in the browser using the domain you entered while installing Jitsi. You should see the following window:
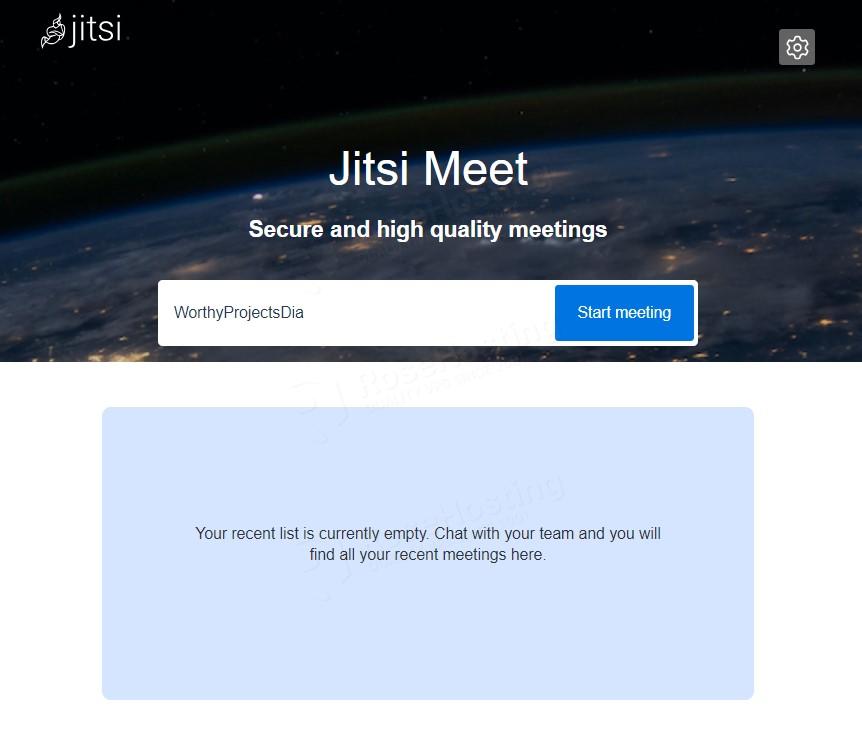
Enter the name you want for your meeting and click the Start Meeting button.
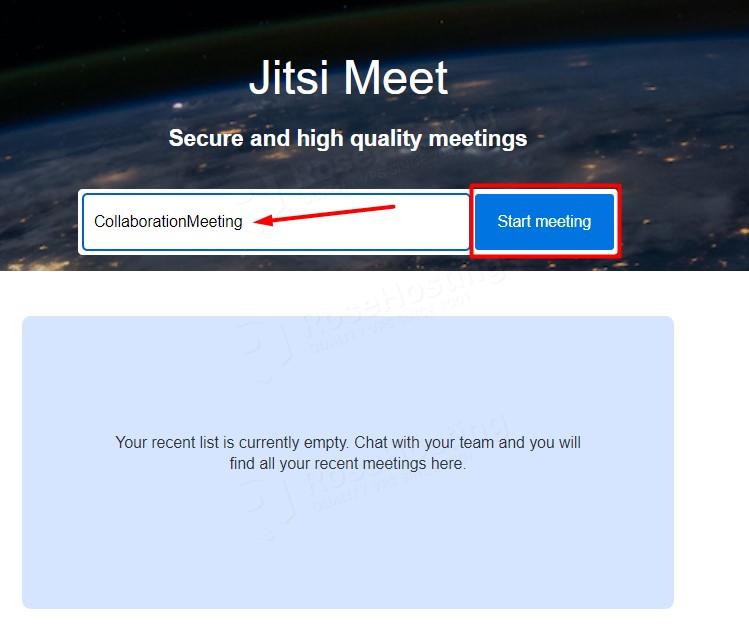
Then, you must enter your name in the field and join the meeting.

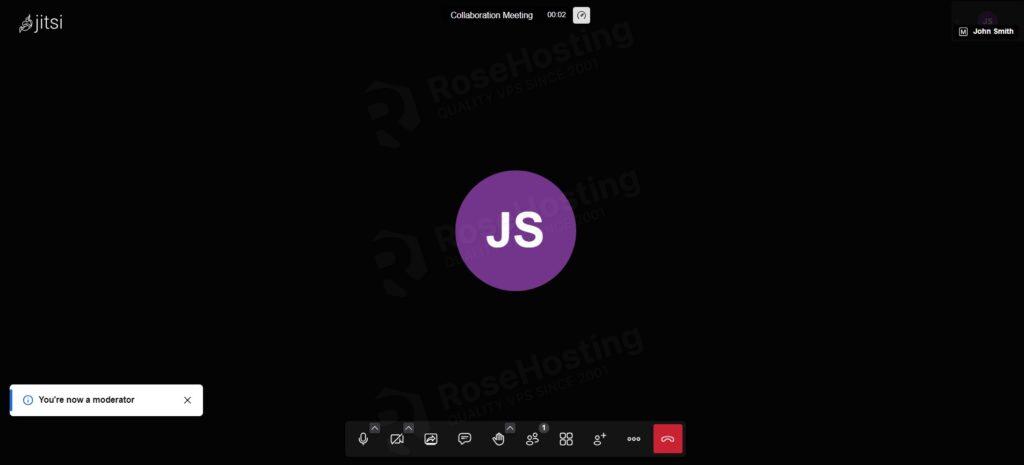
You should see the following screen once you join the meeting.
Step 5. Create User Authentication for Jitsi
This is the default Jitis setup, and it is not entirely secure because everybody can create a room and have a meeting if they access the domain. To secure the Jitsi only for authenticated users, we need to open the file:
nano +39 /etc/prosody/conf.avail/YourDomainName.com.cfg.lua
Replace the following line:
authentication = "jitsi-anonymous"
With:
authentication = "internal_hashed"
Next is to create a new Jitsi user account and set a password for it:
prosodyctl register "YourUsername" YourDomainHere.com "StrongPasswordHere"
Once created, restart the following services:
systemctl restart prosody jicofo jitsi-videobridge2
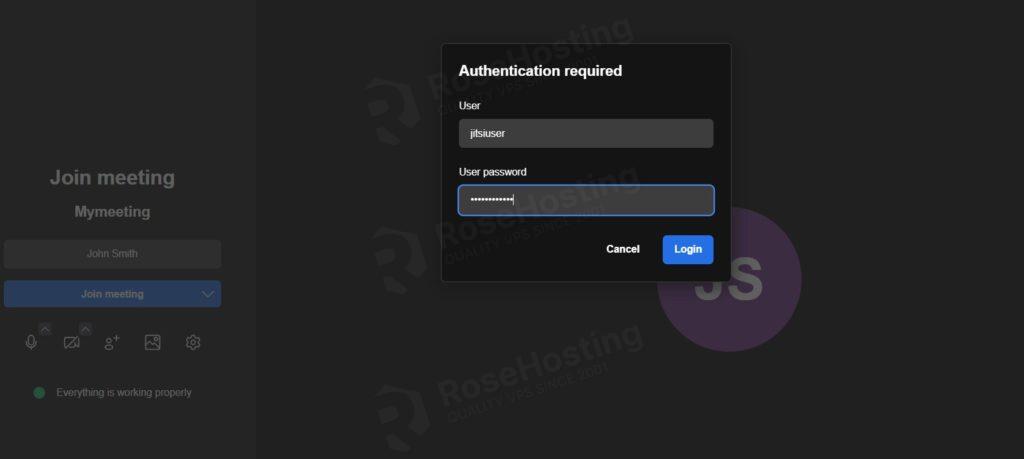
When you attempt to start a new meeting, you must provide a password and user. You can use the credentials we set before.
That’s it. You successfully installed Jitsi Meet on Debian 12 OS and learned how to secure it with user authentication. Of course, you do not have to do this on your own. You only need to sign up for one of our Jitsi hosting plans and submit a support ticket. Our admins will help you with any aspect of your server’s Jitsi installation and configuration.
PS. If you liked this post on how to install Jitsi on Debian 12, please share it with your friends on social networks or leave a comment in the comments section. Thank you.