
Taiga is an open-source project management system that helps you to manage both simple and complex projects for startups. It is a simple, powerful, and customizable application specially designed for Agile developers and designers to manage the development of the project. Taiga’s backend is written in Python and Django while the frontend is written in JavaScript using CoffeeScript and AngularJS frameworks. It offers several features including, project collaboration, Kanban board, bug tracking, reporting, time tracking, backlogs, wiki, and more.
In this tutorial, we will show you how to install the Taiga project management system on CentOS 8.
Table of Contents
Prerequisites
- A CentOS 8 VPS (we’ll be using our SSD 2 VPS plan)
- Access to the root user account (or access to an admin account with root privileges)
Step 1: Log in to the Server & Update the Server OS Packages
First, log in to your CentOS 8 server via SSH as the root user:
ssh root@IP_Address -p Port_number
You will need to replace ‘IP_Address‘ and ‘Port_number‘ with your server’s respective IP address and SSH port number. Additionally, replace ‘root’ with the username of the admin account if necessary.
Before starting, you have to make sure that all CentOS packages installed on the server are up to date. You can do this by running the following commands:
dnf update -y
Step 2: Getting Started
First, you will need to set up a fully qualified hostname for your system. You can set up it with the following command:
hostnamectl set-hostname taiga.example.com
Next, install other required dependencies with the following command:
dnf install epel-release redis nginx git unzip curl pwgen @python38 python38-devel virtualenv -y
Next, install the virtualenvwrapper with the following command:
pip3 install virtualenvwrapper
Next, start the Nginx and Redis service and enable them to start at system reboot:
systemctl start nginx redis
systemctl enable nginx redis
Step 3: Install Node.js
By default, the latest version of Node.js is not available in CentOS 8. So you will need to enable Node.js repo in your system.
You can enable it with the following command:
dnf module enable nodejs:12
Next, install the Node.js with the following command:
dnf install nodejs -y
After installing Node.js, verify the installed version of Node.js with the following command:
node --version
You should get the following output:
v12.18.4
Step 4: Install and Configure RabbitMQ
Next, you will need to install the RabbitMQ server in your system. By default, it is not available in the CentOS 8 default repo.
First, add the RabbitMQ repo with the following command:
curl -s https://packagecloud.io/install/repositories/rabbitmq/rabbitmq-server/script.rpm.sh | bash
Next, install the RabbitMQ server with the following command:
dnf install rabbitmq-server -y
Once installed, start the RabbitMQ service and enable it to start at system reboot:
systemctl start rabbitmq-server.service
systemctl enable rabbitmq-server.service
Next, add Taiga iser, virtual host and set permissions with the following command:
rabbitmqctl add_user taiga password
rabbitmqctl add_vhost taiga
rabbitmqctl set_permissions -p taiga taiga ".*" ".*" ".*"
Step 5: Install and Configure PostgreSQL
You can install the PostgreSQL server by running the following command:
dnf install @postgresql -y
Once the installation is completed, initialize the database with the following command:
/usr/bin/postgresql-setup initdb
Next, start the PostgreSQL service and enable it to start at system reboot with the following command:
systemctl start postgresql
systemctl enable postgresql
Next, set the password for PostgreSQL with the following command:
passwd postgres
You will be asked to set a new password as shown below:
New password:
Retype new password:
passwd: all authentication tokens updated successfully.
Next, switch the user to postgres and create a user for taiga:
su - postgres
createuser taiga
Next, log in to PostgreSQL shell with the following command:
[postgres@taiga ~]$ psql
Once login, you should get the following output:
psql (10.14)
Type "help" for help.
Next, set password for taiga user and create a database with the following command:
postgres=# ALTER USER taiga WITH ENCRYPTED password 'password';
postgres=# CREATE DATABASE taiga OWNER taiga;
Next, exit from the PostgreSQL with the following command:
\q
exit
Step 6: Install and Configure Taiga Backend
First, you will need to create a user to run Taiga. You can create it with the following command:
adduser taiga
passwd taiga
Next, add the taiga user to the wheel group for sudo privileges:
usermod -aG wheel taiga
Next, switch the user to taiga with the following command:
su - taiga
Next, create a log directory:
mkdir -p ~/logs
Next, download the latest version of Taiga backend with the following command:
git clone https://github.com/taigaio/taiga-back.git
Once downloaded, change the directory to taiga-back and checkout the stable version:
cd taiga-back
git checkout stable
Next, install the required dependencies with the following command:
sudo pip3 install -r requirements.txt
Next, migrate the database with the following command:
python3 manage.py migrate --noinput
python3 manage.py loaddata initial_user
python3 manage.py loaddata initial_project_templates
python3 manage.py compilemessages
python3 manage.py collectstatic --noinput
Next, create a local.py configuration file:
nano ~/taiga-back/settings/local.py
Add the following lines:
from .common import *

MEDIA_URL = "http://taiga.example.com/media/"
STATIC_URL = "http://taiga.example.com/static/"
SITES["front"]["scheme"] = "http"
SITES["front"]["domain"] = "taiga.example.com"

SECRET_KEY = "your-secret-key"

DEBUG = False
PUBLIC_REGISTER_ENABLED = True

DEFAULT_FROM_EMAIL = "no-reply@taiga.example.com"
SERVER_EMAIL = DEFAULT_FROM_EMAIL

#CELERY_ENABLED = True

EVENTS_PUSH_BACKEND = "taiga.events.backends.rabbitmq.EventsPushBackend"
EVENTS_PUSH_BACKEND_OPTIONS = {"url": "amqp://taiga:password@localhost:5672/taiga"}
Save and close the file then start the server to verify the installation:
python3 manage.py runserver
If everything is fine, you should get the following output:
Trying import local.py settings…

Trying import local.py settings…

Performing system checks…
System check identified no issues (0 silenced).

November 15, 2020 - 08:50:41

Django version 2.2.17, using settings 'settings'

Starting development server at http://127.0.0.1:8000/

Quit the server with CONTROL-C.


Press CTRL+C to stop the server.
Step 7: Configure Taiga Frontend
First, switch the user to taiga and download the latest version of taiga frontend with the following command:
su - taiga
git clone https://github.com/taigaio/taiga-front-dist.git
Once downloaded, change the directory to taiga frontend and checkout the stable version:
cd taiga-front-dist
git checkout stable
Next, copy the sample configuration file with the following command:
cp ~/taiga-front-dist/dist/conf.example.json ~/taiga-front-dist/dist/conf.json
Next, edit the configuration file:
nano ~/taiga-front-dist/dist/conf.json
Define your API and eventsUrl as shown below:
{
    "api": "http://taiga.example.com/api/v1/",
    "eventsUrl": "ws://taiga.example.com/events",
    "eventsMaxMissedHeartbeats": 5,
    "eventsHeartbeatIntervalTime": 60000,
    "eventsReconnectTryInterval": 10000,
    "debug": true,
    "debugInfo": false,
    "defaultLanguage": "en",
    "themes": ["taiga"],
    "defaultTheme": "taiga",
    "defaultLoginEnabled": true,
    "publicRegisterEnabled": true,
    "feedbackEnabled": true,
    "supportUrl": "https://tree.taiga.io/support/",
    "privacyPolicyUrl": null,
    "termsOfServiceUrl": null,
    "GDPRUrl": null,
    "maxUploadFileSize": null,
    "contribPlugins": [],
    "tagManager": { "accountId": null },
    "tribeHost": null,
    "importers": [],
    "gravatar": false,
    "rtlLanguages": ["fa"]
}
Save and close the file when you are finished.
Step 8: Configure Taiga Events
First, switch the user to taiga and download the latest version of taiga events:
su - taiga
git clone https://github.com/taigaio/taiga-events.git taiga-events
Once downloaded, change the directory to taiga events and install all the required dependencies with the following command:
cd taiga-events
npm install
Next, copy the sample configuration file:
cp config.example.json config.json
Next, edit the configuration file and define your RabbitMQ URL and secret key:
nano config.json
Add the following lines:
{
    "url": "amqp://taiga:password@localhost:5672/taiga",
    "secret": "your-secret-key",
    "webSocketServer": {
        "port": 8888
    }
}
Save and close the file then exit from the taiga user with the following command:
exit
Step 9: Create a Systemd Service File for Taiga
Next, you will need to create a systemd service file to manage the Taiga services.
First, create a systemd service file for taiga events with the following command:
nano /etc/systemd/system/taiga_events.service
Add the following lines:
[Unit]
Description=taiga_events
After=network.target

[Service]
User=taiga
WorkingDirectory=/home/taiga/taiga-events
ExecStart=/bin/bash -c "node_modules/coffeescript/bin/coffee index.coffee"
Restart=always
RestartSec=3

[Install]
WantedBy=default.target
Save and close the file then reload the systemd daemon with the following command:
systemctl daemon-reload
Next, start the taiga_events service and enable it to start at system reboot:
systemctl start taiga_events
systemctl enable taiga_events
Next, create a systemd service file for taiga with the following command:
nano /etc/systemd/system/taiga.service
Add the following lines:
[Unit]
Description=taiga_back
After=network.target

[Service]
User=taiga
Environment=PYTHONUNBUFFERED=true
WorkingDirectory=/home/taiga/taiga-back
ExecStart=/usr/local/bin/gunicorn --workers 4 --timeout 60 -b 127.0.0.1:8001 taiga.wsgi
Restart=always
RestartSec=3

[Install]
WantedBy=default.target
Save and close the file then reload the systemd daemon with the following command:
systemctl daemon-reload
Next, start the Taiga service and enable it to start at system reboot with the following command:
systemctl start taiga
systemctl enable taiga
Step 10: Configure Nginx for Taiga
Next, you will need to configure Nginx to serve Taiga. First, create an Nginx virtual host configuration file with the following command:
nano /etc/nginx/conf.d/taiga.conf
Add the following lines:
server {
    listen 80;
    server_name taiga.example.com

    large_client_header_buffers 4 32k;
    client_max_body_size 50M;
    charset utf-8;

    access_log /home/taiga/logs/nginx.access.log;
    error_log /home/taiga/logs/nginx.error.log;

    # Frontend
    location / {
        root /home/taiga/taiga-front-dist/dist/;
        try_files $uri $uri/ /index.html;
    }

    # Backend
    location /api {
        proxy_set_header Host $http_host;
        proxy_set_header X-Real-IP $remote_addr;
        proxy_set_header X-Scheme $scheme;
        proxy_set_header X-Forwarded-Proto $scheme;
        proxy_set_header X-Forwarded-For $proxy_add_x_forwarded_for;
        proxy_pass http://127.0.0.1:8001/api;
        proxy_redirect off;
    }

    # Admin access (/admin/)
    location /admin {
        proxy_set_header Host $http_host;
        proxy_set_header X-Real-IP $remote_addr;
        proxy_set_header X-Scheme $scheme;
        proxy_set_header X-Forwarded-Proto $scheme;
        proxy_set_header X-Forwarded-For $proxy_add_x_forwarded_for;
        proxy_pass http://127.0.0.1:8001$request_uri;
        proxy_redirect off;
    }

    # Static files
    location /static {
        alias /home/taiga/taiga-back/static;
    }

    # Media files
    location /media {
        alias /home/taiga/taiga-back/media;
    }

    # Events
    location /events {
        proxy_pass http://127.0.0.1:8888/events;
        proxy_http_version 1.1;
        proxy_set_header Upgrade $http_upgrade;
        proxy_set_header Connection "upgrade";
        proxy_connect_timeout 7d;
        proxy_send_timeout 7d;
        proxy_read_timeout 7d;
    }
}
Save and close the file then restart the Nginx service to apply the changes:
systemctl restart nginx
Next, provide necessary permissions to the Taiga with the following command:
chown -R taiga:taiga /home/taiga/
chmod o+x /home/taiga/
chmod o+rx ~taiga/taiga-back/media
Step 11: Access Taiga Web Inetrface
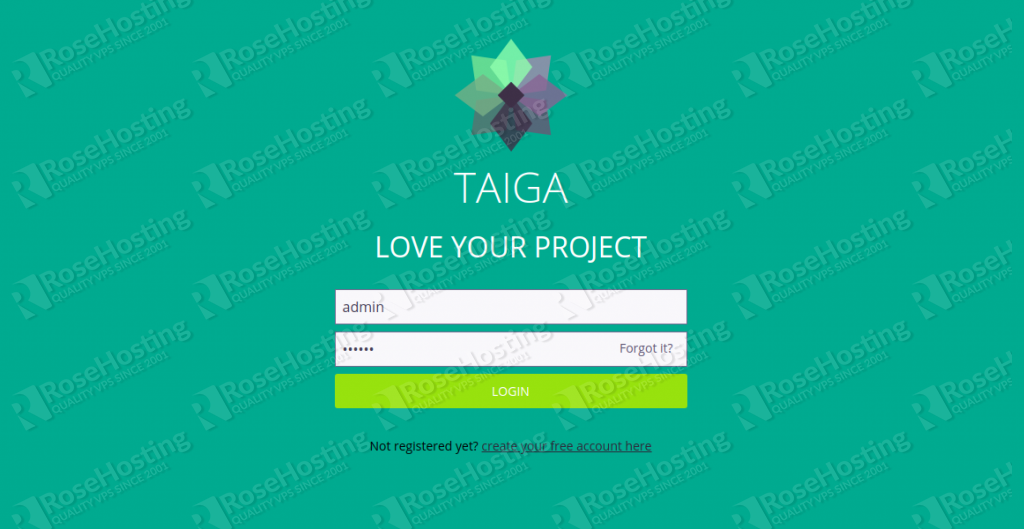
Now, open your web browser and access the Taiga web interface using the URL http://taiga.example.com. You will be redirected to the Taiga login page:

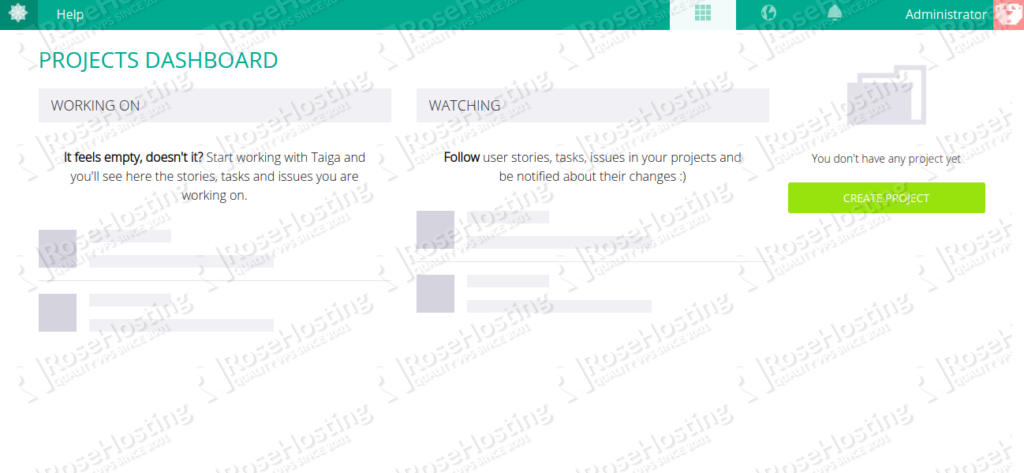
Provide default username as admin and the password as 123123 then click on the Login button. You should see the Taiga default dashboard in the following screen:


Of course, you don’t have to do any of this if you use one of our Linux VPS Hosting services,
in which case you can simply ask our expert Linux admins to setup this for you. They are available 24×7 and will take care of your request immediately.
PS. If you liked this post please share it with your friends on the social networks using the buttons on the left or simply leave a reply below. Thanks.