In this blog post, we are going to explain the most common Nginx web server errors and will try to give you a simple solution for every possible issue.
Nginx is a web server that can be used as a multifunction tool such as reverse proxy, load balancing, caching, and more. Nginx is free and open-source and its popularity day by day is increasing rapidly. Nginx used as an HTTP proxy, can handle more than 10 thousand simultaneous connections at once. In the next few paragraphs will be explained the five most common Nginx web server errors with possible solutions. Let’s get to work!
Table of Contents
Prerequisites
- Fresh install of Ubuntu 20.04, CentOS, AlmaLinux or Debian OS
- User privileges: root or non-root user with sudo privileges
Update the System
It is always recommended before we do anything on our server, to update the packages to their latest versions available.
sudo apt update -y && sudo apt upgrade -y
Install Nginx Web Server
Before we start with explaining the Nginx web server errors we are going to install it with the command below:
sudo apt install nginx -y
Once, Nginx is installed start it and enable it with the commands below:
sudo systemctl start nginx && sudo systemctl enable nginx
To check the status of the Nginx service, execute the following line:
sudo systemctl status nginx
You should receive the following output:
root@vps:~# sudo systemctl status nginx
● nginx.service - A high performance web server and a reverse proxy server
     Loaded: loaded (/lib/systemd/system/nginx.service; enabled; vendor preset: enabled)
     Active: active (running) since Fri 2022-03-18 18:28:46 UTC; 2min 30s ago
       Docs: man:nginx(8)
   Main PID: 60832 (nginx)
      Tasks: 5 (limit: 4617)
     Memory: 5.1M
     CGroup: /system.slice/nginx.service
             ├─60832 nginx: master process /usr/sbin/nginx -g daemon on; master_process on;
That was for the installation process. Now in the next few paragraphs, we are going to dig deeper into the most common Nginx web server errors. Let’s get started.
Address family not supported by protocol
This issue is occurring after a fresh installation of Nginx, after starting the nginx.service. The full error is given below:
 Mar 18 19:17:18 nginx.vps nginx[62558]: nginx: [emerg] socket() [::]:80 failed (97: Address family not supported by protocol)
Mar 18 19:17:18 nginx.vps nginx[62558]: nginx: configuration file /etc/nginx/nginx.conf test failed
It clearly says that there is some problem with the listening address and the Nginx configuration test is failing. To solve this issue and to be able to start the nginx.service first open the nginx default configuration file:
nano /etc/nginx/sites-available/default
Find these lines of code and comment the line as described below:
server {
        listen 80 default_server;
        #listen [::]:80 default_server;
Save the file, close it and start the nginx service.
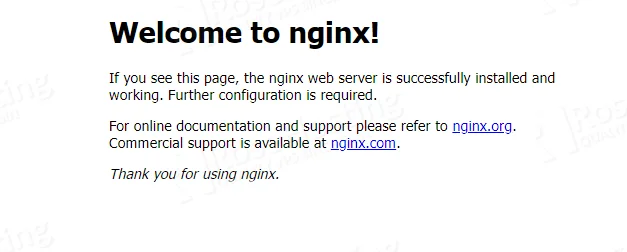
Default Nginx Page

If you see this page on a fresh installation of Nginx, it can not be threatened as an issue, since it is normal. But if you set up a virtual host file then obviously there is some mistake.
First try to set up a symbolic link
sudo ln -s /etc/nginx/sites-available/websitename /etc/nginx/sites-enabled
Then, you need to check the nginx configuration syntax
nginx -t
You should receive the following output:
root@vps:~# nginx -t
nginx: the configuration file /etc/nginx/nginx.conf syntax is ok
nginx: configuration file /etc/nginx/nginx.conf test is successful
After this you need to restart the nginx.service for the changes to take the effectivity.
sudo systemctl restart nginx
403 Forbidden

This issue is related to the access of the requested resource. It means that the resource is not accessible and there may be multiple reasons for that. One of the reasons may be the permissions of the document root of the website. The second reason may be the rules in the Nginx configuration file, and the third reason is the blocked IP address. These are the possible solutions:
Set the right permission of the document root:
chmod 755 /var/www/html/
Unblock the IP address of the client who is trying to access the website with the Iptables method:
iptables -A INPUT -s IP_ADDRESS -j ACCEPT
Unblock the IP address of the client who is trying to access the website If there is CSF installed on the server:
csf -a IP_ADDRESS
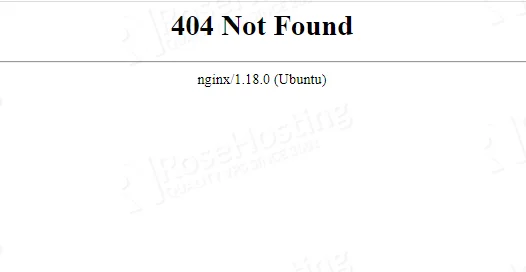
404 Not Found

The 404 Not Found message tells us that the document root of the website can not be found although the visitor’s web browser is connected successfully to our server. To solve this issue you have to open the Nginx configuration file of the website and double-check the document root.
If the name of the document root is the one you want then, you need to check if the document root directory exists as is defined in the configuration file. If these two conditions are true then, the last step is to check the index.html or index.php files, if they are in the correct location of the document root.
If the application is PHP-based then it is good to check if the PHP-FPM service is up and running.The second step is to open the NGINX configuration file and check if these lines of code exist:
location / {
                try_files $uri $uri/ /index.php?$args;
        }
        location ~ \.php$ {
                include snippets/fastcgi-php.conf;
                fastcgi_pass unix:/run/php/php7.4-fpm.sock;
                fastcgi_param   SCRIPT_FILENAME $document_root$fastcgi_script_name;
        }
These lines of code defines the PHP-FPM socket and try_files that allow us to configure URI location and how Nginx serves various files based on the request received.
500 Internal Server Error

This issue is related to the server-side that prevents NGINX to return a proper response. There are many reasons for this issue such as failed MySQL service, failed PHP-FPM service, or in the meantime, the whole server is restarted. To solve this issue you can try the following steps:
- Clear the web browser cache, with CTRL+F5.
- Check the NGINX web server logs
- Check the redirect rules, in the NGINX confuguratuon of the website.
- Set the right file and folder permissions
- Increase the webserver script timeout to be connected longer with NGINX
In this tutorial you learned How to Fix the Common Nginx Web Server Errors in multiple steps. If you are not able to fix some issues, do not hesitate to contact our amazing support. All you have to do is to sign up for our NVMe VPS plans and submit a support ticket. We are available 24/7.
PS. If you liked this post, on How to Fix Common Nginx Web Server Errors, please share it with your friends on social networks or simply leave a reply below. Thanks.
See Related: