In this article we will show you how to install WordPress, as well as deploy CiviCRM on an Ubuntu 18.04 VPS.

Table of Contents
Requirements:
At the time of writing this tutorial, the latest stable version of CiviCRM is 5.10.4 and it requires:
- PHP 7.2 or greater (preferably the latest), with Curl, SOAP, DOM XML, Multibyte, Mcrypt and Zip PHP extensions. The memory_limit value set in PHP should be between 256 and 512 megabytes, and open_basedir and safemode should be disabled;
- MySQL 5.6 or greater, MariaDB or Percona;
- Apache web server 2.0 or higher compiled with mod_rewrite module.
Step 1: Log in to the Server & Update the Server OS Packages
Log in to your Ubuntu 18.04 VPS with SSH as the root user:
ssh root@IP_Address -p Port_number
Don’t forget to replace “IP_Address” and “Port_number” with your server’s respective IP address and SSH port numbers.
Before we can start with the CiviCRM installation, we have to make sure that all Ubuntu OS packages installed on the server are up to date. We can do this by running the following commands:
sudo apt-get update
sudo apt-get upgrade
Step 2: Install Apache Web Server
Check whether Apache is already installed and running on your server:
ps aux | grep apache2
We can also check if there are Apache2 packages installed on the server:
dpkg -l | grep apache2
If Apache is already installed on the server, we can skip the Apache installation steps and proceed with PHP installation.
If Apache is not installed, we can install it using:
apt-get install apache2
Once installed, start the Apache server and enable it to start on server boot:
systemctl start apache2
systemctl enable apache2
Step 3: Install MariaDB
We will use MariaDB as our database engine. We can install MariaDB server from the Ubuntu base repository using the following commands:
sudo apt-get install mariadb-server-10.1 mariadb-server-core-10.1
Step 4: Install the Required PHP Extensions
The default PHP version available from the official Ubuntu 18.04 repository is PHP 7.2.
Install the required PHP extensions:
apt-get install php7.2-curl php7.2-gd php7.2-mbstring php7.2-mysql php7.2-zip
Step 5: Install PHP Module “mcrypt”
Install the PHP “mcrypt” module on the server using pecl channel:
sudo apt install php-dev libmcrypt-dev
sudo pecl channel-update pecl.php.net
sudo pecl install mcrypt-1.0.1
Step 6: Configure PHP
Locate the PHP configuration file:
php --ini | grep Loaded
The output should be something like this:
Loaded Configuration File: /etc/php/7.2/cli/php.ini
Edit the php.ini configuration file:
vi /etc/php/7.2/cli/php.ini
Add/modify the following options:
memory_limit = 256M
file_uploads = On
allow_url_fopen = On
allow_url_include = Off
upload_max_filesize = 64M
short_open_tag = On
max_execution_time = 300
default_charset = "UTF-8"
extension=mcrypt.so
Make sure that ‘open_basedir’ and ‘safemode’ are not set:
#php -i | grep -i safemode

#php -i | grep -i open_basedir
open_basedir => no value => no value
Step 7: Enable Apache “Rewrite” Module
Enable the Apache rewrite module if it is not already done:
a2enmod rewrite
Restart the Apache service for the changes to take effect:
service apache2 restart
Step 8: Install WordPress
Download and extract the latest WordPress installation files in the document root directory of your WordPress website ( e.g /var/www/html/your-domain.com).
cd /opt/
wget https://wordpress.org/latest.zip
unzip latest.zip
mkdir -p /var/www/html/your-domain.com
mv /opt/wordpress/* /var/www/html/your-domain.com/
chown -R www-data:www-data /var/www/html/your-domain.com
rm latest.zip
Make sure to replace “your-domain.com” with your unique registered domain name.
Step 9: Create a Database for WordPress
Create a MySQL database for the WordPress website:
mysql -u root -p
MariaDB [(none)]> CREATE DATABASE wpdb;
MariaDB [(none)]> GRANT ALL PRIVILEGES ON wpdb.* TO 'wpuser'@'localhost' IDENTIFIED BY 'Str0ngPa55w0rd';
MariaDB [(none)]> FLUSH PRIVILEGES;
MariaDB [(none)]> exit;
Don’t forget to replace ‘Str0ngPa55w0rd’ with an actual strong password.
Step 10: Create a Virtual Host in Apache
Create a virtual host in Apache for your domain:
vi /etc/apache2/sites-available/your-domain.com.conf
And add the following content to the file:
<VirtualHost *:80>
    ServerAdmin admin@your-domain.com
    ServerName your-domain.com ServerAlias www.your-domain.com DocumentRoot /var/www/html/your-domain.com <Directory /var/www/html/your-domain.com> Options Indexes FollowSymLinks AllowOverride All Require all granted </Directory> ErrorLog ${APACHE_LOG_DIR}/your-domain.com_error.log CustomLog ${APACHE_LOG_DIR}/your-domain.com_access.log combined </VirtualHost>
Replace ‘your-domain.com‘ with your actual domain.
To enable the virtual host we have just created, run the following command:
a2ensite your-domain.com.conf
Then, disable the default Apache configuration:
a2dissite 000-default.conf
Restart Apache service for the changes to take effect:
systemctl restart apache2
Open http://your-domain.com in a web browser and finish the WordPress installation.
Step 11: Install CiviCRM
Download the latest version of CiviCRM from https://civicrm.org/download and extract it in the /var/www/html/your-domain.com/wp-content/plugins/ directory on your server:
cd /opt
wget https://download.civicrm.org/civicrm-5.10.4-wordpress.zip
unzip civicrm-5.10.4-wordpress.zip
chown www-data:www-data -R /opt/civicrm/
mv /opt/civicrm/ /var/www/html/your-domain.com/wp-content/plugins/
Log in to your WordPress back-end as admin user, open http://your-domain.com/wp-admin/plugins.php and activate the CiviCRM plugin. CiviCRM may be configured to use the existing WordPress database, or a new database. It is best to create and use a separate database for CiviCRM.
Step 12: Create a Database for CiviCRM
Create a new MySQL database for CiviCRM:
mysql -u root -p
MariaDB [(none)]> CREATE DATABASE civicrmdb;
MariaDB [(none)]> GRANT ALL PRIVILEGES ON civicrmdb.* TO 'wpuser'@'localhost' IDENTIFIED BY 'civicrmStr0ngPa55w0rd';
MariaDB [(none)]> FLUSH PRIVILEGES;
MariaDB [(none)]> exit;
Don’t forget to replace “civicrmStr0ngPa55w0rd” with an actual, strong password.
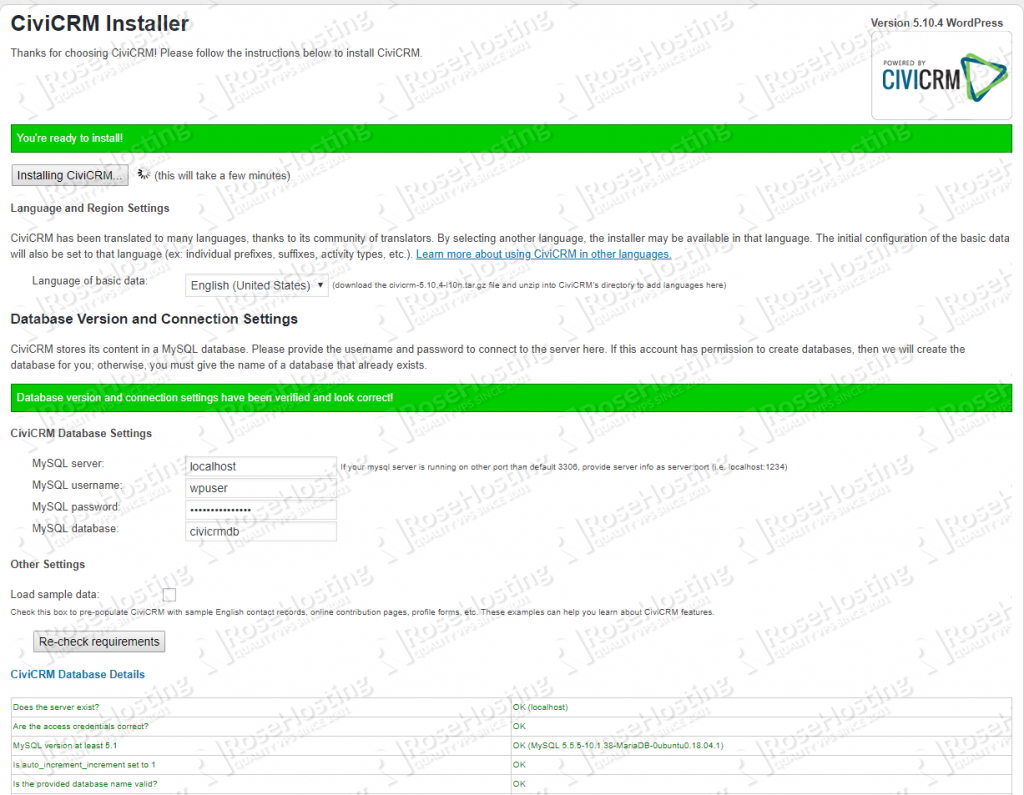
Then, go to the WordPress dashboard and click on the ‘CiviCRM Installer’ link at the top of the page. From there, change the database name, verify that all requirements are met, and install CiviCRM:
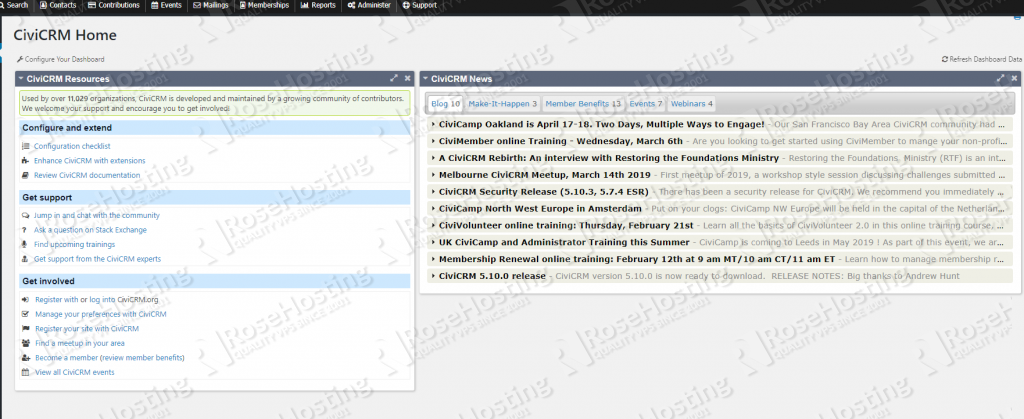
That is it. CiviCRM has been installed on your server. You can now configure and extend CiviCRM according to your needs.

PS. If you liked this post on how to install CiviCRM on an Ubuntu 18.04 VPS, please share it with your friends on the social networks using the buttons on the left or simply leave a reply below. Thanks.


