
Gitea is an open-source Git service written in the Go language. It is a version control platform similar to GitHub.
It is robust and scalable and offers many features, including issues and time tracking, repository branching, file locking, tagging, merging, and many others.
Since Gitea was created using the Go language, it supports a lot of operating systems, including Linux, macOS, and Windows, on architectures like amd64, i386, ARM, PowerPC, and others.
Table of Contents
Prerequisites
- A Debian 11 VPS
- SSH root access or regular system user with sudo privileges
Step 1. Log in to your server
Using your favorite SSH client, log in to your Debian 11 server.
ssh root@IP_Address -p Port_number
Replace IP_Address and Port_number with your server’s actual IP address and SSH port number. You can also use another system user with sudo privileges instead of using ‘root’ to log in to your VPS.
This article will use ‘root’ to execute the shell commands. If you want to use your regular user with sudo privileges to run the commands, make sure to append ‘sudo’ in front of the commands.
This tutorial is written for the Debian 11 server. To check your operating system, run this command:
# lsb_release -a
You will get an output like this:
No LSB modules are available.
Distributor ID: Debian
Description: Debian GNU/Linux 11 (bullseye)
Release: 11
Codename: bullseye
Step 2. Update the System and Create a User
Before starting, you have to ensure that your Debian 11 packages installed on the server are up to date. You can do this by running the following commands:
# apt update
# apt upgrade
Now, let’s create a system user
# adduser \
--system \
--shell /bin/bash \
--gecos 'Gitea Version Control' \
--group \
--disabled-password \
--home /home/git \
git
Step 3. Install MariaDB and Create a Database
Gitea requires a database server to store its data. Gitea supports PostgreSQL, MySQL/MariaDB, SQLite, and MSSQL. In this step, we are going to install MariaDB from the default Debian repository.
# apt install mariadb-server git
Once installed, the MariaDB server should be up and running. Execute the command below to create a database and user name and give the privilege to the user.
mysql -e "create database gitea"
mysql -e "grant all privileges on gitea.* to gitea@localhost identified by 'm0d1fyth15'"
Replace m0d1fyth15 above with a stronger password.
Step 4. Download and Install Gitea
Now, it is time to download the Gitea binary. We will download it using wget and store it in /usr/local/bin.
# wget https://dl.gitea.com/gitea/1.19.1/gitea-1.19.1-linux-amd64 -O /usr/local/bin/gitea
Check out more recent versions of Gitea.
We would also need to run these commands.
# mkdir -p /var/lib/gitea/{custom,data,log}
# chown -R git:git /var/lib/gitea/
# chmod -R 750 /var/lib/gitea/
# mkdir /etc/gitea
# chown root:git /etc/gitea
# chmod 770 /etc/gitea
Then, create a file.
# nano /etc/gitea/app.ini
Paste the following into the file.
DOMAIN = gitea.yourdomain.com
ROOT_URL = http://gitea.yourdomain.com/
Save the file, then exit, and give the correct permission.
# chown git. /etc/gitea/app.ini
Step 5. Create Systemd File
We do not need to type the content of the systemd file; simply download it from github.
# wget https://raw.githubusercontent.com/go-gitea/gitea/main/contrib/systemd/gitea.service -P /etc/systemd/system/
# systemctl daemon-reload
Time to run the service.
# systemctl enable --now gitea
Gitea service should be up and running now. To verify this, we can check with this command.
# systemctl status gitea
It will return an output like this.
● gitea.service - Gitea (Git with a cup of tea)
Loaded: loaded (/etc/systemd/system/gitea.service; enabled; vendor preset: enabled)
Active: active (running) since Sun 2023-04-16 06:09:30 EDT; 5s ago
Main PID: 996 (gitea)
Tasks: 6 (limit: 2294)
Memory: 114.0M
CPU: 693ms
CGroup: /system.slice/gitea.service
└─996 /usr/local/bin/gitea web --config /etc/gitea/app.ini

Apr 16 06:09:30 debian11 gitea[996]: 2023/04/16 06:09:30 ...s/install/setting.go:21:PreloadSettings() [I] AppPath: /usr/local/bin/gitea
Apr 16 06:09:30 debian11 gitea[996]: 2023/04/16 06:09:30 ...s/install/setting.go:22:PreloadSettings() [I] AppWorkPath: /var/lib/gitea
Apr 16 06:09:30 debian11 gitea[996]: 2023/04/16 06:09:30 ...s/install/setting.go:23:PreloadSettings() [I] Custom path: /var/lib/gitea/custom
Apr 16 06:09:30 debian11 gitea[996]: 2023/04/16 06:09:30 ...s/install/setting.go:24:PreloadSettings() [I] Log path: /var/lib/gitea/log
Apr 16 06:09:30 debian11 gitea[996]: 2023/04/16 06:09:30 ...s/install/setting.go:25:PreloadSettings() [I] Configuration file: /etc/gitea/app.ini
Apr 16 06:09:30 debian11 gitea[996]: 2023/04/16 06:09:30 ...s/install/setting.go:26:PreloadSettings() [I] Prepare to run install page
Apr 16 06:09:30 debian11 gitea[996]: 2023/04/16 06:09:30 ...s/install/setting.go:29:PreloadSettings() [I] SQLite3 is supported
Apr 16 06:09:30 debian11 gitea[996]: 2023/04/16 06:09:30 cmd/web.go:220:listen() [I] [643bc95a-6] Listen: http://0.0.0.0:3000
Apr 16 06:09:30 debian11 gitea[996]: 2023/04/16 06:09:30 cmd/web.go:224:listen() [I] [643bc95a-6] AppURL(ROOT_URL): http://localhost:3000/
Apr 16 06:09:30 debian11 gitea[996]: 2023/04/16 06:09:30 ...s/graceful/server.go:62:NewServer() [I] [643bc95a-6] Starting new Web server: tcp:0.0.0.0:3000 on PID: 996
At this point, you should be able to access it at http://YOUR_SERVER_IP_ADDRESS:3000
Step 6. Install and Configure Nginx
To access Gitea using your domain or subdomain name, we need to install a webserver and configure it as a reverse proxy. In this step, we are going to install Nginx as the webserver.
# nano /etc/nginx/conf.d/gitea.conf
Copy and paste the content below.
server {
listen 80;
server_name gitea.yourdomain.com;
access_log /var/log/nginx/gitea_access.log;
error_log /var/log/nginx/gitea_error.log;

location / {
proxy_pass http://localhost:3000;
}
}
Save the file, exit, then restart nginx.
# systemctl restart nginx
Step 7. Configure Gitea
Now, it is time to install the Gitea service through the web browser. Navigate to your http://gitea.yourdomain.com, and you will see this.
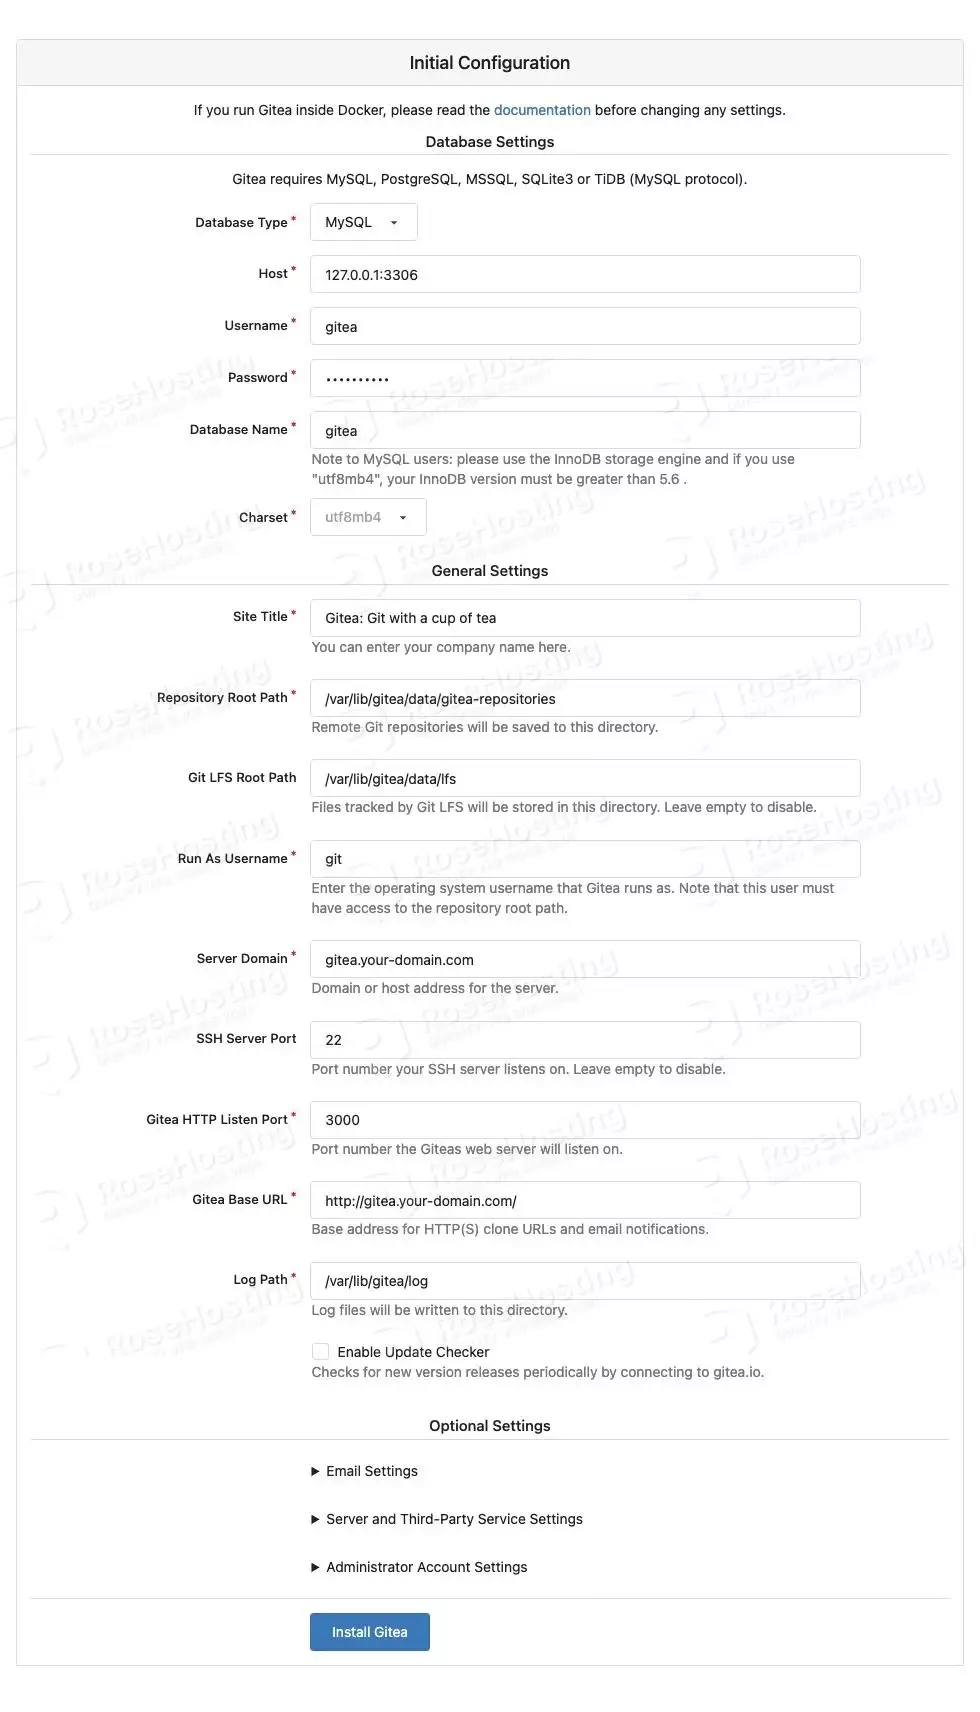
In this step, you need to provide the database credentials, and you can leave the already filled fields. Then, click on Install Gitea.
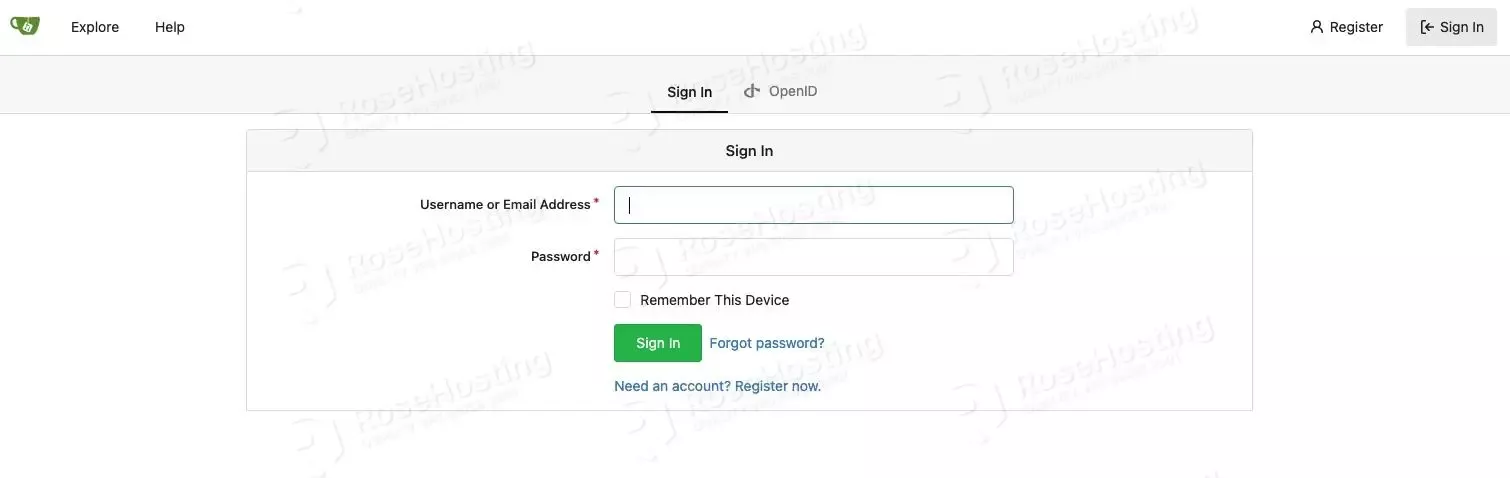
You will be brought to this step, you can click on ‘Need an account? Register now link to register your first user.
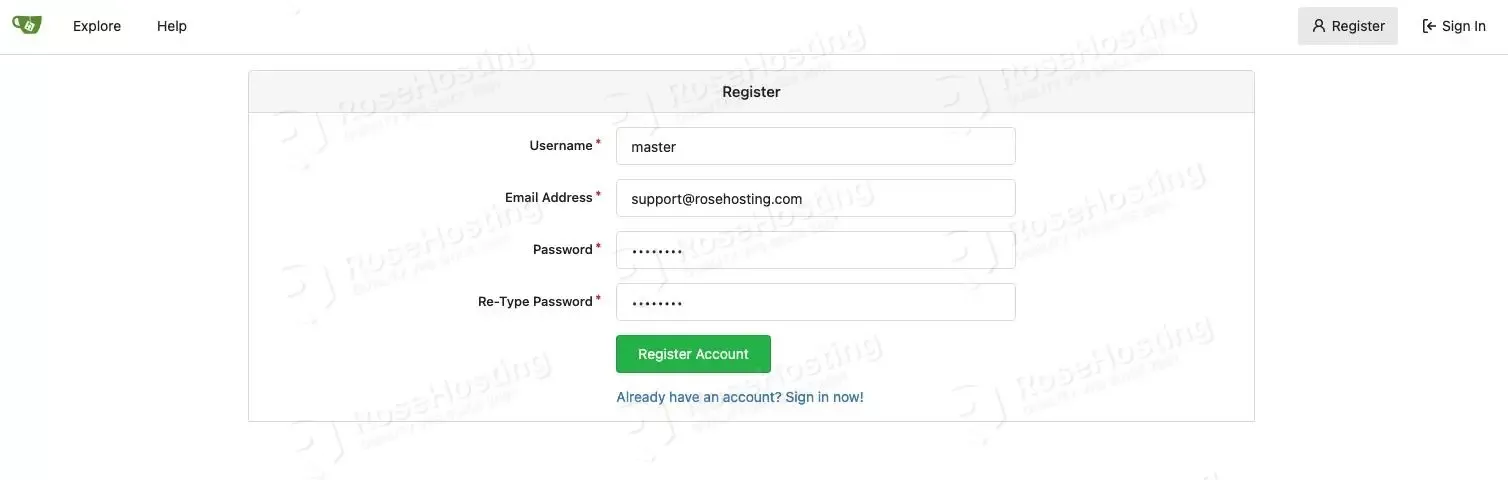
Fill in all required fields, make sure to use a strong password, then click on Register Account
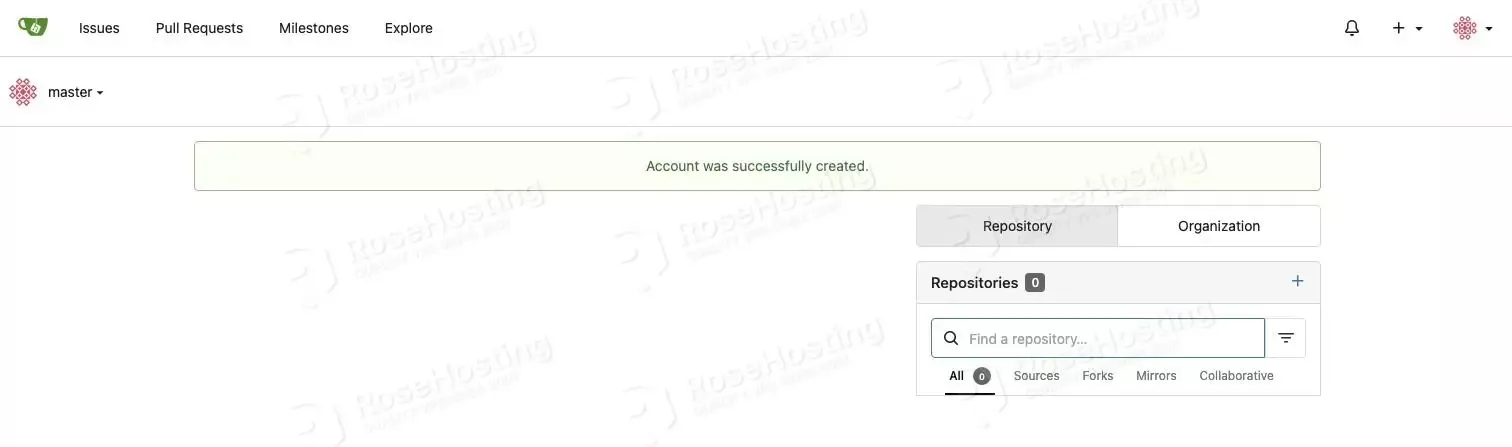
The first account created has administrator privileges, so we can use this user to manage our Gitea website.
That’s it. You have successfully installed Gitea on Debian 11.
Congratulations! You successfully installed and configured Gitea on Debian 11. If you find installing and finishing this setup difficult, you can always contact our admins, who will do the rest for you. We are available 24/7. Always trust our epic support.
PS. If you liked this post on how to install Gitea on Debian 11, please share it with your friends on social networks or simply leave a reply below. Thanks.