
In this tutorial, we will show you how to install Gitea on Debian 9. We’ll also show you how to deploy the Gitea git service on a Debian 9 VPS.
 Gitea is a free, open-source, and lightweight version control system written in Golang. It is a self-hosted git service and an alternative solution to GitHub, Bitbucket, and Gitlab. Its main aim is to provide the easiest way of setting up a self-hosted Git service. It runs on multiple platforms including Linux, macOS, and Windows. Gitea also supports several database systems, including SQLite, MySQL, and PostgreSQL out of the box. Installing Gitea on Debian 9, should take no more than 10 minutes. Let’s get started.
Prerequisites:
- A Debian 9 VPS with root access enabled or a user with sudo privileges.
- A valid domain name pointed to your server IP address. In this tutorial, we will use
gitea.mydomain.com.
Table of Contents
Step 1: Login and Update Packages
First, we’re going to need to log into our server using SSH. You can do that by entering this command:
ssh root@IP_Address -p Port_Number
Remember to replace “root” with your username if you are not using the root user. Change “IP_Address” and “Port_Number” according to your server’s IP address and SSH port number.
Once you are logged in, you should update all of your packages to their latest available versions.
apt-get update -y
apt-get upgrade -y
Step 2: Install and Configure MariaDB Database
Gitea uses SQLite, MySQL/MariaDB, and PostgreSQL to store its data. Here, we will use MariaDB for our database solution.
Let’s install MariaDB by running the following command:
apt-get install mariadb-server mariadb-client -y
Once installed, run the following command to secure the MariaDB installation:
mysql_secure_installation
This command will set the root password, remove anonymous users, disallow root login remotely and remove the test database as shown below:
Enter current password for root (enter for none): press [Enter]
Set root password? [Y/n]: N
Remove anonymous users? [Y/n]: Y
Disallow root login remotely? [Y/n]: Y
Remove test database and access to it? [Y/n]: Y
Reload privilege tables now? [Y/n]: Y
Once MariaDB is secured, log in to MariaDB shell with the following command:
mysql -u root -p
Enter your root password when prompt then change the GLOBAL innodeb_file_per_table to On:
MariaDB [(none)]> SET GLOBAL innodb_file_per_table = ON;
Next, create a database and user for Gitea with the following command:
MariaDB [(none)]> CREATE DATABASE gitea;
MariaDB [(none)]> CREATE USER 'gitea'@'localhost' IDENTIFIED BY 'password';
Make sure to choose a unique and strong password for your Gitea MariaDB user.
Next, grant all the privileges to Gitea and alter the database with the following command:
MariaDB [(none)]> GRANT ALL ON gitea.* TO 'gitea'@'localhost' IDENTIFIED BY 'password' WITH GRANT OPTION;
MariaDB [(none)]> ALTER DATABASE gitea CHARACTER SET = utf8mb4 COLLATE utf8mb4_unicode_ci;
Finally, flush the privileges and exit from the MariaDB shell with the following command:
MariaDB [(none)]> FLUSH PRIVILEGES;
MariaDB [(none)]> EXIT;
Next, open the MariaDB default configuration file and tweak some settings:
nano /etc/mysql/mariadb.conf.d/50-server.cnf
Add the following lines:
innodb_file_format = Barracuda
innodb_large_prefix = 1
innodb_default_row_format = dynamic
Save and close the file. Then, restart the MariaDB service to apply the configuration changes:
systemctl restart mariadb
Step 3: Download and Install Gitea on Debian 9
Go to the Gitea download page and download the latest version of the Gitea binary package with the following command:
wget https://github.com/go-gitea/gitea/releases/download/v1.9.1/gitea-1.9.1-linux-amd64
Once downloaded, copy the downloaded binary to the /usr/local/bin directory:
cp gitea-1.9.1-linux-amd64 /usr/local/bin/gitea
Next, provide executable permission using the following command:
chmod 755 /usr/local/bin/gitea
You can now check the Gitea version using the following command:
gitea --version
You should get the following output:
Gitea version 1.9.1 built with GNU Make 4.1, go1.12.8 : bindata, sqlite, sqlite_unlock_notify
Next, we will need to create a directory structure for our repositories, configuration and log files. Run the following command to create the directory structure for Gitea:
mkdir -p /etc/gitea /var/lib/gitea/{custom,data,indexers,public,log}
Step 4: Create a Systemd Service File for Gitea
Now, we will need to create a systemd service file to manage the Gitea service. You can start, stop, and restart the Gitea service with Systemd.
Run the following command to create a systemd service file:
nano /etc/systemd/system/gitea.service
Add the following lines:
[Unit]
Description=Gitea
After=syslog.target
After=network.target
After=mysql.service

[Service]
RestartSec=2s
Type=simple
User=root
Group=root
WorkingDirectory=/var/lib/gitea/
ExecStart=/usr/local/bin/gitea web -c /etc/gitea/app.ini
Restart=always
Environment=USER=root HOME=/root GITEA_WORK_DIR=/var/lib/gitea

[Install]
WantedBy=multi-user.target
Save and close the file. Then, reload the systemd daemon list with the following command:
systemctl daemon-reload
Next, start Gitea service and enable it to start automatically after system reboot with the following commands:
systemctl start gitea
systemctl enable gitea
You can also check the Gitea service status using the following command:
systemctl status gitea
You should get the following output:
● gitea.service - Gitea
Loaded: loaded (/etc/systemd/system/gitea.service; disabled; vendor preset: enabled)
Active: active (running) since Wed 2019-08-21 10:44:06 UTC; 7s ago
Main PID: 3995 (gitea)
Tasks: 6 (limit: 7372)
CGroup: /system.slice/gitea.service
└─3995 /usr/local/bin/gitea web -c /etc/gitea/app.ini

Aug 21 10:44:06 debian9 gitea[3995]: 2019/08/21 10:44:06 routers/init.go:74:GlobalInit() [T] Custom path: /var/lib/gitea/custom
Aug 21 10:44:06 debian9 gitea[3995]: 2019/08/21 10:44:06 routers/init.go:75:GlobalInit() [T] Log path: /var/lib/gitea/log
Aug 21 10:44:06 debian9 gitea[3995]: 2019/08/21 10:44:06 ...dules/setting/log.go:226:newLogService() [I] Gitea v1.9.1 built with GNU Make 4.1, g
Aug 21 10:44:06 debian9 gitea[3995]: 2019/08/21 10:44:06 ...dules/setting/log.go:269:newLogService() [I] Gitea Log Mode: Console(Console:info)
Aug 21 10:44:06 debian9 gitea[3995]: 2019/08/21 10:44:06 ...les/setting/cache.go:42:newCacheService() [I] Cache Service Enabled
Aug 21 10:44:06 debian9 gitea[3995]: 2019/08/21 10:44:06 ...s/setting/session.go:45:newSessionService() [I] Session Service Enabled
Aug 21 10:44:06 debian9 gitea[3995]: 2019/08/21 10:44:06 routers/init.go:106:GlobalInit() [I] SQLite3 Supported
Aug 21 10:44:06 debian9 gitea[3995]: 2019/08/21 10:44:06 routers/init.go:37:checkRunMode() [I] Run Mode: Development
Aug 21 10:44:07 debian9 gitea[3995]: 2019/08/21 10:44:07 cmd/web.go:151:runWeb() [I] Listen: http://0.0.0.0:3000
Aug 21 10:44:07 debian9 gitea[3995]: 2019/08/21 10:44:07 ...ce/gracehttp/http.go:142:Serve() [I] Serving [::]:3000 with pid 3995
By default, Gitea runs on port 3000. You can check it with the following command:
netstat -ant | grep 3000
Output:
tcp6 0 0 :::3000 :::* LISTEN
Step 5: Configure Nginx as a Reverse Proxy for Gitea
If you want to access your Gitea installation using a domain, you will have to create a reverse proxy.
First, install the Nginx web server with the following command:
apt-get install nginx -y
Once installed, create a new virtual host server block for Gitea:
nano /etc/nginx/sites-available/gitea.conf
Add the following lines:
upstream gitea {
 server 127.0.0.1:3000 weight=100 max_fails=5 fail_timeout=5;
}

server {
 listen 80;
 server_name gitea.mydomain.com;

location / {
  proxy_set_header X-Forwarded-Host $host;
  proxy_set_header X-Forwarded-Server $host;
  proxy_set_header X-Forwarded-For $proxy_add_x_forwarded_for;
  proxy_pass http://gitea/;
 }
}
Remember to replace mydomain.com with your own registered domain.
Save and close the file. Then, check Nginx for any syntax errors with the following command:
nginx -t
Next, enable the virtual host directive with the following command:
ln -s /etc/nginx/sites-available/gitea.conf /etc/nginx/sites-enabled/
Finally, restart the Nginx service to apply the configuration changes:
systemctl restart nginx
Step 6: Access the Gitea Web Installation Wizard
Now, open your web browser and visit the URL http://gitea.mydomain.com/install. You will be redirected to the Gitea installation page:
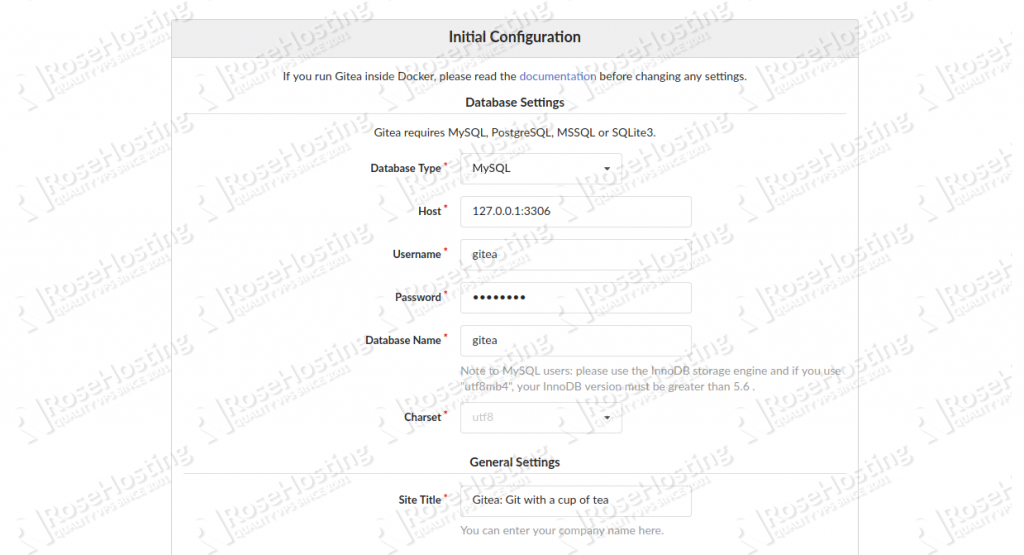
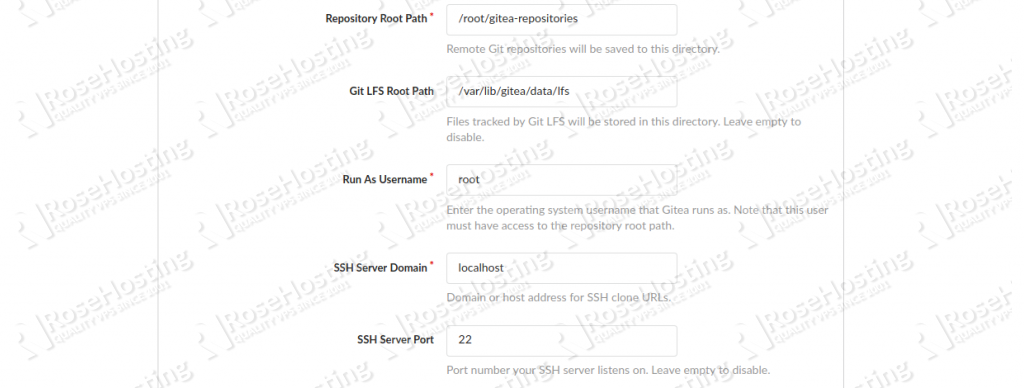
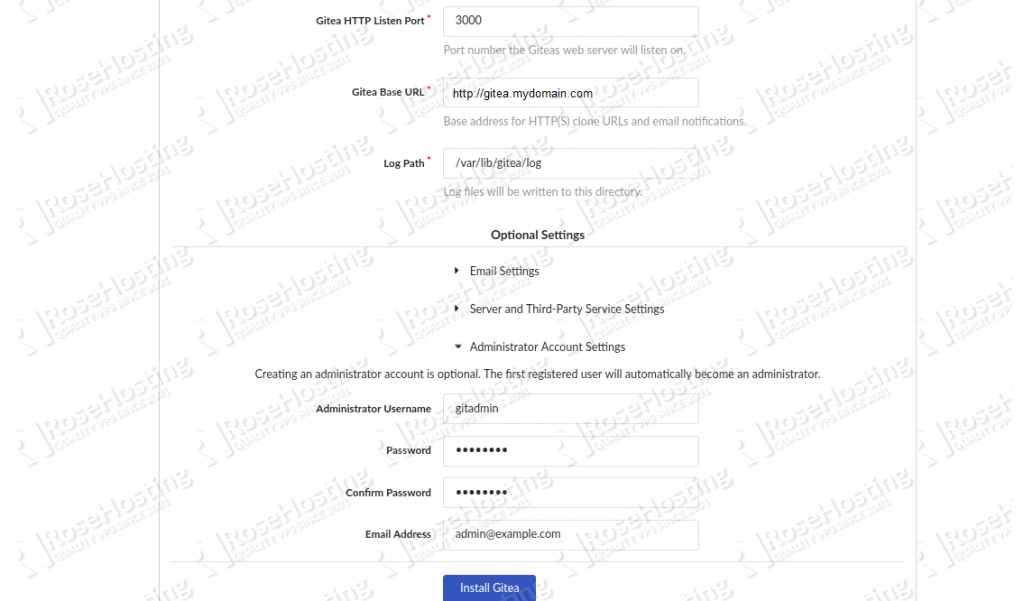
Enter your database information, Site title, Gitea base URL and server URL, Admin account information and click on the Install Gitea button. Once the installation has been completed successfully, you will be redirected to the Gitea dashboard screen:
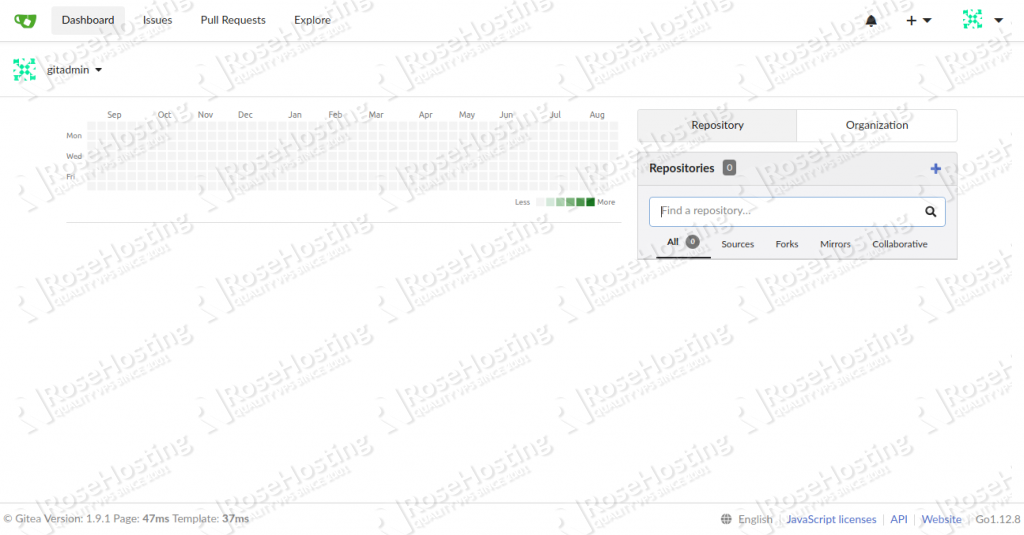
Now, click on the + button to create your first repository:
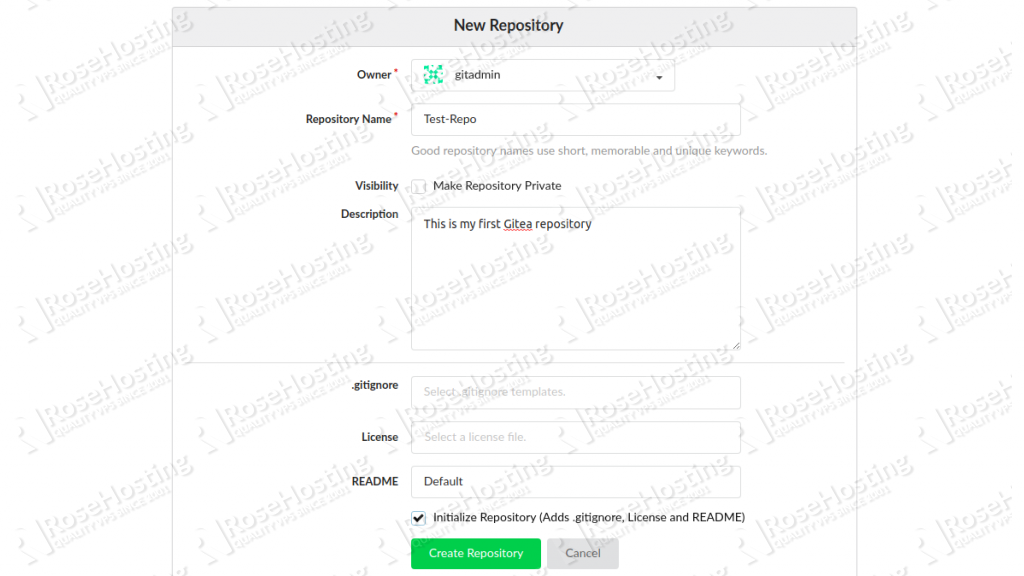
Provide your repository details and click on the Create Repository button. Once the repository has been created, you should see the following page:
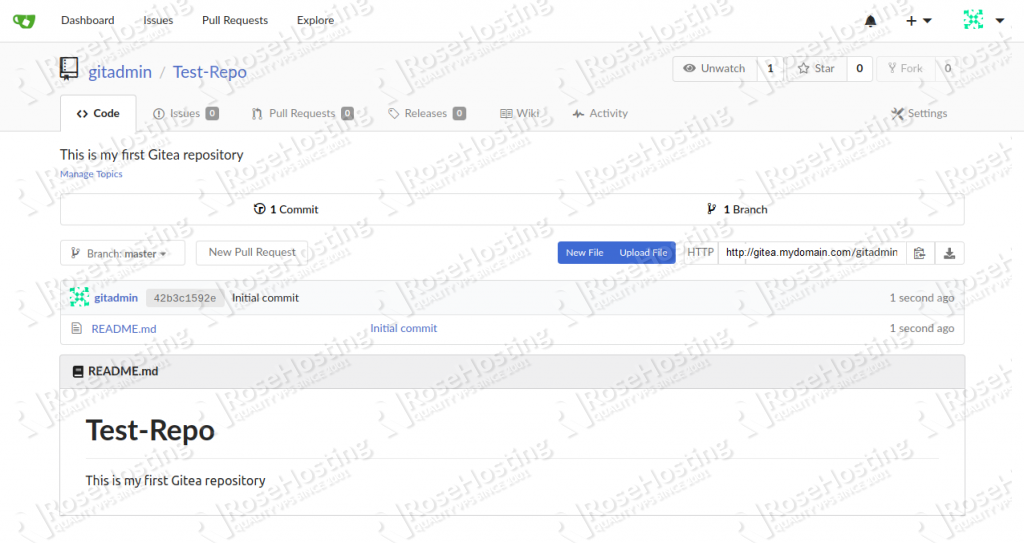
Now, click on the Upload File button. You should see the following page:
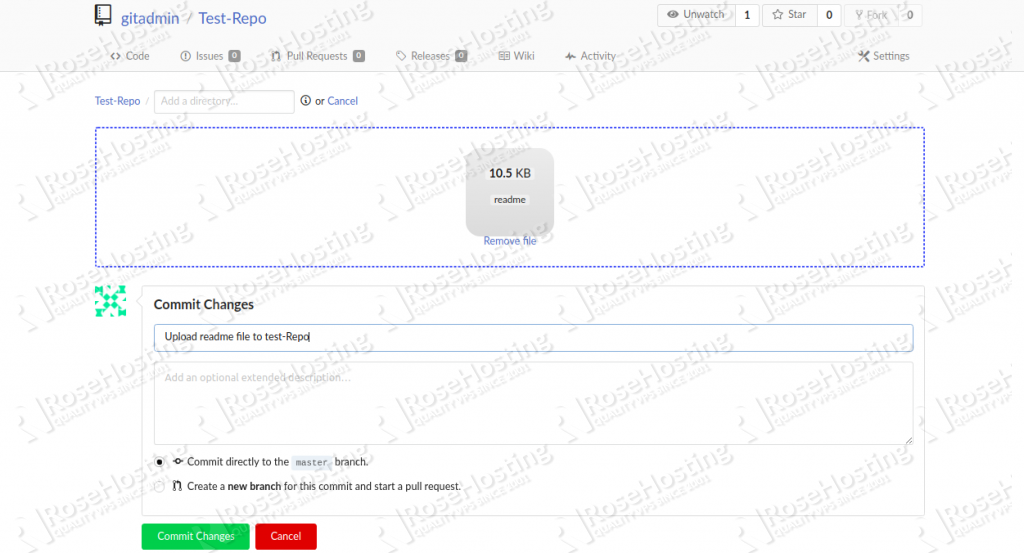
Upload your file, add a description in the Commit Changes box and click on the Commit Changes button. You should see your newly uploaded file in the following page:
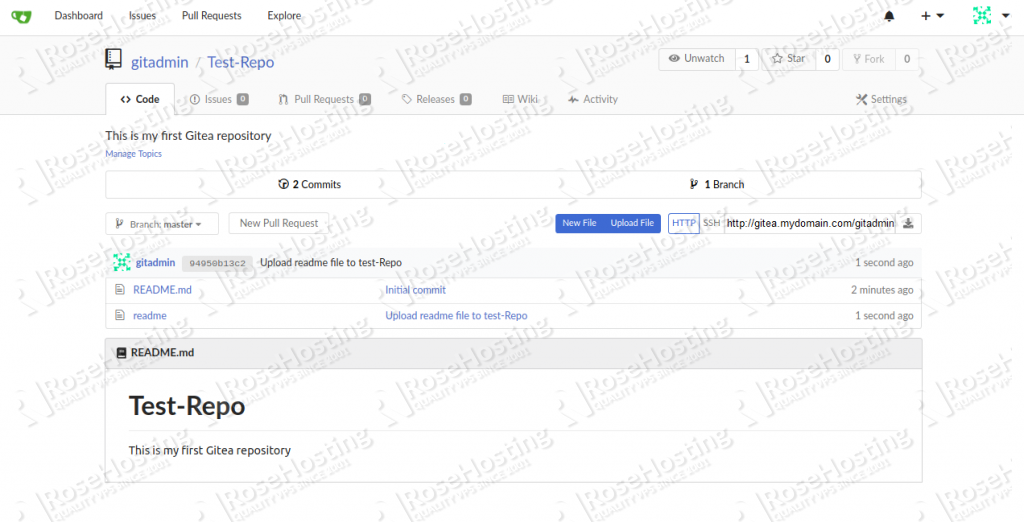
Congratulations! you have successfully installed Gitea on a Debian 9 VPS as well as create a test project. You have also configured Gitea behind the Nginx Reverse Proxy. You are now able to create your own repositories with Gitea and deploy them in a development environment. For more information, you can visit the Gitea official documentation.
Follow this tutorial for installing Gitea on Ubuntu 20.04
 Of course, you don’t have to install Gitea on Debian 9 if you have a Managed Debian Server with us. You can simply ask our support team to install Gitea on Debian 9 for you. They are available 24/7 and will be able to help you with the installation.
PS. If you enjoyed reading this blog post on how to install Gitea on Debian 9, feel free to share it on social networks using the shortcuts below, or simply leave a comment in the comments section. Thanks.