
In this blog, we will show you how to install Jenkins on Ubuntu 24.04 OS. Jenkins is an open-source automation server developed to automate software development procedures such as building, testing, and deploying the application. Jenkins is written in Java and it runs in servlet containers such as Apache Tomcat. There are many features and plugins offered by this software such as CI/CD, GIT, SSH Build Agents, email extensions, etc. All these plugins and many others are installed very easily in the installation process of Jenkins.
The process to Install Jenkins on Ubuntu 24.04 is a straightforward process that may take up to 10 minutes. Let’s get started!
Table of Contents
Prerequisites to Install Jenkins on Ubuntu 24.04
- A server running Ubuntu 24.04 OS
- User privileges: root or non-root user with sudo privileges
- A server with at least 2 GB of RAM (Our NVMe 2 VPS plan)
Step 1. Update the System
Every fresh install of Ubuntu 24.04 needs the packages to be updated to the latest versions available. To do that execute the following command:
sudo apt update -y && sudo apt upgrade -y
Step 2. Install Java
Since Jenkins is installed in Java we need to install it first so we can proceed with the Jenkins process of installation. Execute the command below to install Java:
sudo apt install openjdk-21-jdk -y
Once installed, we can check the Java version with the command below:
java -version
You should receive the following output:
root@host:~# java -version
openjdk version "21.0.3" 2024-04-16
OpenJDK Runtime Environment (build 21.0.3+9-Ubuntu-1ubuntu1)
OpenJDK 64-Bit Server VM (build 21.0.3+9-Ubuntu-1ubuntu1, mixed mode, sharing)
Step 3. Add Jenkins GPG key and Repository
Next step is to add the Jenkins GPG key with the following command:
sudo wget -O /usr/share/keyrings/jenkins-keyring.asc https://pkg.jenkins.io/debian-stable/jenkins.io-2023.key
Then add the Jenkins repository because it is not added by default in the Ubuntu 24.04 sources list:
echo "deb [signed-by=/usr/share/keyrings/jenkins-keyring.asc]" https://pkg.jenkins.io/debian-stable binary/ | sudo tee \
/etc/apt/sources.list.d/jenkins.list > /dev/null
Once, the key and the repo are added update the system again and move to the next step of the installation.
sudo apt update -y
Step 4. Install Jenkins on Ubuntu 24.04
To install Jenkins execute the following command:
sudo apt install jenkins -y
Once installed, start and enable the Jenkins service:
sudo systemctl start jenkins && sudo systemctl enable jenkins
To check the status of the service:
sudo systemctl status jenkins
You should get the following output:
root@host:~# sudo systemctl status jenkins
● jenkins.service - Jenkins Continuous Integration Server
     Loaded: loaded (/usr/lib/systemd/system/jenkins.service; enabled; preset: enabled)
     Active: active (running) since Tue 2024-06-11 09:39:02 CDT; 15s ago
   Main PID: 11666 (java)
      Tasks: 52 (limit: 4613)
     Memory: 1.1G (peak: 1.2G)
        CPU: 1min 24.854s
     CGroup: /system.slice/jenkins.service
             └─11666 /usr/bin/java -Djava.awt.headless=true -jar /usr/share/java/jenkins.war --webroot=/var/cache/jenkins/war --httpPort=8080
Step 5. Install Apache And Create Apache Configuration
The Apache web server is required, so we can create a reverse proxy in the next step. To install the Apache web server execute the following command:
sudo apt install apache2 -y
Once installed start and enable the service:
sudo systemctl enable apache2 && sudo systemctl start apache2
Check if the service is up and running:
sudo systemctl status apache2
You should receive the following output:
root@host:~# sudo systemctl status apache2
● apache2.service - The Apache HTTP Server
     Loaded: loaded (/usr/lib/systemd/system/apache2.service; enabled; preset: enabled)
     Active: active (running) since Tue 2024-06-11 09:56:04 CDT; 4s ago
       Docs: https://httpd.apache.org/docs/2.4/
    Process: 12142 ExecStart=/usr/sbin/apachectl start (code=exited, status=0/SUCCESS)
   Main PID: 12145 (apache2)
      Tasks: 6 (limit: 4613)
     Memory: 10.5M (peak: 10.8M)
        CPU: 139ms
     CGroup: /system.slice/apache2.service
We need to create an Apache virtual host file and set it up with the reverse proxy directive in order can access the Jenkins via domain name.
Create an Apache configuration file with the following command:
touch /etc/apache2/sites-available/jenkins.conf
Open it with your favorite text editor and paste the following lines of code:
<Virtualhost *:80>
    ServerName        yourdomain.com
    ProxyRequests     Off
    ProxyPreserveHost On
    AllowEncodedSlashes NoDecode

    <Proxy http:localhost:8080/*>
      Order deny,allow
      Allow from all
    </Proxy>


    ProxyPass         /  http://localhost:8080/ nocanon
    ProxyPassReverse  /  http://localhost:8080/
    ProxyPassReverse  /  http://yourdomain.com/
</Virtualhost>
Save and close the file. Then you need to execute the following commands to enable the Jenkins configuration and some Apache modules:
sudo a2ensite jenkins
sudo a2enmod headers
sudo a2enmod rewrite
sudo a2enmod proxy
sudo a2enmod proxy_http
sudo systemctl restart apache2
After these commands, if everything is OK, you will be able to access Jenkins via your domain at http://YourDomain.com
Step 6. Finalize Install Jenkins on Ubuntu 24.04
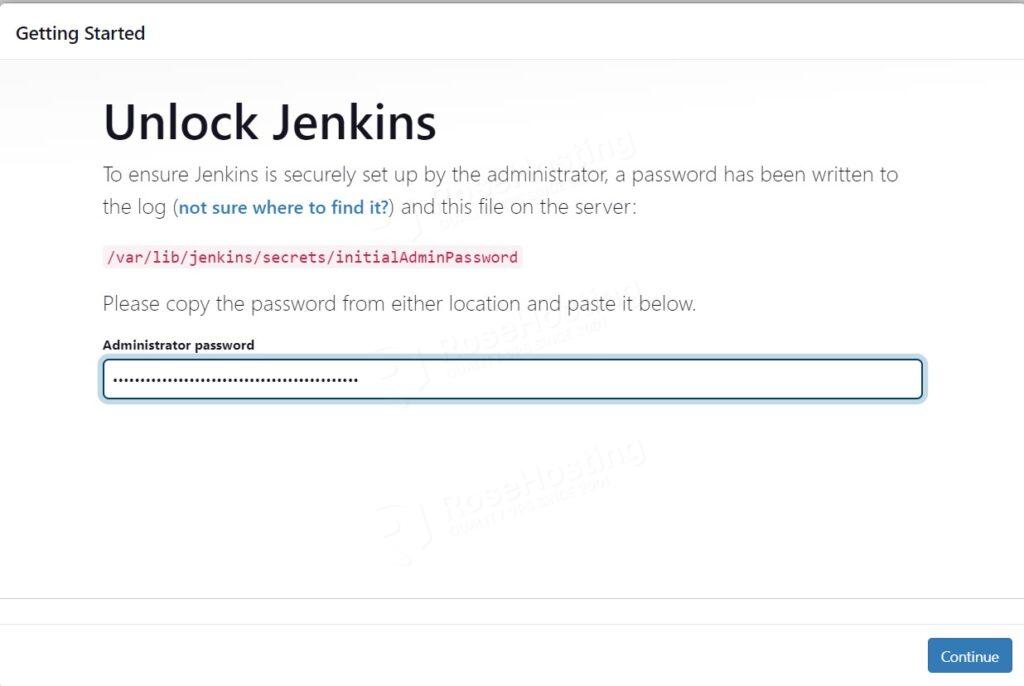
On the first screen, you will be asked for the password to unlock Jenkins. The password can be found by executing the following command on the server:
cat /var/lib/jenkins/secrets/initialAdminPassword
You should receive the password as shown below:
root@host:~# cat /var/lib/jenkins/secrets/initialAdminPassword
24598462a23846c58060fd15ceeb6abe
Enter the password and click on the continue button.
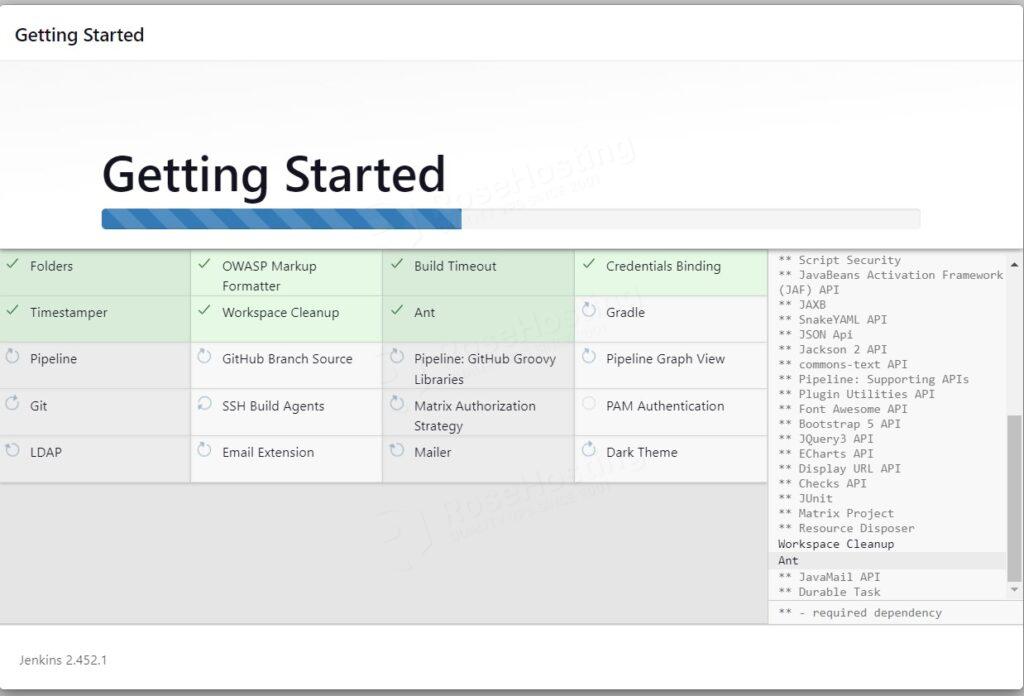
Then click on the “Install suggested plugins” tab.

The installation of Jenkins along with suggested plugins will start.
Once the installation is complete, you will be asked to enter your username, password, full name, and the email.
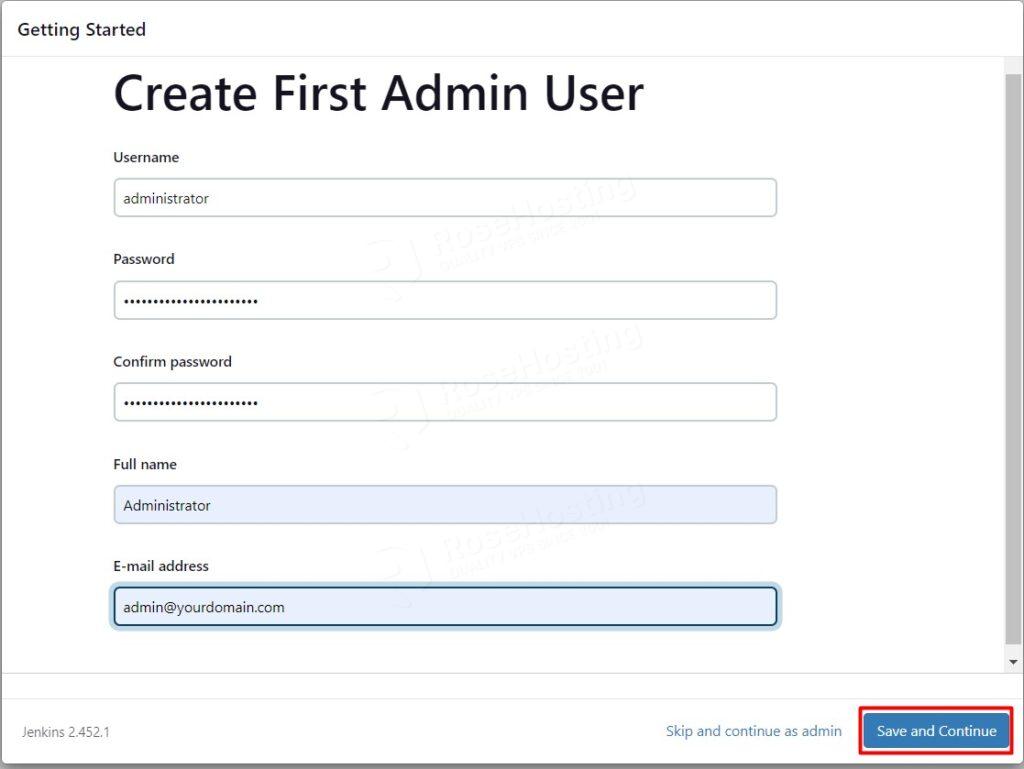
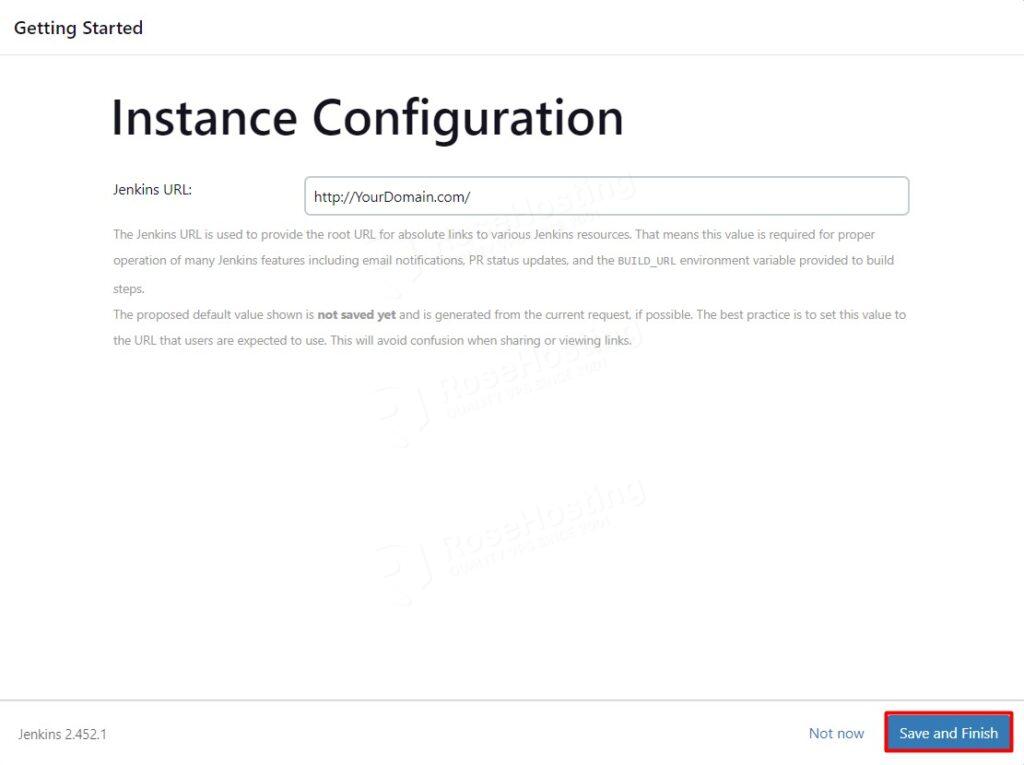
After saving these credentials the next window will be for the URL of your application. This window is to confirm if the domain is correct in the Apache configuration. Click on the “Save and Finish” button.
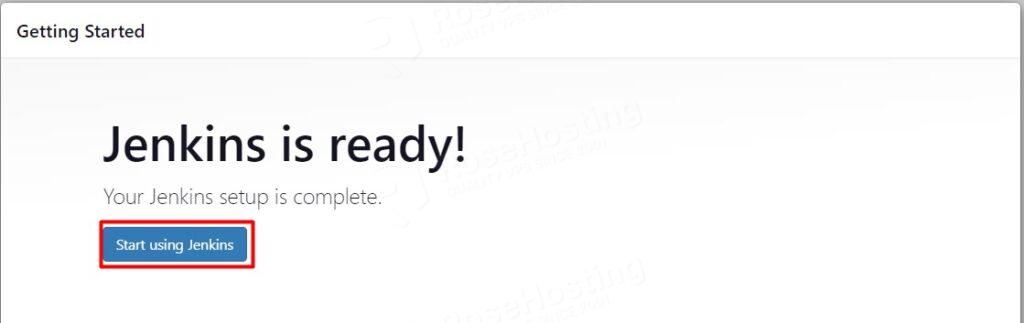
After this, there will be a button for “Start using Jenkins”. Click on that button and you will be redirected to the Administrator website of Jenkins.
That’s it. You learned how to successfully install Jenkins on Ubuntu 24.04. Of course, you do not have to do this on your own. You only need to sign up for one of our NVMe Ubuntu hosting plans and submit a support ticket. Our admins will help you with any aspect of the Jenkins installation and configuration on your server.
If you liked this post on installing Jenkins on Ubuntu 24.04, please share it with your friends and leave a comment below.
The following piece of code has something wrong.
====================
ServerName yourdomain.com
ProxyRequests Off
ProxyPreserveHost On
AllowEncodedSlashes NoDecode
Order deny,allow
Allow from all
ProxyPass / http://localhost:8080/ nocanon
ProxyPassReverse / http://localhost:8080/
ProxyPassReverse / http://yourdomain.com/
====================
Could you please send me a right copy of the configuration?
Thanks,
Yang
Nothing is wrong here, make sure to replace yourdomain.com with your own domain name pointing to your server.
@Yang
replace
Order deny,allow
Allow from all
with
Require all granted
and restart server
New apache2 versions have different settings
Unfortunately it is wrong – I commented out the following two lines while testing and got apache working:
Order deny,allow
Allow from all
I also tried the suggestion from anshul tiwari, but received the error:
Require not allowed in context
We modified the Apache configuration a little. Please copy the Apache configuration and try again. Or you can simply remove the following lines:
< Proxy http:localhost:8080/* >
Order deny,allow
Allow from all
< /Proxy >
And not use them at all.
Both ways worked on our side, and we were using Apache version: Apache/2.4.58 (Ubuntu)