A LEMP stack is a synonym of LEMP server or LEMP web server. It refers to a set-up which includes Linux, Nginx, MySQL (MariaDB) and PHP.
REQUIREMENTS
We will be using our SSD 1 Linux VPS hosting plan for this tutorial.
UPDATE THE SYSTEM
Make sure your server is fully up to date using:
# apt-get update && apt-get upgrade
INSTALL NGINX
To install Nginx on your Debian 8 server, you need to execute the following command:
# apt-get install nginx
After the installation is complete, you can start Nginx with:
# systemctl start nginx
Enable Nginx to start on boot:
# systemctl enable nginx
Possible issues:
If during the Nginx installation you encounter error such as:
dpkg: error processing package nginx (--configure):
dependency problems - leaving unconfigured
Processing triggers for systemd (215-17+deb8u1) ...
Errors were encountered while processing:
nginx-full
nginx
E: Sub-process /usr/bin/dpkg returned an error code (1)
then, you can fix this by opening the default Nginx configuration file and comment the listen [::]:80 default_server; line. Enter the below command:
# vim /etc/nginx/sites-available/default
Locate the listen [::]:80 default_server; line and comment it by putting # in front of the line. Restart Nginx for the changes to take effect and run the install Nginx command so the package manager finishes the Nginx configuration:
# systemctl restart nginx

# apt-get install nginx
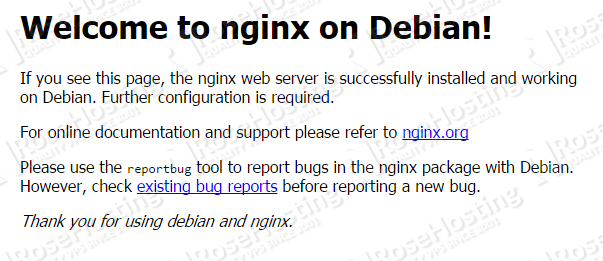
Verify that Nginx is running by opening a web browser and visiting your server IP address (http://server_ip) . You should get the Nginx welcome page like the one below:
INSTALL MYSQL
Now let’s install MySQL. Issue the following:
# apt-get install mysql-server
During the installation, you will be asked to enter a password for the MySQL root user. Do not enter an easy to crack password. It should contain at least 8 characters mixed with upper and down cases.
Now that MySQL is installed, we recommend you to do the MySQL secure installation by running:
# mysql_secure_installation
Enter your root password and answer with ‘n’ when you are asked to change your MySQL root password. Below is the entire procedure that you can follow:
Setting the root password ensures that nobody can log into the MySQL
root user without the proper authorisation.

You already have a root password set, so you can safely answer 'n'.

Change the root password? [Y/n] n
... skipping.

By default, a MySQL installation has an anonymous user, allowing anyone
to log into MySQL without having to have a user account created for
them.  This is intended only for testing, and to make the installation
go a bit smoother.  You should remove them before moving into a
production environment.

Remove anonymous users? [Y/n] y
... Success!

Normally, root should only be allowed to connect from 'localhost'.  This
ensures that someone cannot guess at the root password from the network.

Disallow root login remotely? [Y/n] y
... Success!

By default, MySQL comes with a database named 'test' that anyone can
access.  This is also intended only for testing, and should be removed
before moving into a production environment.

Remove test database and access to it? [Y/n] y
- Dropping test database...
ERROR 1008 (HY000) at line 1: Can't drop database 'test'; database doesn't exist
... Failed!  Not critical, keep moving...
- Removing privileges on test database...
... Success!

Reloading the privilege tables will ensure that all changes made so far
will take effect immediately.

Reload privilege tables now? [Y/n] y
... Success!

Cleaning up...


All done!  If you've completed all of the above steps, your MySQL
installation should now be secure.

Thanks for using MySQL!
Enable MySQL to start on boot:
# systemctl enable mysql
INSTALL PHP-FPM
Install PHP-FPM by running the underneath command:
# apt-get install php5-fpm php5-mysql
Next step you need to do is to modify the Nginx configuration file. But to avoid looking for lines that need to be edited or commented out through the default Nginx file, let’s rename the file and create a new one. The below command do exactly that:
# mv /etc/nginx/sites-available/default /etc/nginx/sites-available/default.old

# vim /etc/nginx/sites-available/default
Now, that you have a new default file opened, paste the following content:
server {
        listen       80;
        server_name  your_website_name.com;
        root /var/www/html;
        index index.php index.html index.htm index.nginx-debian.html;
        location / {
                try_files $uri $uri/ =404;
        }
        error_page 404 /404.html;
        error_page 500 502 503 504 /50x.html;
        location = /50x.html {
                root /var/www/html;
        }
        location ~ \.php$ {
                try_files $uri =404;
                fastcgi_pass unix:/var/run/php5-fpm.sock;
                fastcgi_index index.php;
                fastcgi_param SCRIPT_FILENAME $document_root$fastcgi_script_name;
                include fastcgi_params;
        }
}
Save and exit the file.
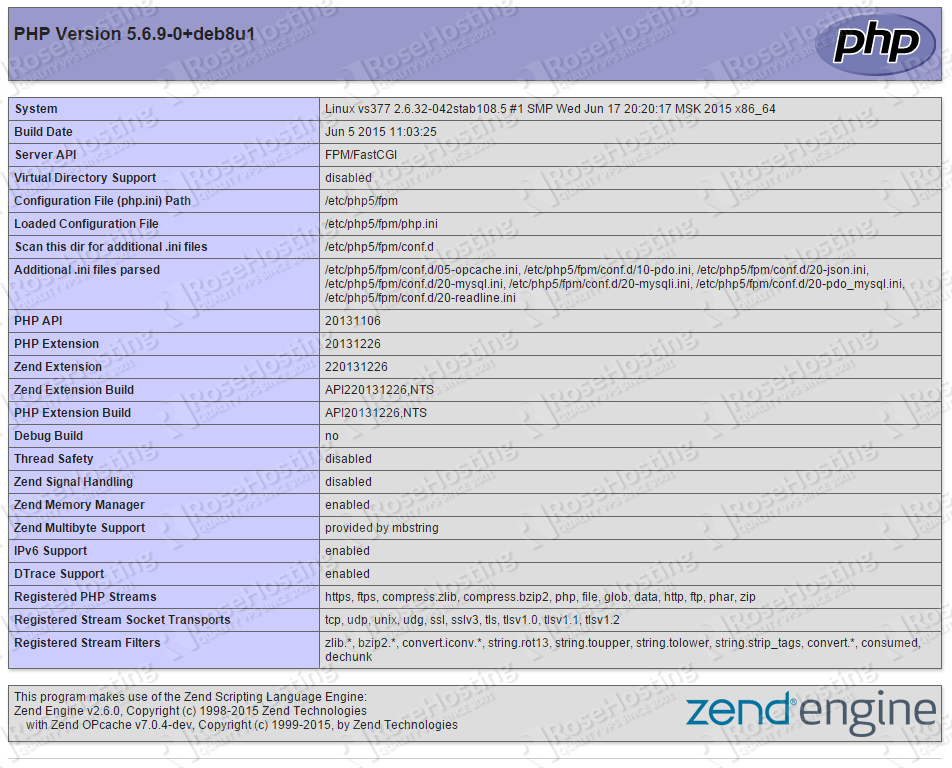
Now, let’s make a simple PHP page test. Create a PHP info page so you can check your PHP version, modules activated etc…
Create a file, let’s call it info.php into the /var/www/html directory:
# vim /var/www/html/info.php
Paste the following into the file:
<?php
phpinfo();
?>
Restart Nginx for the changes to take effect:
# systemctl restart nginx
Now, open your favorite web browser and navigate to http://your_server_ip_address/info.php . You will be welcomed by a web page similar to the one below:
That’s it. You have successfully installed the LEMP stack on your Debian 8 VPS.
Of course you don’t have to do any of this if you use one of our Linux VPS Hosting services, in which case you can simply ask our expert Linux admins to install the LEMP stack for you. They are available 24×7 and will take care of your request immediately.
PS. If you liked this post please share it with your friends on the social networks using the buttons on the left or simply leave a reply below. Thanks.


I am using VPS 512MB and articles help me get better performance with Nginx & PHP-FPM
Thank you!
Thanks!
Helped me building my site :)