In this tutorial, we will explain how to install a free Let’s Encrypt SSL certificate on a CentOS 8 VPS with Nginx as a web server.

Let’s Encrypt is a free, open-source and non-profit certificate authority that provides free SSL certificates for websites to enable TLS encryption. It was developed by the Internet Security Research Group (ISRG) and trusted by all major browsers. It is used to automate the process of certificate creation, validation, signing, implementation, and renewal of certificates for secure websites.
The main aim of Let’s Encrypt is to promote the use of SSL across the web and make encrypted connections throughout the Internet, keeping everyone safer in the process. The certificate is valid for only 90 days, so you will need to renew it manually or or set up the auto renewal system, which should be enabled by default.
Currently, Let’s encrypt supports automated certification issuance for Apache, Nginx, Plex, and HAproxy, which should cover almost everyone’s use case. Let’s start with our install guide.
Table of Contents
Prerequisites
- For the purpose of this tutorial, we will use a CentOS 8 VPS.
- Full SSH root access or a user with sudo privileges is also required. Our VPSes all come with root access included by default at no extra cost.
- A valid domain name is pointed towards your VPS IP address.
Step 1: Log in and Update Packages
First, we’re going to need to log into our server using SSH. You can do that by entering this command:
ssh root@IP_Address -p Port_Number
Remember to replace “root” with your username if you are not using the root user. Change “IP_Address” and “Port_Number” according to your server’s IP address and SSH port number. The default SSH port number is 22.
Once you are logged in, you should update all of your packages to their latest available versions.
dnf update -y
Once the updates are completed, restart your system to apply the changes.
Step 2: Install Nginx and PHP
First, install the Nginx webserver and PHP by running the following command:
dnf install nginx php php-fpm php-cli -y
Once all packages are installed, start the Nginx and PHP-FPM services and enable them to start at boot with the following command:
systemctl start nginx
systemctl enable nginx
systemctl start php-fpm
systemctl enable php-fpm
Step 3: Configure PHP-FPM
By default, PHP-FPM is configured to run as the Apache user and group. In this tutorial, we will use the Nginx webserver. This means that you will need to configure PHP-FPM to run as an Nginx user and group.
To do so, edit the PHP-FPM configuration file:
nano /etc/php-fpm.d/www.conf
Change the user and group value from apache to nginx, as shown below:
user = nginx
group = nginx
Save and close the file when you are finished. Then, restart the PHP-FPM service to apply the changes:
systemctl restart php-fpm
Step 4: Create an Nginx Virtual Host
Before starting, create a sample website for Nginx.
mkdir /var/www/html/yourdomain.com
Next, create a sample PHP file inside the website directory and open it with your preferred text editor:
nano /var/www/html/yourdomain.com/index.php
Add the following lines to the file:
<?php
phpinfo();
?>
Save and close the file, then set the ownership of your website to nginx with the following command:
chown -R nginx:nginx /var/www/html/yourdomain.com/
Next, create a new Nginx virtual host configuration file that will serve your website:
nano /etc/nginx/conf.d/yourdomain.com.conf
Add the following lines:
server {
server_name yourdomain.com;
root /var/www/html/yourdomain.com;
location / {
index index.php;
}
access_log /var/log/nginx/yourdomain.access.log;
error_log /var/log/nginx/yourdomain.error.log;
location ~ \.php$ {
fastcgi_pass unix:/run/php-fpm/www.sock;
fastcgi_param SCRIPT_FILENAME $document_root$fastcgi_script_name;
include /etc/nginx/fastcgi_params;
}
}
Make sure you replace all instances of yourdomain with your registered domain name.
Save and close the file, then check the Nginx configuration file for any syntax errors with the following command:
nginx -t
You should see the following output:
nginx: the configuration file /etc/nginx/nginx.conf syntax is ok
nginx: configuration file /etc/nginx/nginx.conf test is successful
Next, restart the Nginx service to apply the configuration changes:
systemctl restart nginx
Your web server should now be up and running.
Step 5: Install the Certbot Client
In order to generate a Let’s Encrypt certificate for your website, you will need to install the Certbot client in your system.
The Certbot is a command-line tool used to simplifies the process for obtaining and renewing Let’s Encrypt SSL certificates for your website.
By default, Certbot package is not available in the CentOS standard repository. So you will need to download it from the vendor’s website.
You can download and install it with the following command:
wget https://dl.eff.org/certbot-auto
mv certbot-auto /usr/local/bin/certbot-auto
chmod 0755 /usr/local/bin/certbot-auto
Once the Certbot has been installed, run the following command to obtain and install an SSL certificate for your website:
certbot-auto --nginx -d yourdomain.com
The above command will first install all of the required dependencies on your server. Once installed, you will be asked to provide an email address and accept the terms of service, as shown below:
Saving debug log to /var/log/letsencrypt/letsencrypt.log
Plugins selected: Authenticator nginx, Installer nginx
Enter email address (used for urgent renewal and security notices)
(Enter 'c' to cancel): admin@yourdomain.com
- - - - - - - - - - - - - - - - - - - - - - - - - - - - - - - - - - - - - - - -
Please read the Terms of Service at
https://letsencrypt.org/documents/LE-SA-v1.2-November-15-2017.pdf. You must
agree in order to register with the ACME server at
https://acme-v02.api.letsencrypt.org/directory
- - - - - - - - - - - - - - - - - - - - - - - - - - - - - - - - - - - - - - - -
(A)gree/(C)ancel: A
- - - - - - -  - - - - - - - - - - - - - - - - - - - - - - - - - - - - - - - -
Would you be willing to share your email address with the Electronic Frontier
Foundation, a founding partner of the Let's Encrypt project and the non-profit
organization that develops Certbot? We'd like to send you email about our work
encrypting the web, EFF news, campaigns, and ways to support digital freedom.
- - - - - - - - - - - - - - - - - - - - - - - - - - - - - - - - - - - - - - - -
(Y)es/(N)o: N
Type N if you don’t wish to share your email to the EFF, then hit Enter to continue. Once the certificate has been installed, you should see the following output:
Obtaining a new certificate
Performing the following challenges:
http-01 challenge for yourdomain.com
Waiting for verification...
Cleaning up challenges
Deploying Certificate to VirtualHost /etc/nginx/conf.d/yourdomain.com.conf
Redirecting all traffic on port 80 to ssl in /etc/nginx/conf.d/yourdomain.com.conf
- - - - - - - - - - - - - - - - - - - - - - - - - - - - - - - - - - - - - - - -
Congratulations! You have successfully enabled https://yourdomain.com
You should test your configuration at:
https://www.ssllabs.com/ssltest/analyze.html?d=yourdomain.com
- - - - - - - - - - - - - - - - - - - - - - - - - - - - - - - - - - - - - - - -
IMPORTANT NOTES:
- Congratulations! Your certificate and chain have been saved at:
/etc/letsencrypt/live/yourdomain.com/fullchain.pem
Your key file has been saved at:
/etc/letsencrypt/live/yourdomain.com/privkey.pem
Your cert will expire on 2020-08-30. To obtain a new or tweaked
version of this certificate in the future, simply run certbot-auto
again with the "certonly" option. To non-interactively renew *all*
of your certificates, run "certbot-auto renew"
- Your account credentials have been saved in your Certbot
configuration directory at /etc/letsencrypt. You should make a
secure backup of this folder now. This configuration directory will
also contain certificates and private keys obtained by Certbot so
making regular backups of this folder is ideal.
- If you like Certbot, please consider supporting our work by:
Donating to ISRG / Let's Encrypt:   https://letsencrypt.org/donate
Donating to EFF:                    https://eff.org/donate-le
- We were unable to subscribe you the EFF mailing list because your
e-mail address appears to be invalid. You can try again later by
visiting https://act.eff.org.
Now, your website is secured with Let’s Encrypt SSL. You can test your SSL certificate using an online tool.
Step 6: Access Your Website
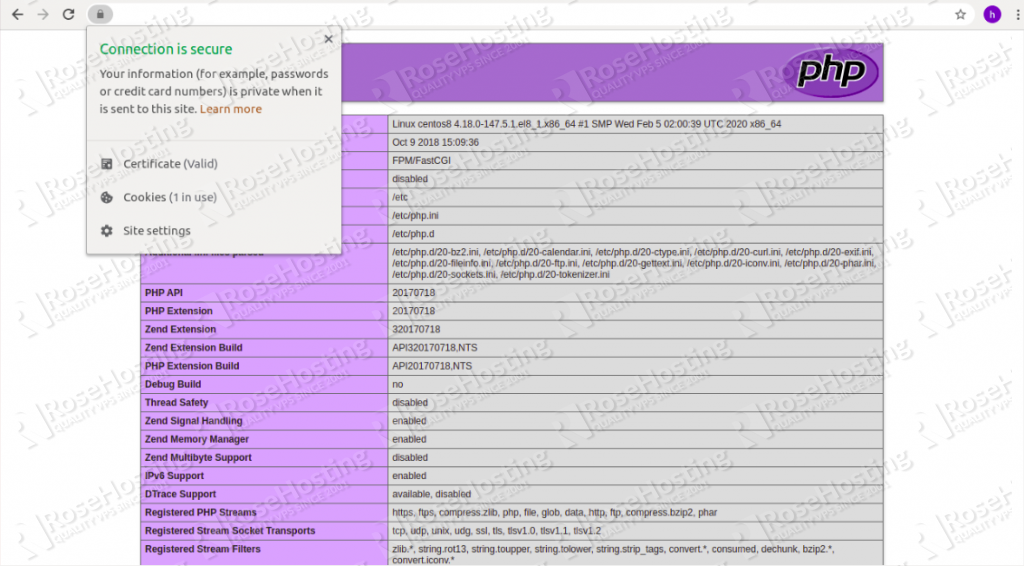
Now, open your web browser and access your website securely using the URL https://yourdomain.com.
You should see the following page:

In the above page, you should be able to see that the site is properly secured, usually with a green lock icon on the left edge of the address bar.
Step 7: Set up Automatic Renewal
Now that we have installed Let’s Encrypt on our CentOS 8 VPS, we’ll need to make sure that our certificate stays renewed and valid.
By default, Let’s Encrypt certificates are valid for 90 days. It is recommended to renew the certificate before it expires since an expired certificate will give users a safety warning when they try to visit your website.
You can test the renewal process manually with the following command.
certbot-auto renew --dry-run
The above command will automatically check the currently installed certificates and tries to renew them if they are less than 30 days away from the expiration date.
You can also add a cronjob to automatically run the above command twice a day.
To do so, edit the crontab file with the following command:
crontab -e
Add the following line:
* */12 * * * root /usr/local/bin/certbot-auto renew >/dev/null 2>&1
You can always change the interval of this cronjob if twice a day is too often by adjusting the values on the far left.
Save and close the file. Now your certificate will be renewed regularly. Congratulations! You have now installed Let’s Encrypt on your CentOS 8 server with Nginx.

Setting up a website with all of the plugins and features that you need can take a lot of time and effort that you could be spending on running your business. If you use one of our managed CentOS 8 hosting services, we’ll do all of the grunt work for you. From server maintenance to installation and configuration requests, we cover everything you need to keep your server in top form, all at no additional cost.
If this tutorial helped you configure your Nginx website with SSL on your CentOS 8 VPS, please consider leaving a comment in our comments section, or share this post on social media by using our share shortcuts. Thank you.