
Odoo is an open-source Python and Javascript software used to manage business processes. It includes various features such as customer relationship management, e-commerce, accounting, billing, manufacturing, project management, etc. Odoo uses the PostgreSQL database management system to store its data. This blog post will cover all the requirements for the latest Odoo 18 version, such as Python’s latest version, PostgreSQL service, Python requirements, and Odoo service configuration. Learning how to install Odoo 18 on Ubuntu 24.04 is a straightforward process that may take up to 15 minutes. Let’s get started!
Table of Contents
Prerequisites
- A server with Ubuntu 24.04 as OS
- User privileges: root or non-root user with sudo privileges
Step 1. Update the System
Before we start with the installation, we will update the system packages to their latest versions available:
sudo apt update -y && sudo apt upgrade -y
Step 2. Install Python and its dependencies
To install the latest Python version and its dependencies, execute the following command:
sudo apt install build-essential wget git python3-pip python3-dev python3-venv python3-wheel python3 libfreetype6-dev libxml2-dev libzip-dev libsasl2-dev python3-setuptools libjpeg-dev zlib1g-dev libpq-dev libxslt1-dev libldap2-dev libtiff5-dev libopenjp2-7-dev -y
Once installed you can check the Python version with the command below:
python3 -V
You should get the following output:
root@host:~# python3 -V
Python 3.12.3
Step 3. Install NPM and Node CSS plugins
Next, we need to install NPM and Node with the following commands:
sudo apt-get install npm -y

npm install -g less less-plugin-clean-css

sudo apt-get install node-less -y
Step 4. Install Wkhtmltopdf
The Wkhtmltopdf converts HTML pages to PDF files. To install it, execute the following command:
sudo apt-get install wkhtmltopdf -y
Once installed, create the symbolic links in case wkhtmltopdf is not readable:
sudo ln -s /usr/local/bin/wkhtmltopdf /usr/bin
Step 5. Install PostgreSQL database service
To install the PostgreSQL database service, execute the command below:
sudo apt-get install postgresql -y
The PostgreSQL version 16 will be installed, and to start and enable the PostgreSQL service, you need to do the following:
sudo systemctl start postgresql && sudo systemctl enable postgresql
To check the status of the service:
sudo systemctl status postgresql
You should get output similar to this:
root@host:~# sudo systemctl status postgresql
● postgresql.service - PostgreSQL RDBMS
     Loaded: loaded (/usr/lib/systemd/system/postgresql.service; enabled; preset: enabled)
     Active: active (exited) since Sat 2024-10-19 02:48:16 CDT; 2min 23s ago
   Main PID: 28842 (code=exited, status=0/SUCCESS)
        CPU: 5ms

Oct 19 02:48:16 host.test.vps systemd[1]: Starting postgresql.service - PostgreSQL RDBMS...
Oct 19 02:48:16 host.test.vps systemd[1]: Finished postgresql.service - PostgreSQL RDBMS.
Step 6. Create Odoo System and Database User
Next, we must create an Odoo system and an Odoo database user. We will create the users with the same name, odoo18.
To create an Odoo system user in the /opt directory, execute the following:
sudo useradd -m -U -r -d /opt/odoo18 -s /bin/bash odoo18
Odoo database user can be created with the command below:
sudo su - postgres -c "createuser -s odoo18"
Step 7. Install and Configure Odoo 18
Next, we need to download and install Odoo. First, log in as the “odoo18” user you created before:
su - odoo18
You will be automatically in the home directory of the odoo18 user, and that is the /opt directory. To check this, you can execute the pwd command on your command line:
odoo18@host:~$ pwd
/opt/odoo18
Next is to download Odoo files from the Odoo GitHub repository:
git clone https://www.github.com/odoo/odoo --depth 1 --branch 18.0 /opt/odoo18/odoo18
Once downloaded, create a Python virtual environment and install the Odoo 18 requirements with the following commands one by one:
python3.12 -m venv odoo18-venv
source odoo18-venv/bin/activate
pip install --upgrade pip
pip3 install wheel
pip3 install -r odoo18/requirements.txt
Once the requirements are installed, deactivate the environment with the following:
deactivate
And then press CTRL+D to log out from the odoo18 user. The screen should look like this:
(odoo18-venv) odoo18@host:~$ deactivate
odoo18@host:~$
logout
root@host:~#
Next, we need to create an Odoo custom addons directory, a Log file directory along with a Log file for Odoo and grant the correct permissions:
mkdir /opt/odoo18/odoo18-custom-addons
chown -R odoo18:odoo18 /opt/odoo18/odoo18-custom-addons
mkdir -p /var/log/odoo18/ && touch /var/log/odoo18/odoo18.log
chown -R odoo18:odoo18 /var/log/odoo18/
Step 8. Create an Odoo configuration file
Next, we need to create an Odoo configuration file:
touch /etc/odoo18.conf
Open the file with your favorite text editor and paste the following lines of code:
[options]

admin_passwd = StrongPasswordHere
db_host = False
db_port = False
db_user = odoo18
db_password = False
xmlrpc_port = 8069
logfile = /var/log/odoo18/odoo18.log
addons_path = /opt/odoo18/odoo18/addons,/opt/odoo18/odoo18-custom-addons
Save the file and close it.
Step 9. Create an Odoo Service file
Next, we need to create an Odoo service file:
touch /etc/systemd/system/odoo18.service
Open the file with your favorite text editor and paste the following lines of code:
[Unit]
Description=odoo18

[Service]
Type=simple
SyslogIdentifier=odoo18
PermissionsStartOnly=true
User=odoo18
Group=odoo18
ExecStart=/opt/odoo18/odoo18-venv/bin/python3 /opt/odoo18/odoo18/odoo-bin -c /etc/odoo18.conf
StandardOutput=journal+console

[Install]
WantedBy=multi-user.target
Save the file and close it.
Step 10. Manage Odoo service
Now, when everything is completed, we can manage our Odoo service. Start and enable the odoo service:
sudo systemctl start odoo18 && sudo systemctl enable odoo18
To check the status of the Odoo service, execute the following command:
sudo systemctl status odoo18
You should get output similar to this:
root@host:/opt/odoo18# sudo systemctl status odoo18
● odoo18.service - odoo18
     Loaded: loaded (/etc/systemd/system/odoo18.service; enabled; preset: enabled)
     Active: active (running) since Sat 2024-10-19 05:22:54 CDT; 10s ago
   Main PID: 34380 (python3)
      Tasks: 4 (limit: 4613)
     Memory: 89.2M (peak: 89.6M)
        CPU: 5.899s
     CGroup: /system.slice/odoo18.service
             └─34380 /opt/odoo18/odoo18-venv/bin/python3 /opt/odoo18/odoo18/odoo-bin -c /etc/odoo18.conf

Oct 19 13:22:54 host.test.vps systemd[1]: Started odoo18.service - odoo18.
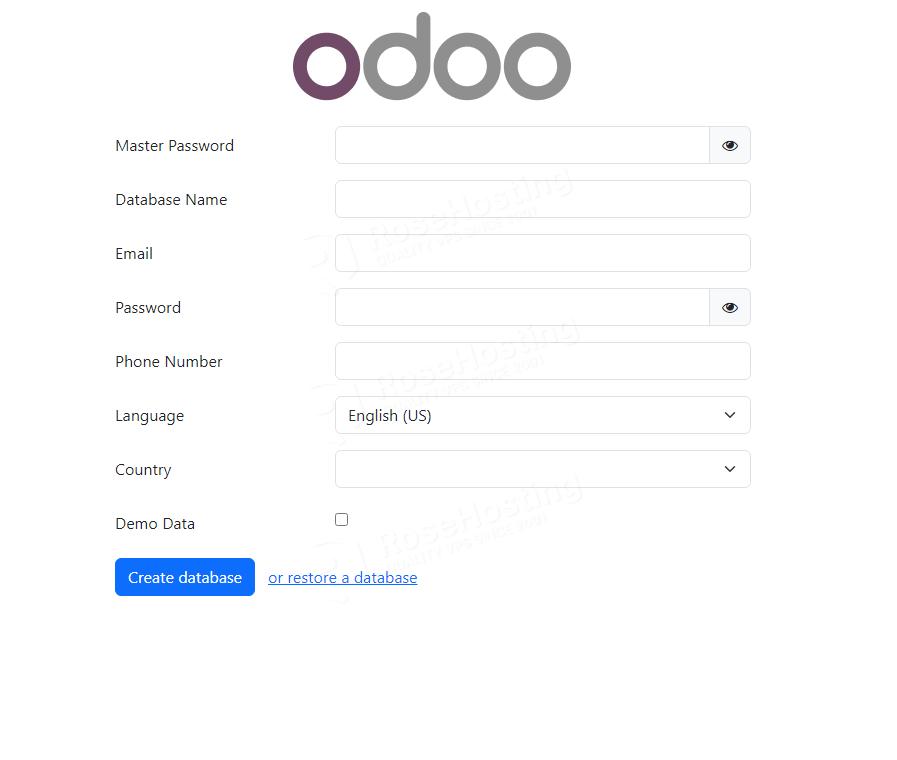
To access Odoo in the browser, you need to use your server IP address and port 8069 because, in this blog post, we configured Odoo to listen on that port.
http://YourServerIPAddress:8069
Congratulations!
You successfully installed the latest Odoo 18 on Ubuntu 24.04. Of course, you don’t have to install Odoo 18 on Ubuntu 24.04 if you have difficulties and are unfamiliar with Linux. You can always contact our technical support. With any of our managed Ubuntu VPS plans, we are at your disposal 24/7 and will take care of your request immediately.
If you liked this post about installing Odoo 18 on Ubuntu 24.04, please share it with your friends or leave a comment below.
Great job!
It ‘s appreciate your collaboration and your help to bring us to understand something complicate in easy words.
Hello , I’m in the step 7
$ su – odoo18
ubuntu server ask me a password , but haven’t one for odoo18 user , I must will create one ?
thanks.
You should create the odoo18 user as mentioned in step 6.
sudo useradd -m -U -r -d /opt/odoo18 -s /bin/bash odoo18If you have already created the odoo user but are not logged in as root user, you can use the following command:
sudo su - odoo18i have followed all your steps but i am getting “Database creation error: Access Denied” error
What do i need to do ?
Thanks
Please check on the Odoo configuration file (/etc/odoo18.conf) to see if your Master Password is set. If it’s still “StrongPasswordHere,” update to a new and strong password and try again. You can also check if the database user you created in step 6 is the same as the one on the Odoo configuration file.
root@host:~# : not a good practice in ubuntu
-> sudo
Thx rosehosting as usual constant useful source
Hi,
I completed all the steps. while creating the database in the browser, it shows a permission denied error.
I followed all the steps, By default our ubuntu server has odoo user and a root user.
thanks in advance
use either sudo in front of the command, or try as root
Hello,
I got this in the last step, can you help me please?
root@Odoo-Community:~# sudo systemctl status odoo18
× odoo18.service – odoo18
Loaded: loaded (/etc/systemd/system/odoo18.service; enabled; preset: enabled)
Active: failed (Result: exit-code) since Sat 2025-02-22 01:35:43 UTC; 9min ago
Duration: 1.877s
Invocation: 0b803ce531e64795816402ddbe1d9f97
Process: 28090 ExecStart=/opt/odoo18/odoo18-venv/bin/python3 /opt/odoo18/odoo18/odoo-bin -c /etc/odoo18.conf (code=exited, status=1/FAILURE)
Main PID: 28090 (code=exited, status=1/FAILURE)
Mem peak: 78.1M
CPU: 1.327s
Feb 22 01:35:43 Odoo-Community odoo18[28090]: File “/usr/lib/python3.12/configparser.py”, line 684, in read
Feb 22 01:35:43 Odoo-Community odoo18[28090]: self._read(fp, filename)
Feb 22 01:35:43 Odoo-Community odoo18[28090]: File “/usr/lib/python3.12/configparser.py”, line 1064, in _read
Feb 22 01:35:43 Odoo-Community odoo18[28090]: raise MissingSectionHeaderError(fpname, lineno, line)
Feb 22 01:35:43 Odoo-Community odoo18[28090]: configparser.MissingSectionHeaderError: File contains no section headers.
Feb 22 01:35:43 Odoo-Community odoo18[28090]: file: ‘/etc/odoo18.conf’, line: 1
Feb 22 01:35:43 Odoo-Community odoo18[28090]: ‘admin_passwd = kjsiuLoiYtK1 db_host = False db_port = False db_user = odoo18 db_password = False xmlrpc_port >
Feb 22 01:35:43 Odoo-Community systemd[1]: odoo18.service: Main process exited, code=exited, status=1/FAILURE
Feb 22 01:35:43 Odoo-Community systemd[1]: odoo18.service: Failed with result ‘exit-code’.
Feb 22 01:35:43 Odoo-Community systemd[1]: odoo18.service: Consumed 1.327s CPU time, 78.1M memory peak.
Please check your Odoo configuration
Hello,
Thanks for this guide, it’s very helpful. I followed your instructions to the T and have odoo running, however the Odoo service stops at random times with the error below. I have also verified that pytz is installed and have uninstalled and reinstalled it. Please let me know what should I check next. Thank you
—————————————————————————————————————–
(odoo18-venv) odoo18@E01ERP01:~$ pip show pytz
Name: pytz
Version: 2025.1
Summary: World timezone definitions, modern and historical
Home-page: http://pythonhosted.org/pytz
Author: Stuart Bishop
Author-email: stuart@stuartbishop.net
License: MIT
Location: /opt/odoo18/odoo18-venv/lib/python3.12/site-packages
Requires:
Required-by: Babel, zeep
—————————————————————————————————————————
root@E01ERP01:~# sudo systemctl status odoo18
× odoo18.service – odoo18
Loaded: loaded (/etc/systemd/system/odoo18.service; enabled; preset: enabled)
Active: failed (Result: exit-code) since Wed 2025-02-26 23:37:57 UTC; 42min ago
Duration: 6min 1.255s
Invocation: 538b98044e50482eb7990bd1403bfe41
Process: 1568 ExecStart=/opt/odoo18/odoo18-venv/bin/python3 /opt/odoo18/odoo18/odoo-bin -c /etc/odoo18.conf (code=exited, status=1/FAILURE)
Main PID: 1568 (code=exited, status=1/FAILURE)
Mem peak: 144.1M
CPU: 10.117s
Feb 26 23:37:57 E01ERP01 odoo18[1568]: File “/opt/odoo18/odoo18/odoo/__init__.py”, line 49, in
Feb 26 23:37:57 E01ERP01 odoo18[1568]: _monkeypatches.patch_all()
Feb 26 23:37:57 E01ERP01 odoo18[1568]: File “/opt/odoo18/odoo18/odoo/_monkeypatches/__init__.py”, line 24, in patch_all
Feb 26 23:37:57 E01ERP01 odoo18[1568]: from .pytz import patch_pytz
Feb 26 23:37:57 E01ERP01 odoo18[1568]: File “/opt/odoo18/odoo18/odoo/_monkeypatches/pytz.py”, line 18, in
Feb 26 23:37:57 E01ERP01 odoo18[1568]: import pytz
Feb 26 23:37:57 E01ERP01 odoo18[1568]: ModuleNotFoundError: No module named ‘pytz’
Feb 26 23:37:57 E01ERP01 systemd[1]: odoo18.service: Main process exited, code=exited, status=1/FAILURE
Feb 26 23:37:57 E01ERP01 systemd[1]: 5:185m5:185modoo18.service: Failed with result ‘exit-code’.
Feb 26 23:37:57 E01ERP01 systemd[1]: odoo18.service: Consumed 10.117s CPU time, 144.1M memory peak.
pip3 install -U pytz
OR
pip3 install –upgrade pytz
This worked on our end.
this is great, thank you!. is there a way to add an SSL to the new setup? can i use the Odoo17 ssl setup or is there new changes?
We have a guide on how to install Odoo 17 on Ubuntu 24.04 as well.