 OwnCloud is a web based file management and sharing solution. Using OwnCloud you can sync and share your files, calendar, contacts, etc… and easily access them from all your devices from anywhere.
In this blog article we will install OwnCloud 7 on an Ubuntu 14.04 VPS. The installation is pretty easy and fast.
In order to run OwnCloud 7 the following requirements you need to have Apache web server, MySQL database server and PHP installed on your Ubuntu 14.04 VPS.
First of all log in to your server as root and make sure that all packages are up to date
apt-get update
apt-get upgrade
Instal Apache web server on your Ubuntu 14.04 VPS if it is not already installed
apt-get install apache2
Install PHP on your server
apt-get install php5 php5-mysql
and the following PHP modules required by OwnCloud
apt-get install php5-gd php5-json php5-curl php5-intl php5-mcrypt php5-imagick
Install MySQL database server
apt-get install mysql-server
After the MySQL server is installed, run the ‘mysql_secure_installation‘ and use the following settings
Set root password? [Y/n] y
Remove anonymous users? [Y/n] y
Disallow root login remotely? [Y/n] y
Remove test database and access to it? [Y/n] y
Reload privilege tables now? [Y/n] y
Download the latest stable release of OwnCloud on your server. At the time of writing this article it is OwnCloud version 7.0.0.
wget https://download.owncloud.org/community/owncloud-7.0.0.tar.bz2
Unpack the downloaded archive to the Apache’s document root directory
tar -xvf owncloud-7.0.0.tar.bz2 -C /var/www/html
The user running the web server have to be the ownner of the OwnCloud files, so we will change the ownership
chown www-data:www-data -R /var/www/html/owncloud/
Log in to your MySQL server and create a user and database for OwnCloud. Give full privileges to the MySQL user on the database.
mysql -u root -p
Enter password:
mysql> CREATE USER 'ownclouduser'@'localhost' IDENTIFIED BY 'YOURPASSWORD';
mysql> CREATE DATABASE ownclouddb;
mysql> GRANT ALL ON ownclouddb.* TO 'ownclouduser'@'localhost';
mysql> FLUSH PRIVILEGES;
mysql> exit
Don’t forget to change ‘YOURPASSWORD‘ with an actual strong password.
Now navigate your browser to http://YOURDOMAIN.TLD/owncloud . There you will create a new administrator user and enter the information of the MySQL database we created earlier in this tutorial.
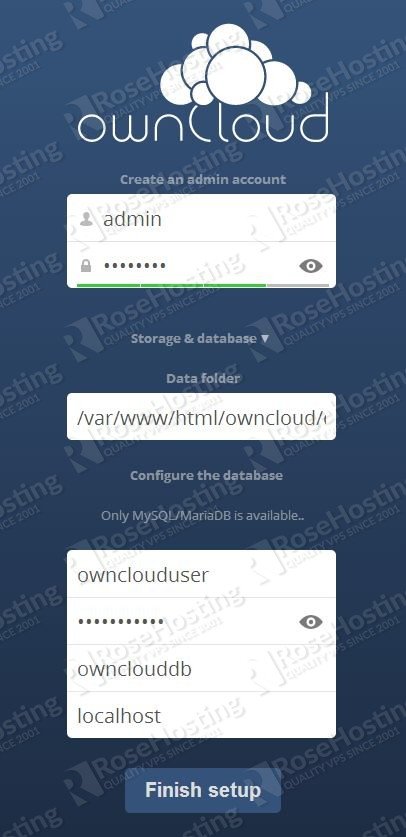
Finish the setup and log in to your OwnCloud 7 server. That’s all.
Of course you don’t have to do any of this if you use one of our Linux VPS Hosting services, in which case you can simply ask our expert Linux admins to install OwnCloud 7 for you. They are available 24×7 and will take care of your request immediately.
PS. If you liked this post please share it with your friends on the social networks using the buttons on the left or simply leave a reply below. Thanks.
This was really helpful. Thank you.
This has been very helpful. Thank you!