Ruby on Rails, or simply Rails, is an open-source web application framework built on top of the Ruby programming language. It is used by many developers since it makes application development very simple.

Basically, it’s a model-view-controller framework that provides default structures for databases, web pages, and various web services.
In the following tutorial, you will learn step-by-step how to install Ruby on Rails on a Debian 11 VPS.
Table of Contents
Requirements
- For the purposes of this tutorial, we will be using a Debian 11 VPS.
- Full SSH root access or a user with sudo privileges is also required.
Step 1: Log in via SSH and update the system
Log in to your Debian VPS with SSH as a root user:
ssh root@IP_ADDRESS -p PORT_NUMBER
Remember to replace IP_Address and Port_Number with your server’s actual IP address and SSH port number respectively.
You can check whether you have the proper Debian version installed on your server with the following command:
lsb_release -a
You should get this output:
No LSB modules are available.
Distributor ID: Debian
Description: Debian GNU/Linux 11 (bullseye)
Release: 11
Codename: bullseye
Then, run the following command to make sure that all installed packages on the server are updated to the latest available version
apt update && apt upgrade
Step 2: Install RVM (Ruby Version Manager)
One way of installing Ruby on Rails is by using the Ruby Version Manager, or shortly RVM.
First, install the required dependencies with the following command:
apt install apt-transport-https ca-certificates gnupg2 curl
Then, we need to import the GPG key with the following command:
$ curl -sSL https://rvm.io/pkuczynski.asc | gpg2 --import -
Install the RVM stable version by running the command below:
$ curl -sSL https://get.rvm.io | bash -s stable --ruby
The command will automatically install the packages required, and install the latest stable Ruby version.
To start using RVM you need to run:
source /usr/local/rvm/scripts/rvm
To list which Ruby versions are available for installation, run the following command:
rvm list known
The list should look like the following one:
# MRI Rubies
[ruby-]1.8.6[-p420]
[ruby-]1.8.7[-head] # security released on head
[ruby-]1.9.1[-p431]
[ruby-]1.9.2[-p330]
[ruby-]1.9.3[-p551]
[ruby-]2.0.0[-p648]
[ruby-]2.1[.10]
[ruby-]2.2[.10]
[ruby-]2.3[.8]
[ruby-]2.4[.10]
[ruby-]2.5[.8]
[ruby-]2.6[.6]
[ruby-]2.7[.2]
[ruby-]3[.0.0]
ruby-head
Step 3: Install Ruby
To install a specific version of Ruby you can use the command:
rvm install <version_number>
Verify the ruby version by running the following command:
ruby -v
The output should be similar to the following:
ruby 3.0.0p0 (2020-12-25 revision 95aff21468) [x86_64-linux]
Run the following RVM command will help you to set the installed version of Ruby as the system default:
rvm use --default 3.0.0
Step 4: Install Rails
Rails is a Ruby gem and different versions of Rails are available for installation too. To install Rails you can use the command below:
gem install rails
To verify the installation as well as to check what version of Rails you are currently using, you can use the command:
rails -v
Output:
Rails 6.1.4.1
Step 5: Install Nodejs and Yarn
Rails need a Javascript runtime for application development. The simple and easiest way to install Node.js is to install them from the Debian default repository.
By default, the latest version of Node.js is not available in the Debian 11 default repository. So you will need to add the Node.js official repository to your system.
Add the Node.js repository with the following command:
curl -sL https://deb.nodesource.com/setup_16.x | bash -
Then to install the Yarn package manager, run:
curl -sL https://dl.yarnpkg.com/debian/pubkey.gpg | gpg --dearmor | sudo tee /usr/share/keyrings/yarnkey.gpg >/dev/null
echo "deb [signed-by=/usr/share/keyrings/yarnkey.gpg] https://dl.yarnpkg.com/debian stable main" | sudo tee /etc/apt/sources.list.d/yarn.list
Update apt and install Node.js and Yarn from the added repositories running the following command:
apt update && apt install nodejs yarn
Once NodeJS and Yarn have been installed, you can verify the installed version of Node.js with the following command:
node -v
You should get the following output:
v16.13.0
You can verify the yarn version with the following command:
yarn -v
You should get the following output:
1.22.15
Step 6: Create Rails Application
You can now start your first Rails project with the following command:
rails new myapp
Start the Rails application:
cd myapp
rails server -b 0.0.0.0
Output:
=> Booting Puma
=> Rails 6.1.4.1 application starting in development
=> Run `bin/rails server --help` for more startup options
Puma starting in single mode...
* Puma version: 5.5.2 (ruby 3.0.0-p0) ("Zawgyi")
* Min threads: 5
* Max threads: 5
* Environment: development
* PID: 9473
* Listening on http://0.0.0.0:3000
Use Ctrl-C to stop
By now, the Rails application should be running on port 3000.
Now open your web browser and type your server IP address with port ‘3000’ on the address bar.
http://Your_Server_IP_Address:3000/
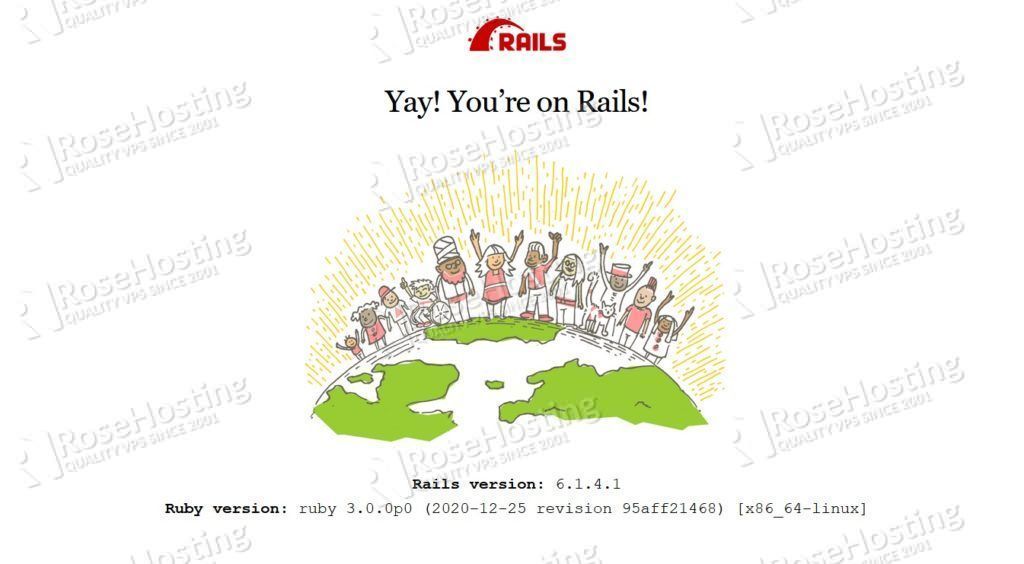
You will get the default index.html page of Ruby on Rails:

Of course, you don’t have to install Ruby on Rails on Debian 11, if you use one of our Ruby on Rails VPS hosting services, in which case you can simply ask our expert Linux VPS hosting admins to install Ruby on Rails on Debian 11 for you. They are available 24/7 and will take care of your request immediately.
PS. If you liked this post on how to install Ruby on Rails on Debian 11 please share it with your friends on the social networks using the buttons on the left or simply leave a reply below. Thanks.