In this tutorial, we will show you how to install SOPlanning on a CentOS 7 VPS.

Table of Contents
Prerequisites
This is what you’ll need in order to install and run SOPlanning on your server. We’ll go through these throughout the tutorial.
- A CentOS 7 VPS
- LAMP stack (consists of Linux, Apache, MySQL, and PHP)
- SSH access with root privileges (or access to a user with sudo privileges)
Step 1: Log in to the Server and Update
We start by logging in to our VPS using the SSH command.
# ssh root@IP_Address -p Port_number
Replace “root” with a user that has sudo privileges if necessary. Additionally, replace “IP_Address” and “Port_Number” with your server’s respective IP address and SSH port.
Once that is done, you can check whether you have the proper CentOS 7 version installed on your server with the following command:
# cat /etc/redhat-release
You should get this output:
CentOS Linux release 7.6.1810 (Core)
Then, run the following command to make sure that all installed packages on the server are updated to their latest available versions:
# yum update
We can now start with the installation of our LAMP stack.
Step 2: Install Apache
If you don’t have Apache, you can install it by invoking the following command:
# yum install httpd openssl mod_ssl
Once installed, let’s enable it on boot and start the service.
# systemctl enable httpd
# systemctl start httpd
Step 3: Install MariaDB Server
In order to be able to install SOPlanning, we need to install MySQL (or MariaDB, an open-source variant) onto our server.
# yum install mariadb-server
Once installed, let’s enable it on boot and start the service.
# systemctl enable mariadb
# systemctl start mariadb
At this point, MariaDB is running and we are now going to create a password for the root user. Run the following command to create a root password, remove the test database, remove the anonymous user, before finally reloading the privileges.
# mysql_secure_installation
When prompted, answer the questions below by following the guide.
Enter current password for root (enter for none): Press the [Enter] key on your keyboard.
Set root password? [Y/n]: Y
New password: Enter a new password
Re-enter new password: Repeat the new password
Remove anonymous users? [Y/n]: Y
Disallow root login remotely? [Y/n]: Y
Remove test database and access to it? [Y/n]: Y
Reload privilege tables now? [Y/n]: Y
Step 4: Install PHP
By default, CentOS 7 provides PHP 5.4 in their built-in repositories. However, for this tutorial we will be using PHP 7.2, a version of PHP not currently available through the default repositories. That’s why we’ll add a third-party repository instead.
First, we need to set up YUM to be able to install third-party repositories in the first place. We can do so by executing this command:
# yum install epel-release yum-utils -y
Once that is done, we can proceed to install ‘remirepo’, our choice of third-party repository for this tutorial:
# yum install http://rpms.remirepo.net/enterprise/remi-release-7.rpm
According to the documentation, SOPlanning at the time of writing supports PHP 7.2. To configure the repository, we need to run:
# yum-config-manager --enable remi-php72
At this point we can install PHP 7.2
# yum install php php-common php-mysql php-opcache php-mcrypt php-cli php-gd php-curl php-xml -y
Now that PHP 7.2 is installed, let’s check and verify it.
# php -v
PHP 7.2.19 (cli) (built: May 29 2019 11:04:13) ( NTS )
Copyright (c) 1997-2018 The PHP Group
Zend Engine v3.2.0, Copyright (c) 1998-2018 Zend Technologies
with Zend OPcache v7.2.19, Copyright (c) 1999-2018, by Zend Technologies
We can now continue with our setup process.
Step 5: Create a Database
We now need to create a database for SOPlanning to be able to store its data. We can create one using the following commands. Please note that you will be asked for the MariaDB root password that you created earlier in Step 3:
# mysql -u root -p
mysql> create database soplanning;
Query OK, 1 row affected (0.00 sec)

mysql> grant all on soplanning.* to soplanning@localhost identified by 'm0d1fyth15';
Query OK, 0 rows affected, 1 warning (0.00 sec)

mysql> flush privileges;
Query OK, 0 rows affected (0.00 sec)

mysql> quit
Please change the password ‘m0d1fyth15‘ above to your desired one – make sure it’s a strong password.
Step 6: Create an Apache Virtual Host
This is an optional step if you wish to access your SOPlanning site using a domain name. In order to be able to access our SOPlanning site through a domain name instead of an IP address, we need to set up a virtual host using our Apache server. We need to create a config file at the /etc/httpd/conf.d/ directory using our preferred text editor. For this tutorial, we’ll be using ‘nano’:
# nano /etc/httpd/conf.d/yourdomainname.conf
Then fill the file with this text. Remember to replace ‘YOUR_SERVER_IP‘ with your server’s public IP address, and all instances of ‘yourdomainname.com‘ with your registered domain name.
<VirtualHost YOUR_SERVER_IP:80>
ServerAdmin webmaster@yourdomainname.com
DocumentRoot "/var/www/html/soplanning/www"
ServerName yourdomainname.com
ServerAlias www.yourdomainname.com
ErrorLog "/var/log/httpd/yourdomainname.com-error_log"
CustomLog "/var/log/httpd/yourdomainname.com-access_log" combined

<Directory "/var/www/html/soplanning/www">
DirectoryIndex index.php index.html
Options FollowSymLinks
AllowOverride All
Require all granted
</Directory>
</VirtualHost>
Then save and quit the text editor. We now need to restart Apache in order for our changes to take effect:
# systemctl restart httpd
Step 7: Download SOPlanning
In this step, we will download and extract the downloaded file into the /var/www/html/soplanning directory. That can be done with these four commands. Execute them one-by-one:
# cd /var/www/html
# wget https://sourceforge.net/projects/soplanning/files/latest/download -O soplanning.zip
# unzip soplanning.zip
# chown -R apache: /var/www/html/soplanning
Step 8: Install SOPlanning
To start installing SOPlanning on your domain, let’s navigate to http://yourdomainname.com using your preferred web browser.
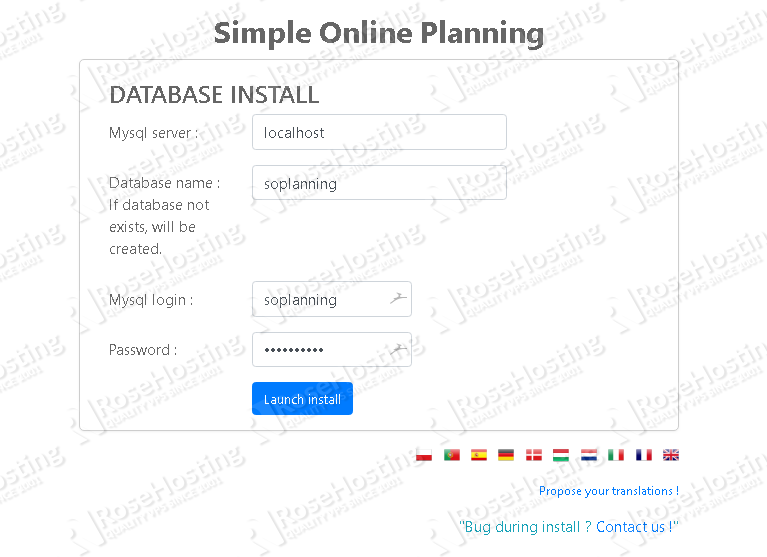
Next is to configure the database parameters – we’ll use the credentials that we created earlier in Step 5, then click on the ‘Launch install’ button.
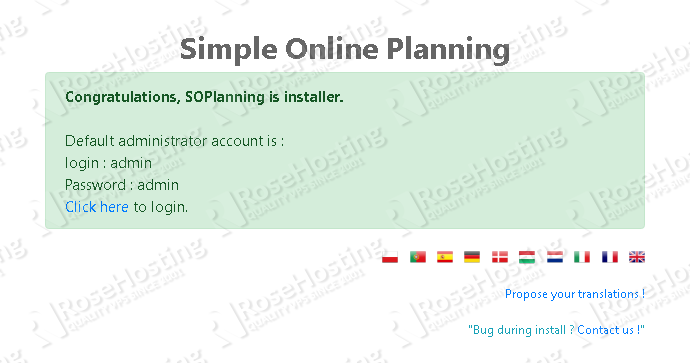
Congratulations, SOPlanning has been successfully installed! You can now log in to the dashboard by clicking the ‘Click here’ link found on the page. The default username and password are both the phrase ‘admin’. Make sure that you change the password to a stronger one once you log in.
Once logged in, you can see the dashboard. For more information about how to use SOPlanning, you can read their documentation.
Step 9: Install an SSL Certificate (Optional)
In this step, we will show you how to install an SSL certificate from Let’s Encrypt.
# yum install certbot-apache
# certbot
You will be asked for your email address, then you need to agree with their ToS to proceed with the certificate installation.
If there is no issue when requesting the certificate, Certbot will automatically create a new Apache virtual host to apply the certificate configuration.
At this point, you can access your SOPlanning installation from https://yourdomainname.com.

PS. If you liked this post on how to install SOPlanning on CentOS 7, please share it with your friends on the social networks using the share buttons below, or simply leave a reply in the comments section. Thanks.


I am getting error “please add read/write rights on “../../www/upload/files” directory when i try to launch the website from the browser. I have set 775 permissions on upload and files folder.
What could i be doing wrong?
You should check that you have added the correct owner and group of the files also in order for the installation to work properly
can you please share some more details on how to add correct owner and on which files and folders?
The ‘chown -R apache: /var/www/html/soplanning’ line changes the permissions, if the setup doesn’t work please re-check that you have followed all the commands in the tutorial