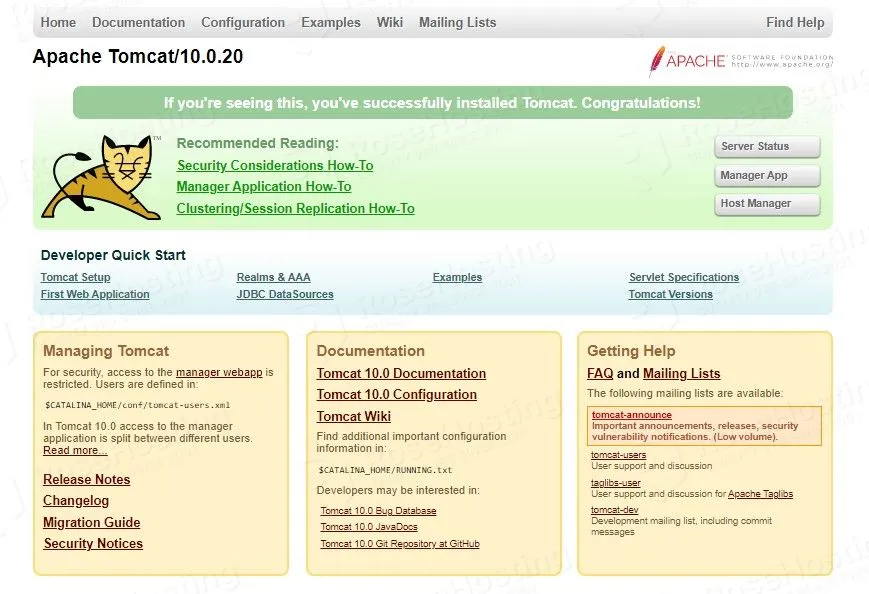
In this tutorial, we are going to install Tomcat 10 and secure it with an SSL certificate on AlmaLinux OS.
Tomcat is an open-source application written in Java program language used for rendering Java web pages and executing Java servlets. Tomcat is also known as Apache Tomcat and it can be installed on many Linux distributions such as Debian, Ubuntu, CentOS, and of course AlmaLinux. In this tutorial, we are going to install Tomcat 10 and set up a reverse proxy with Apache configuration so we can secure the domain with an SSL certificate.
Installing Tomcat 10 on AlmaLinux with Apache as a reverse proxy can take up to 15 minutes. Let’s get started!
Table of Contents
Prerequisites
- A server with AlmaLinux as OS
- A valid domain pointed to the server IP address
- User privileges: root or non-root user with sudo privileges
Step 1. Update the System
After a fresh installation of AlmaLinux, we need to update the packages to the latest versions available:
sudo dnf update -y && sudo dnf upgrade -y
Step 2. Install Apache2 Web Server
To install the Apache2 execute the following command:
sudo dnf install httpd -y
To start and enable the apache service, execute the commands below:
sudo systemctl start httpd && sudo systemctl enable httpd
Check the status of the Apache service:
sudo systemctl status httpd
You should receive the following output:
[root@vps ~]# sudo systemctl status httpd
● httpd.service - The Apache HTTP Server
   Loaded: loaded (/usr/lib/systemd/system/httpd.service; enabled; vendor preset: disabled)
   Active: active (running) since Mon 2022-05-09 12:43:47 CDT; 7s ago
     Docs: man:httpd.service(8)
 Main PID: 7287 (httpd)
   Status: "Started, listening on: port 80"
    Tasks: 213 (limit: 23715)
   Memory: 36.5M
   CGroup: /system.slice/httpd.service
           ├─7287 /usr/sbin/httpd -DFOREGROUND
           ├─7353 /usr/sbin/httpd -DFOREGROUND
           ├─7354 /usr/sbin/httpd -DFOREGROUND
           ├─7355 /usr/sbin/httpd -DFOREGROUND
           └─7356 /usr/sbin/httpd -DFOREGROUND

May 09 12:43:46 host.test.vps systemd[1]: Starting The Apache HTTP Server...
Step 3. Install Java
To install the latest Java 17 version along with other dependencies execute the following commands:
dnf install epel-release

install java-17-openjdk-devel
After successfull installation check the installed version.
java -version
You should receive the following output:
[root@vps ~]# java -version
openjdk version "17.0.3" 2022-04-19 LTS
OpenJDK Runtime Environment 21.9 (build 17.0.3+6-LTS)
OpenJDK 64-Bit Server VM 21.9 (build 17.0.3+6-LTS, mixed mode, sharing)
Step 4. Install Tomcat 10
First, we need to create a directory for tomcat installation, a tomcat user, and a group.
mkdir /opt/tomcat

groupadd tomcat

useradd -s /bin/nologin -g tomcat -d /opt/tomcat tomcat
Download Tomcat 10 and extract it in the /opt/tomcat directory on your server.
cd /opt

wget https://downloads.apache.org/tomcat/tomcat-10/v10.0.20/bin/apache-tomcat-10.0.20.tar.gz -O tomcat-10.0.20.tar.gz

tar xzvf tomcat-10.0.20.tar.gz -C /opt/tomcat --strip-components=1
Once, downloaded and extracted, set the right permissions.
chown tomcat:tomcat -R /opt/tomcat/

chmod +x /opt/tomcat/bin/*.sh
Next, is to create a Systemd Service File for Tomcat.
touch /etc/systemd/system/tomcat.service
Open the file, and paste the following lines of code.
[Unit]
Description=Apache Tomcat
After=network.target

[Service]
Type=forking

User=tomcat
Group=tomcat

Environment="JAVA_HOME=/usr/lib/jvm/jre"
Environment="JAVA_OPTS=-Djava.awt.headless=true -Djava.security.egd=file:/dev/./urandom"

Environment="CATALINA_BASE=/opt/tomcat"
Environment="CATALINA_HOME=/opt/tomcat"
Environment="CATALINA_PID=/opt/tomcat/temp/tomcat.pid"
Environment="CATALINA_OPTS=-Xms512M -Xmx1024M -server -XX:+UseParallelGC"

ExecStart=/opt/tomcat/bin/startup.sh
ExecStop=/opt/tomcat/bin/shutdown.sh

ExecReload=/bin/kill $MAINPID
RemainAfterExit=yes

[Install]
WantedBy=multi-user.target
Save, the file close it and restart the daemon.
systemctl daemon-reload
Start and enable the Tomcat service:
systemctl start tomcat && systemctl enable tomcat
Once started check the status of the service:
systemctl status tomcat
You should receive the following output:
[root@vps ~]# systemctl status tomcat
● tomcat.service - Apache Tomcat
   Loaded: loaded (/etc/systemd/system/tomcat.service; enabled; vendor preset: disabled)
   Active: active (exited) since Mon 2022-05-09 14:47:43 CDT; 3min 7s ago
    Tasks: 0 (limit: 23715)
   Memory: 0B
   CGroup: /system.slice/tomcat.service

May 09 14:47:43 host.test.vps systemd[1]: Starting Apache Tomcat...
Step 5. Create Apache as a reverse proxy for Tomcat
Now, you can access Tomcat on port 8080 at http://YourServerIPAddress:8080, but it will be insecurity and as we know, we can only install an SSL certificate on the domain.
touch /etc/httpd/conf.d/tomcat.conf
Open the file with your favorite editor and paste the following lines of code:
<VirtualHost *:80>
  ServerName yourdomain.com
  ProxyRequests off
  ProxyPass / http://127.0.0.1:8080/
  ProxyPassReverse / http://127.0.0.1:8080/
</VirtualHost>
Save the file, close it and check the Apache syntax.
httpd -t
You should receive the following output:
[root@vps httpd]# httpd -t
Syntax OK
If the syntax is OK, restart the service
sudo systemctl restart httpd
Now, you can access your Tomcat via domain at http://yourdomain.com, but we are not done here in this tutorial. The next step is about securing the Tomcat domain with an SSL certificate.
Step 6. Install SSL certificate
Install first, the mod_ssl extension and python certbot.
dnf install epel-release mod_ssl -y

dnf install python3-certbot-apache -y
Once, this is installed you can generate an SSL certificate with the following command:
certbot --apache --agree-tos --redirect --hsts --staple-ocsp --email admin@yourdomain.com -d yourdomain.com
After successful installation you should receive the following output:
Deploying certificate
Successfully deployed certificate for yourdomain.com to /etc/httpd/conf.d/tomcat-le-ssl.conf
Congratulations! You have successfully enabled HTTPS on https://yourdomain.com

- - - - - - - - - - - - - - - - - - - - - - - - - - - - - - - - - - - - - - - -
If you like Certbot, please consider supporting our work by:
 * Donating to ISRG / Let's Encrypt:   https://letsencrypt.org/donate
 * Donating to EFF:                    https://eff.org/donate-le
Now you can access your Tomcat interface securely at https://yourdomain.com
Congratulations! You successfully installed and secured Tomcat 10 with an SSL certificate on AlmaLinux. If you find it difficult to install and configure all these with the provided commands, you can always contact our technical support and they will do the rest for you. We are available 24/7.
P.S If you liked this post on how to install and secure Tomcat on AlmaLinux, please share it with your friends on social networks or simply leave a reply below. Thanks.

