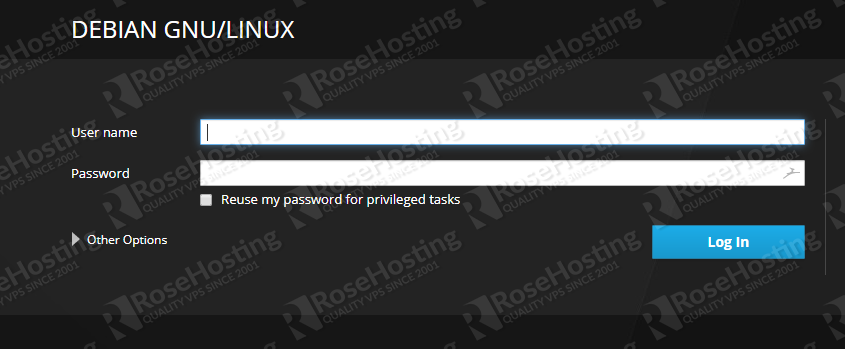
In this tutorial, we will guide you through the steps of installing Cockpit on a Debian 9 VPS as well as configure the Apache web server as a reverse proxy, that way you can access Cockpit with your domain name.

Table of Contents
Prerequisites
- A Debian 9 VPS. For the purposes of this tutorial we will use our SSD 1 VPS hosting plan.
- system user with root privileges.
Step 1: Log in and Update the Server
Log into your Debian 9 VPS via SSH as the root user, or as another user with root privileges:
ssh root@IP_Address -p Port_number
where ‘IP_Address‘ and ‘Port_number‘ are the actual IP address of your server and the SSH port number.
Once you are logged in, make sure that all installed packages on the server are updated to the latest available version by running the following commands
apt update && apt upgrade
You can also enable automatic updates on your Debian 9 VPS by following one of our previous tutorials.
Step 2: Install Cockpit
Cockpit is included in the Debian 9 ‘backports’ repositories, therefore it can be easily installed using the apt package manager. In order to do that, we have to enable the Debian ‘backports’ repository:
echo 'deb http://deb.debian.org/debian stretch-backports main' > \
 /etc/apt/sources.list.d/backports.list
Once it is enabled, update the repository list:
apt update
Once the repository list is updated, run the following command to install Cockpit along with all of its dependencies:
apt -y install cockpit
Enable the Cockpit service to automatically start after a server reboot:
systemctl enable cockpit
After the installation is completed, Cockpit should be automatically started. You can check its status by issuing the following command:
systemctl status cockpit
Output:
cockpit.service - Cockpit Web Service
   Loaded: loaded (/lib/systemd/system/cockpit.service; static; vendor preset: enabled)
   Active: active (running) since Tue 2019-07-02 05:44:29 EDT; 2min 33s ago
     Docs: man:cockpit-ws(8)
  Process: 9737 ExecStartPre=/usr/sbin/remotectl certificate --ensure --user=root --group=cockpit-ws --selinux-type= (code=exited, status=0/SUCCESS)
 Main PID: 9740 (cockpit-ws)
    Tasks: 3 (limit: 4915)
   CGroup: /system.slice/cockpit.service
           ââ9740 /usr/lib/cockpit/cockpit-ws
           ââ9746 /usr/bin/ssh-agent

Jul 02 05:44:30 hostname cockpit-ws[9740]: logged in user session
The status output shows that Cockpit is up and running on your Debian 9 VPS and you can already start using it. Cockpit by default is listening on port 9090 and at this point you can access it by navigating your favorite web browser to http://Your_IP/9090 . However, you might not have a web server installed, so we’ll be showing you how to do that in the next step. On top of that, we will also show you how to configure the web server, so you can access Cockpit with a domain name instead of your server’s IP address.
Step 3: Install and Configure Apache as a Reverse Proxy
Apache is the most popular web server in the world. We will install it for the purposes of this tutorial and use it as a reverse proxy. If Apache is not already installed on your Debian 9 VPS, you can easily install it using the following command:
apt -y install apache2
After the installation has been completed, the web server should be automatically started and running on your server. Check its status to make sure that it’s running:
systemctl status apache2
Output:
apache2.service - The Apache HTTP Server
   Loaded: loaded (/lib/systemd/system/apache2.service; enabled; vendor preset:
  Drop-In: /lib/systemd/system/apache2.service.d
           └─apache2-systemd.conf
   Active: active (running) since Thu 2019-07-04 05:02:57 CDT; 4h 35min ago
  Process: 1766 ExecReload=/usr/sbin/apachectl graceful (code=exited, status=0/S
  Process: 692 ExecStart=/usr/sbin/apachectl start (code=exited, status=0/SUCCES
 Main PID: 790 (apache2)
    Tasks: 8 (limit: 1112)
   CGroup: /system.slice/apache2.service
           ├─  790 /usr/sbin/apache2 -k start
           ├─ 1865 /usr/sbin/apache2 -k start
           ├─ 1866 /usr/sbin/apache2 -k start
           ├─ 1867 /usr/sbin/apache2 -k start
           ├─ 1871 /usr/sbin/apache2 -k start
           ├─ 1872 /usr/sbin/apache2 -k start
           ├─13591 /usr/sbin/apache2 -k start
           └─13662 /usr/sbin/apache2 -k start
Make sure to enable the Apache web server to automatically start after a server reboot:
systemctl enable apache2
Next, we will create an Apache virtual host for the domain name which we will use to access Cockpit. For our example, we will use domain.com, so make sure to change all instances of that domain name to your unique domain name. Create an Apache configuration file with the following contents:
nano /etc/apache2/sites-available/domain.com.conf

<VirtualHost *:80>
ServerName domain.com
ServerAlias www.domain.com

ProxyRequests Off

Order deny,allow
Allow from all


RewriteEngine On
RewriteCond %{HTTP:Upgrade} =websocket [NC]
RewriteRule /(.*) ws://127.0.0.1:9090/$1 [P,L]
RewriteCond %{HTTP:Upgrade} !=websocket [NC]
RewriteRule /(.*) http://127.0.0.1:9090/$1 [P,L]

ProxyPass / http://127.0.0.1:9090/
ProxyPassReverse / http://127.0.0.1:9090/

Order allow,deny
Allow from all
</VirtualHost>
Save the file and activate the virtual host with the following command:
a2ensite domain.com
And then restart the web server for the changes to take effect:
systemctl restart apache2
Finally, you should be able to access Cockpit with your domain name at http://domain.com and use one of your system users to log into the application.
That’s it! You now have a working setup of Cockpit on your Debian 9 VPS.

PS. If you liked this post on how to install Cockpit on a Debian 9 VPS, please share it with your friends on the social networks using the share buttons below, or simply leave a comment down in the comments section. Thanks.


There’s maybe a missing step in your tutorial, I’m running vanilla debian 9:
systemctl enable cockpit
The unit files have no installation config (WantedBy, RequiredBy, Also, Alias
settings in the [Install] section, and DefaultInstance for template units).
This means they are not meant to be enabled using systemctl.
Possible reasons for having this kind of units are:
1) A unit may be statically enabled by being symlinked from another unit’s
.wants/ or .requires/ directory.
2) A unit’s purpose may be to act as a helper for some other unit which has
a requirement dependency on it.
3) A unit may be started when needed via activation (socket, path, timer,
D-Bus, udev, scripted systemctl call, …).
4) In case of template units, the unit is meant to be enabled with some
instance name specified.
¿can you point me out in the right direction?
Try to use the following command:
systemctl enable --now cockpit.socket