GLPI has enhanced functions to make the daily life for the administrators easier, like a job-tracking-system with mail-notification and methods to build a database with basic information about your network-topology.
Below are the functions of this application:
- Inventory of computers, peripherals, network printers and associated components through an interface with OCS Inventory or FusionInventory.
- Management of issues on many environments through creation of tickets, management of tickets, assignment, tickets scheduling, etc.
- Licenses management (ITIL compliant)
- Assignment of equipment by geographical area to users and groups
- Management of business and financial information (purchase, guarantee and extension, damping)
- Equipment status management
- Management of applications for assistance of all types of equipment inventory
- Interface to allow the user to file a support ticket
- Business management, contracts, documents related to inventory items
- Equipment booking
- Management of a Frequently-Asked Questions (FAQ).
- Report generator: hardware, network or interventions (support).
- Multilingual support with 45 languages available.
UPDATE THE SYSTEM
Log in to your Linux VPS as user root and first of all make sure that all packages are up to date:
# apt-get update && apt-get upgrade -y
INSTALL APACHE
The following command will install the Apache web server.
# apt-get install apache2
Enable Apache to start up on boot:
# update-rc.d apache2 enable
INSTALL PHP
Next, you need to install PHP and some needed extra packages. Enter the following:
# apt-get install php5 libapache2-mod-php5 php5-mysql php5-gd
INSTALL MYSQL
Good. We already have an active Apache and PHP installation. Now, let’s install MySQL:
# apt-get install mysql-server
If you somehow didn’t setup a root password when prompted during the installation of MySQL you can fix that with the the post-installation script ‘mysql_secure_installation’ in order to set a root password:
# mysql_secure_installation

- Set root password? [Y/n] y
- Remove anonymous users? [Y/n] y
- Disallow root login remotely? [Y/n] y
- Remove test database and access to it? [Y/n] y
- Reload privilege tables now? [Y/n] y
Once you configured your MySQL root password, create a database needed for the GLPI installation. Enter MySQL console as root:
mysql> create database glpi;

mysql> grant all privileges on glpi.* to 'glpiusr'@'localhost' identified by 'your_password';

mysql> flush privileges;

mysql> exit
INSTALL GLPI
In this article we are using the /opt directory for the location in which GLPI will be downloaded. Of course you can download it to a location of your choice.
# cd /opt
At the time of writing of this tutorial, the latest stable GLPI version is 0.85.4. The download will start after the execution of the below command:
# wget https://forge.indepnet.net/attachments/download/2020/glpi-0.85.4.tar.gz
Let’s unpack the downloaded archive to the Apache’s document root. If you don’t know how to find Apache’s default document root, run:
# grep DocumentRoot grep DocumentRoot /etc/apache2/sites-available/default
Output:
DocumentRoot /var/www
Unpack the archive into Apache’s document root directory:
# tar -xvzf glpi-0.85.4.tar.gz  -C  /var/www/

# cd /var/www/glpi/
Set the correct permissions so you can proceed with the installation:
# chmod -R 777 config/
# chmod -R 777 files/
Now start the GLPI installation by opening your favorite web browser and navigating to http://your_server_ip/glpi. Enter the credentials of the MySQL database you already created and finish the installation. You should get the following info which means that you have successfully installed GLPI.
Default logins / passwords are:

glpi/glpi for the administrator account
tech/tech for the technician account
normal/normal for the normal account
post-only/postonly for the postonly account
You can delete or modify these accounts as well as the initial data.
For security reason, delete the install.php file using the following command:
# rm install/install.php
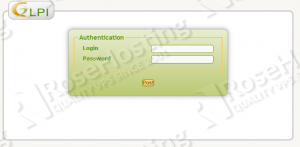
You will be welcomed by the login page:
After you log in, change the password according to your needs. For more information, check GLPI official documentation.
Congratulations, you have successfully installed GLPI on a Debian 7 VPS.
Of course you don’t have to do any of this if you use one of our Linux VPS Hosting services, in which case you can simply ask our expert Linux admins to install GLPI for you. They are available 24×7 and will take care of your request immediately.
PS. If you liked this post please share it with your friends on the social networks using the buttons on the left or simply leave a reply below. Thanks.
