First of all, you need to enable the EPEL repository on your CentOS VPS. In fact, enabling EPEL on CentOS 7 is fairly easy. You can do that using the following command:
yum install http://mirror.us.leaseweb.net/epel/7/x86_64/e/epel-release-7-5.noarch.rpm
Now, verify that EPEL has been enabled on your server by running the following command:
yum repolist
Once you enable EPEL on your CentOS VPS you can update all your system software to the latest version available using the yum package manager. For that purpose, you can run the command:
yum update
When you are done with these pre-installation operations, you can move to the next step, which is, installation of Node.js and NPM Packages. Again, this process is fairly easy and can be completed using a single command.
yum install nodejs npm
After you install Node.js and NPM, it is time to install Log.io on your server. You can install Log.io using NPM by running the following command:
npm install -g log.io --user "root"
The installation should take less than one minute. You may have noticed that we used ‘root’ as user and the reason is because Log.io requires certain permissions so it can monitor your log files.
Now it is time to configure Log.io according to your needs. The configuration files are located in the user’s home directory under a hidden directory called ‘.log.io’. In this case, to access the configuration files you need to navigate to the ‘~/.log.io/’ directory using the following command:
cd ~/.log.io/
There are three configuration files:
harvester.conf
log_server.conf
web_server.conf
In most cases, you will have to edit the harvester.conf. In this configuration file, you can specify which log files need to be monitored for changes. You can edit the file using your favorite text editor. For example, to edit the harvester.conf file using nano, you can run the following command:
nano harvester.conf
When you are done, you can save the file and close it. Then, you can start the Log.io services in background using the following commands:
log.io-server &
log.io-harvester &
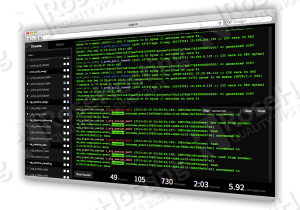
In order to access the web interface where you can monitor your log files, open your favorite web browser and navigate to:
http://IP-ADDRESS:28778/
Here, the IP-ADDRESS should be replaced with the IP address of your CentOS VPS. 28778 is the listening port.
We suggest you to check:
http://logio.org/
and
https://github.com/NarrativeScience/Log.io
for more information about Log.io.
Of course you don’t have to do any of this if you use one of our Linux VPS hosting services, in which case you can simply ask our expert Linux admins to install Log.io for you. They are available 24×7 and will take care of your request immediately.
PS. If you liked this post please share it with your friends on the social networks using the buttons on the left or simply leave a reply below. Thanks.
Sorry but i couldn’t install Log.io using npm command.
It said error. For example here’s 4 last line:
npm ERR!
npm ERR! Additional logging details can be found in:
npm ERR! /root/npm-debug.log
npm ERR! not ok code 0
Can you tell me what happend?
Update your npm, run npm cache clear and try again. If that doesn’t solve your issue, check the “/root/npm-debug.log” file for more details.