Magento is an open-source e-commerce platform written in PHP that uses multiple PHP frameworks such as Symfony and Laminas. The platform is flexible and has a large variety of features to build an online store.
Magento offers a community and enterprise edition. The community edition is available free of charge and is designed primarily for individuals and/or small businesses.
The enterprise edition is the paid version of Magento. Compared to the community edition, the enterprise edition has advanced custom features and functionalities and is mainly aimed at medium to large businesses.
In this tutorial, we will show you how to install the Magento 2.4.4 community edition on Ubuntu 22.04 server, which can be done easily if you follow it step by step.
Table of Contents
Prerequisites:
– A VPS running Ubuntu 22.04
– root SSH access or a regular user with sudo privileges
Step 1. Log in via SSH and update the system
Log in to your Ubuntu 22.04 VPS with SSH as a root user:
ssh root@IP_Address -p Port_number
Replace “IP_Address” and “Port_Number” with your server’s IP address and SSH port.
You can check whether you have the proper Ubuntu version installed on your server with the following command:
lsb_release -a
You should get the following output:
No LSB modules are available.
Distributor ID: Ubuntu
Description: Ubuntu 22.04 LTS
Release: 22.04
Codename: jammy
Now, run the following command to update all installed packages to the latest available version.
apt update && sudo apt upgrade
Step 2: Install Apache webserver
Apache webserver can be installed with the following command:
apt-get install apache2
Once, the installation is complete you can check the status of the Apache service:
systemctl status apache2
You should get the following output:
● apache2.service - The Apache HTTP Server
     Loaded: loaded (/lib/systemd/system/apache2.service; enabled; vendor preset: enabled)
     Active: active (running)
       Docs: https://httpd.apache.org/docs/2.4/
   Main PID: 6982 (apache2)
      Tasks: 55 (limit: 2200)
     Memory: 4.7M
        CPU: 134ms
     CGroup: /system.slice/apache2.service
             ├─6982 /usr/sbin/apache2 -k start
             ├─6984 /usr/sbin/apache2 -k start
             └─6985 /usr/sbin/apache2 -k start
Step 3: Install PHP and PHP extensions
Magento 2.4.4 is fully compatible with PHP 8.1. To install PHP 8.1 and the required PHP extensions, run the following command:
apt install php php-common libapache2-mod-php php-cli php-fpm php-mysql php-json php-opcache php-gmp php-curl php-intl php-mbstring php-xmlrpc php-gd php-xml php-zip
To verify that PHP is successfully installed, run the following command:
php -v
You should get the following output on your screen:
PHP 8.1.2 (cli) (built: Apr 7 2022 17:46:26) (NTS)
Copyright (c) The PHP Group
Zend Engine v4.1.2, Copyright (c) Zend Technologies
with Zend OPcache v8.1.2, Copyright (c), by Zend Technologies
Now that you’ve installed PHP, you need to configure it for Magento.
Find the PHP configuration file:
php --ini | grep "Loaded Configuration File"
Loaded Configuration File: /etc/php/8.1/cli/php.ini
Open the configuration file using your favorite editor. We will use nano:
nano /etc/php/8.1/cli/php.ini
Modify the php.ini file with the following values:
memory_limit = 512M
upload_max_filesize = 128M
zlib.output_compression = On
max_execution_time = 600
max_input_time = 900
date.timezone = America/Chicago
Save and close the PHP configuration file.
Step 4: Install the MySQL server
Run the following command to install the MySQL server from the official Ubuntu repositories:
apt install mysql-server
When the installation is complete, you can improve the security of your MySQL server, by running the mysql_secure_installation script:
mysql_secure_installation
We recommend answering every prompt with ‘Y’.
Step 5: Create a Magento Database
Next, you will need to create a database and user for the Magento installation. First, log in to MySQL with the following command:
mysql -u root -p
Once connected, create a database and user using the following command:
mysql> CREATE DATABASE magento;
mysql> CREATE USER 'magento'@'localhost' IDENTIFIED BY 'Str0ngPa$$w0rd';
mysql> GRANT ALL PRIVILEGES ON magento.* TO 'magento'@'localhost';
mysql> FLUSH PRIVILEGES;
mysql> EXIT;
Step 6. Install Elasticsearch
From 2.4.x, Magento requires users to have Elasticsearch for its search capabilities, because without it we can not install Magento in the next steps.
Before we proceed with the Elasticsearch installation we need to add the GPG Key and Elastic source list to sources.list.d
curl -fsSL https://artifacts.elastic.co/GPG-KEY-elasticsearch | sudo apt-key add -

echo "deb https://artifacts.elastic.co/packages/7.x/apt stable main" | sudo tee -a /etc/apt/sources.list.d/elastic-7.x.list
Update the repo and install the Elasticsearch with the following command:
apt update && apt install elasticsearch
Then start and enable the service.
systemctl start elasticsearch
systemctl enable elasticsearch
To verify whether Elasticsearch is running or not you can run the following command:
$ curl -X GET "localhost:9200"
You will be presented with a message like this.
{
"name" : "ubuntu",
"cluster_name" : "elasticsearch",
"cluster_uuid" : "UFfgYe3eQ7C4xcmOLx_idA",
"version" : {
"number" : "7.17.3",
"build_flavor" : "default",
"build_type" : "deb",
"build_hash" : "5ad023604c8d7416c9eb6c0eadb62b14e766caff",
"build_date" : "2022-04-19T08:11:19.070913226Z",
"build_snapshot" : false,
"lucene_version" : "8.11.1",
"minimum_wire_compatibility_version" : "6.8.0",
"minimum_index_compatibility_version" : "6.0.0-beta1"
},
"tagline" : "You Know, for Search"
}
Step 7: Install Composer
Magento uses Composer to manage its components and dependencies. To install Composer on your server, run the following command:
apt install composer
To check the Composer version you can run the following command:
composer -V
Output:
Composer 2.2.6 2022-02-04 17:00:38
Step 8: Install Magento
Now that you have your environment completely set up, you can proceed with the Magento installation.
For most situations, it is recommended to install Magento using the Marketplace by creating an access key.
For generating Access keys go to the Magento marketplace:
My profile > Marketplace > My products > Access Keys
Now, it’s time to download and install Magento using Composer. We’ll download the latest version of Magento, i.e., 2.4.4.
composer create-project --repository-url=https://repo.magento.com/ magento/project-community-edition=2.4.4 /var/www/magento
Running the command above, you will be asked for your username and password.
Username: Your Public Key
Password: Your Private Key
Go to the /var/www/magento directory:
cd /var/www/magento
Install Magento using the composer command, type:
bin/magento setup:install \
--base-url=http://your-domain.com \
--db-host=localhost \
--db-name=magento \
--db-user=magento \
--db-password=Str0ngPa$$w0rd \
--admin-firstname=Admin \
--admin-lastname=User \
--admin-email=admin@your-domain.com \
--admin-user=admin \
--admin-password=admin123 \
--language=en_US \
--currency=USD \
--timezone=America/Chicago \
--use-rewrites=1
Note: Before running the command above, you need to edit the domain name, email address, and admin password.
After the installation process you should see the following output:
[SUCCESS]: Magento installation complete.
[SUCCESS]: Magento Admin URI: /admin_oii61f
Nothing to import.
Finally, change the ownership of the /var/www/magento directory to the www-data user:
chown -R www-data: /var/www/magento
Step 9: Setup Cron jobs
Magento requires its cron jobs to run to automate its important system functions. Let’s create the following cron job:
sudo -u www-data bin/magento cron:install
You should get the following output:
Crontab has been generated and saved
Step 10: Configure Apache for Magento
Next, you will need to create an Apache virtual host configuration file for your Magento installation. You can create it with the following command:
nano /etc/apache2/sites-available/magento.conf
Add the following lines:
<VirtualHost *:80>
     ServerAdmin admin@your_domain.com
     DocumentRoot /var/www/magento/pub
     ServerName your_domain.com
     ServerAlias www.your_domain.com

     <Directory /var/www/magento/>
          AllowOverride All
     </Directory>

     ErrorLog ${APACHE_LOG_DIR}/error.log
     CustomLog ${APACHE_LOG_DIR}/access.log combined
</VirtualHost>
Save and close the file then activate the Magento virtual host and rewrite the module with the following command:
a2ensite magento.conf
a2enmod rewrite
Next, restart the Apache service to apply the changes:
systemctl restart apache2
Step 11: Access your Magento installation
Now, open your web browser and type the URL http://your_domain.com
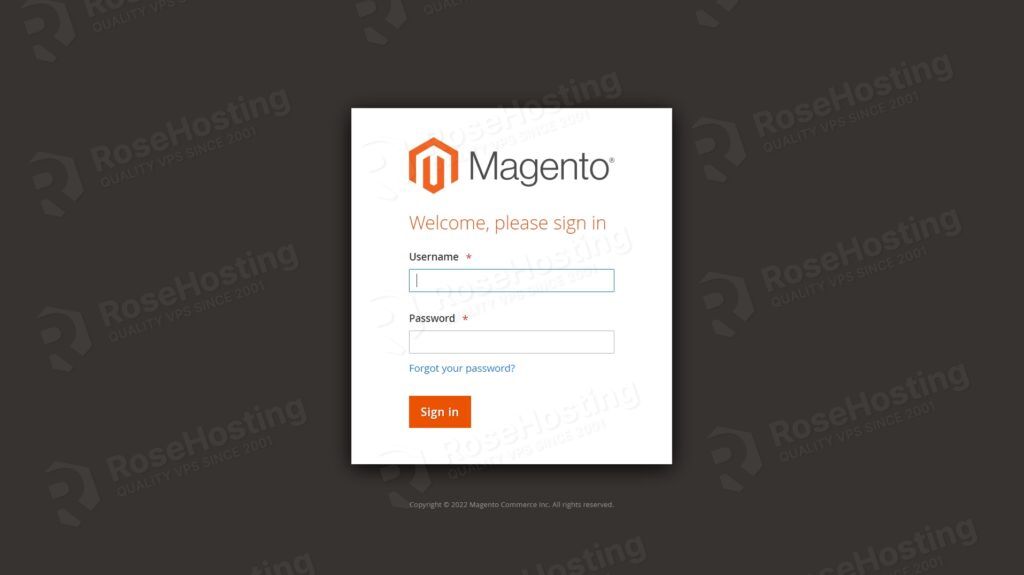
or type http://your_domain.com/admin_oii61f to visit the Magento dashboard. You should see the Magento login page:
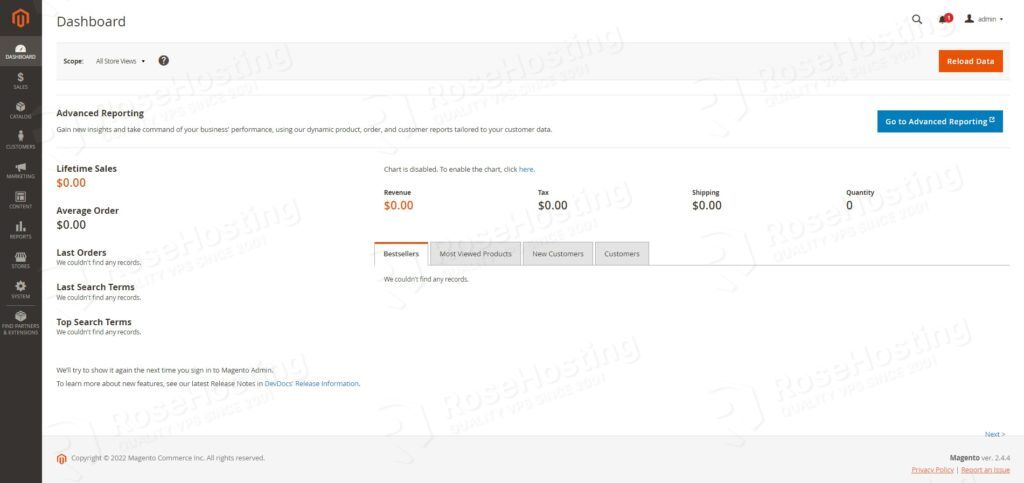
Provide your admin username, and password and click on the Sign in button. You should see the Magento dashboard on the following screen:
Congratulations! you have successfully installed Magento 2.4.4 on Ubuntu 22.04 server.
However, if you are one of our Managed Ubuntu Hosting customers, or if you use one of our Managed VPS Hosting plans, you don’t have to install Magento 2.4.4 on your Ubuntu 22.04 VPS – simply ask our admins, sit back, and relax. Our admins will install Magento on your Ubuntu 22.04 server (or any other OS that you have with us) for you immediately.
PS. If you liked this post about how to install Magento 2.4.4 on Ubuntu 22.04, please share it with your friends on social networks or simply leave a comment in the comments section. Thanks.


Hi Jeff Wilson,
When installing find the
Step 3: Install PHP and PHP extensions
PHP 7.4.3 (cli) (built: Jun 13 2022 13:43:30) ( NTS )
Copyright (c) The PHP Group
Zend Engine v3.4.0, Copyright (c) Zend Technologies
with Zend OPcache v7.4.3, Copyright (c), by Zend Technologies
You should get the following output on your screen:
PHP 8.1.2 (cli) (built: Apr 7 2022 17:46:26) (NTS)
Copyright (c) The PHP Group
Zend Engine v4.1.2, Copyright (c) Zend Technologies
with Zend OPcache v8.1.2, Copyright (c), by Zend Technologies
So is this error?
PHP 8.1 is the required PHP version for Magento 2.4.4, you should install PHP 8.1 if you want to set up Magento 2.4.4 on your server.
Hello Jeff,
Thank you for putting this documentation together. I have been following the steps until I got to installing elasticsearch and when I run the command:
curl -fsSL https://artifacts.elastic.co/GPG-KEY-elasticsearch | sudo apt-key add –
I get this warning: Warning: apt-key is deprecated. Manage keyring files in trusted.gpg.d instead (see apt-key(8)).
The following commands do not work as intended as a result.
Please advise.
Thanks,
Amit