phpMyAdmin is the most popular and most widely used web-based database management tool. It is a free and open-source PHP application, that allows the users to manage single or multiple SQL database servers, locally or on a remote server using a web browser with easy to use graphic user interface. Today, we are going to teach you, how to install phpMyAdmin on Ubuntu 16.04.

Many developers need to interact and manipulate with their databases, but not all of them are comfortable with SQL commands, and this is where phpMyAdmin comes in handy. You e can easily create, rename, delete and edit databases, tables, or fields, execute SQL commands. You can easily import and export tables, create and modify users, and so on, all via an easy-to-use GUI. Installing phpMyAdmin on Ubuntu 16.04 is an easy task if you carefully follow the steps below.
We have an updated version of this tutorial – How to Install phpMyAdmin on Ubuntu 20.04
Step 1: Login via SSH
Login to your Ubuntu 16.04 VPS via SSH as user root
ssh root@IP_address
and make sure that you have the latest version of all installed packages
apt-get update && apt-get upgrade
Step 2: Install LAMP Stack – (Linux, Apache, MariaDB/MySQL, PHP)
phpMyAdmin requires a LAMP (Linux, Apache, MariaDB/MySQL, PHP) stack. If you don’t have it already installed on your server, you can do it by executing the following commands
apt-get install apache2 php mysql-server
Step 3: Install phpMyAdmin on Ubuntu 16.04
Once Apache, PHP, and MySQL are installed, we can go ahead and install phpMyAdmin. The package is included in the official Ubuntu 16.04 repository and it can be easily installed with the command below
apt-get install phpmyadmin
phpMyAdmin will be installed along with its dependencies and all necessary PHP modules.
When you will be prompted to select a web server to configure, hit the space bar to select Apache2 and Enter to confirm and continue
lqqqqqqqqqqqqqqqqqqqqqqqqqqqqqqqqu Configuring phpmyadmin tqqqqqqqqqqqqqqqqqqqqqqqqqqqqqqqqq
x Please choose the web server that should be automatically configured to run phpMyAdmin.  x
x                                                                                          x
x Web server to reconfigure automatically:                                                 x
x                                                                                          x
x    [ ] apache2                                                                           x
x    [ ] lighttpd                                                                          x
x                                                                                          x
x                                                                                          x
x                                                                                      x
x                                                                                          x
mqqqqqqqqqqqqqqqqqqqqqqqqqqqqqqqqqqqqqqqqqqqqqqqqqqqqqqqqqqqqqqqqqqqqqqqqqqqqqqqqqqqqqqqqqqj
On the next screen, select YES to configure a database for phpMyAdmin with dbconfig-common
qqqqqqqqqqqqqqqqqqqqqqqqqqqqqqqqqqqqqqqqqq Configuring phpmyadmin qqqqqqqqqqqqqqqqqqqqqqqqqqqqqqqqqqqqqqqqqqq
x                                                                                                           x
x The phpmyadmin package must have a database installed and configured before it can be used.               x
x  This can be optionally handled with dbconfig-common.                                                     x
x                                                                                                           x
x If you are an advanced database administrator and know that you want to perform this configuration        x
x  manually, or if your database has already been installed and configured, you should refuse this option   x
x Details on what needs to be done should most likely be provided in /usr/share/doc/phpmyadmin.             x
x                                                                                                           x
x Otherwise, you should probably choose this option.                                                        x
x                                                                                                           x
x Configure database for phpmyadmin with dbconfig-common?                                                   x
x                                                                                                           x
x                                                                                                  x
x                                                                                                           x
mqqqqqqqqqqqqqqqqqqqqqqqqqqqqqqqqqqqqqqqqqqqqqqqqqqqqqqqqqqqqqqqqqqqqqqqqqqqqqqqqqqqqqqqqqqqqqqqqqqqqqqqqqqqq
Step 4: Set the Password for the phpMyAdmin User
and finally set a password for the ‘phpmyadmin’ user in MySQL
With this step, the installation of phpMyAdmin is completed.
Step 5: Test and Verify phpMyAdmin Installation on Ubuntu 16.04
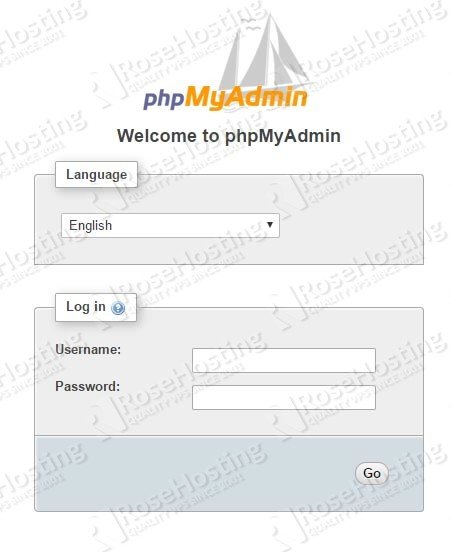
You can access it at http://yourIPaddress/phpmyadmin and log in with your MySQL username and password.


Of course, you don’t have to install phpMyAdmin on Ubuntu 16.04, if you use one of our Optimized Ubuntu Hosting services, in which case you can simply ask our expert Linux admins to install phpMyAdmin on Ubuntu 16.04 for you. They are available 24×7 and will take care of your request immediately. In case you need to install a more recent version of Ubuntu, we have two more tutorials ready for installing phpMyAdmin:
PS. If you liked this post, on how to install phpMyAdmin on Ubuntu 16.04, please share it with your friends on the social networks using the buttons below or simply leave a comment in the comments section. Thanks.
Thanks for this great post. i really appreciate your blog.
The best place for learning.
Yes thanks for this post. Really helped a lot in need.
How to login as root in phpmyadmin? I can’t log in.
Default dbuser is phpmyadmin instead of root.
Thank you bro …Its helped lot
i downloaded the app previously before i saw this post and the app when called up using the url it seeems to not display… i have also tried this one same old problem admin please can u help me….this is what it gives me
Reading package lists… Done
Building dependency tree
Reading state information… Done
phpmyadmin is already the newest version.
The following packages were automatically installed and are no longer required:
libjs-codemirror libjs-jquery-cookie libjs-jquery-event-drag
libjs-jquery-metadata libjs-jquery-mousewheel libjs-jquery-tablesorter
libjs-jquery-ui
Use ‘apt-get autoremove’ to remove them.
0 upgraded, 0 newly installed, 0 to remove and 0 not upgraded.
I am not able to access my phpmyadmin in browser.
Little help please
If you followed the instructions closely, you should be able to access it at
http://yourIPaddress/phpmyadmin1. sudo -H vim /etc/apache2/apache2.conf
2. Add to bottom of file:
Include /etc/phpmyadmin/apache.conf
3. /etc/init.d/apache2 restart
Thanks for good post, it helped to install phpmyadmin.
Thank you very much and it was very supported.