Jenkins is a free and open-source Continuous Integration server written in Java. It helps developers to automate the build and deployment process. It can be installed on a Cloud platform to run self-hosted pipelines.

Jenkins uses master-slave architecture to achieve clustering. Where a build process can be deployed across multiple worker nodes. This will allow you to deploy multiple projects within a single cluster.
In this post, we will walk you through the step-by-step process of setting up the Jenkins cluster on the RoseHosting Cloud Platform. We will use Jenkins DevOps Pack from the RoseHosting Cloud Marketplace to set up the cluster. We will also build a Java project from GitHub using the Maven plugin.
Table of Contents
Install Jenkins DevOps Pack
First, log in to the RoseHosting Cloud Platform using the URL https://app.rosehosting.cloud.
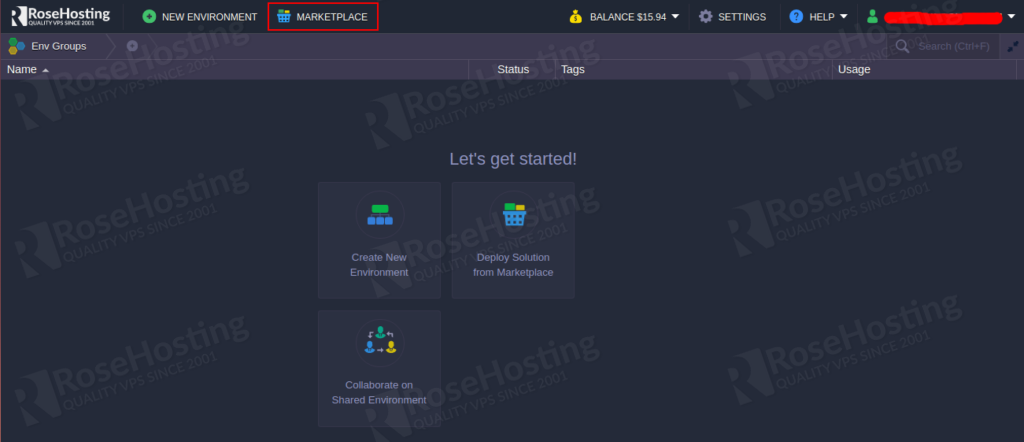
Now, click on the MARKETPLACE => Applications => Dev & Admin Tools then find Jenkins DevOps Pack as shown below:
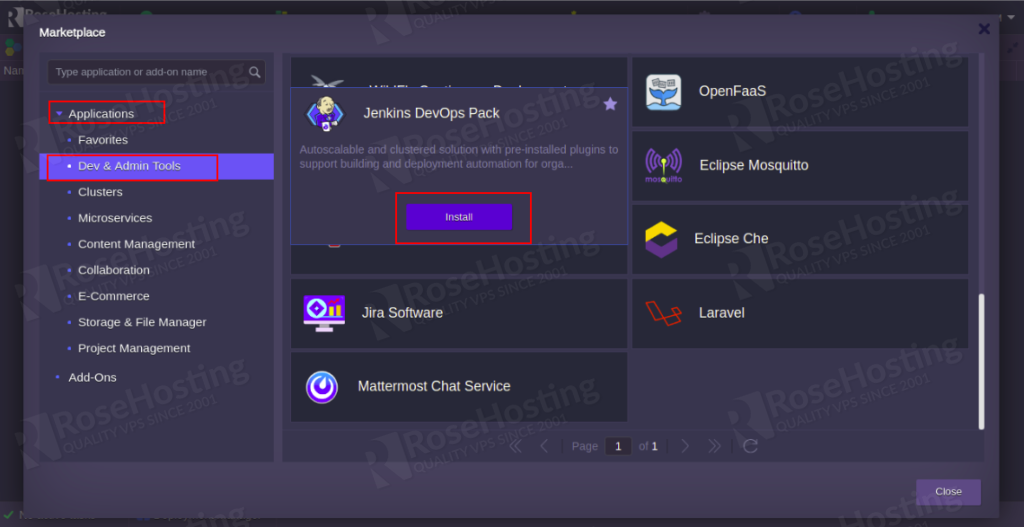
Now, click on the Install button. You should see the following page:
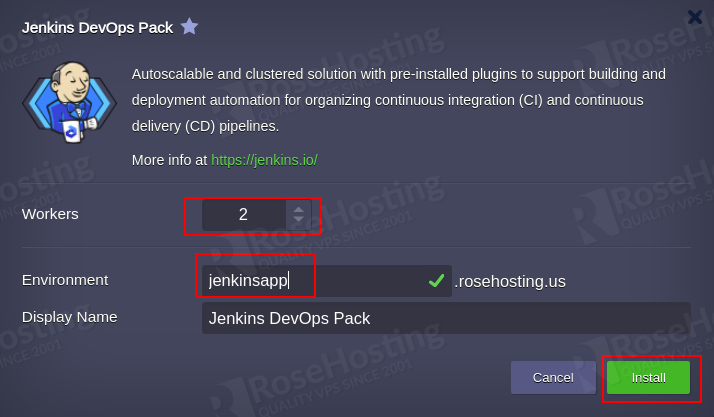
Provide a number of workers, Environment name, and click on the Install button. Once the installation has been completed, you should see the following page:
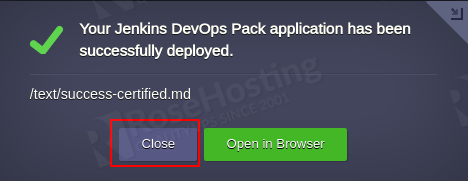
Click on the Close button. You should see your installed Environment on the following page:
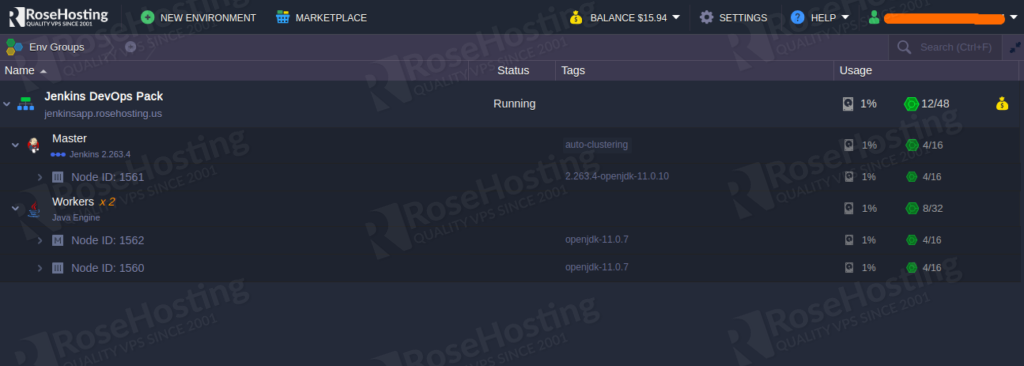
Configure Jenkins Cluster
In the Jenkins cluster, by default, only one executor is configured in a worker to run one job at a time. You can change this executer from the Jenkins admin panel.
First, log in to the Jenkins admin panel using the credentials you received from the email. You should see the Jenkins Dashboard on the following page:
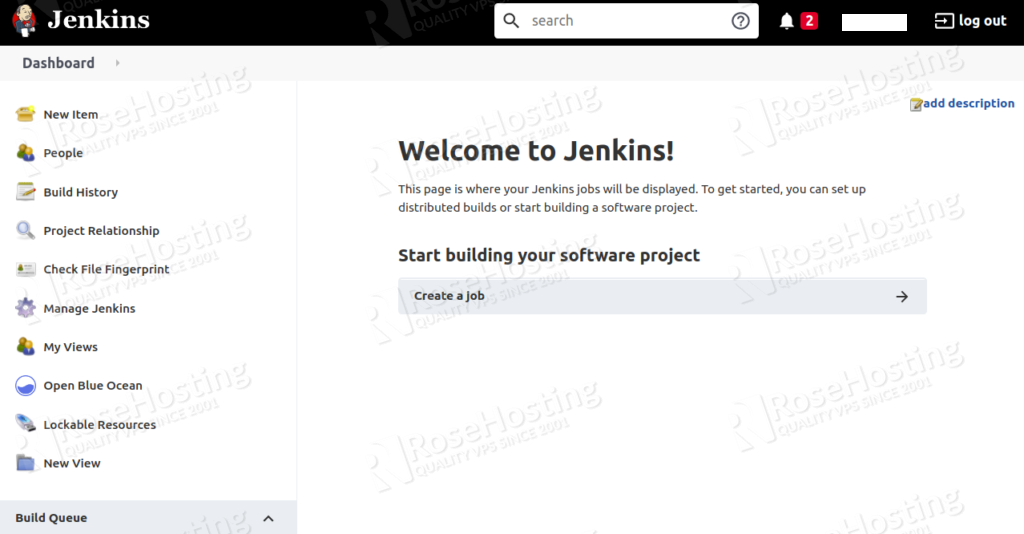

Now, click on the Build Executor Status. You should see the following page:
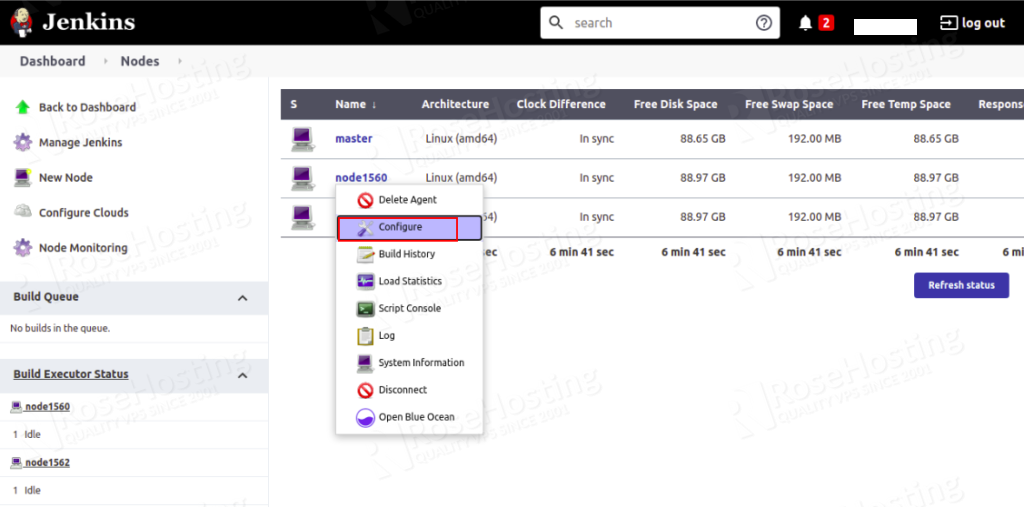
Now, right-click on any node and click on the Configure button. You should see the following page:
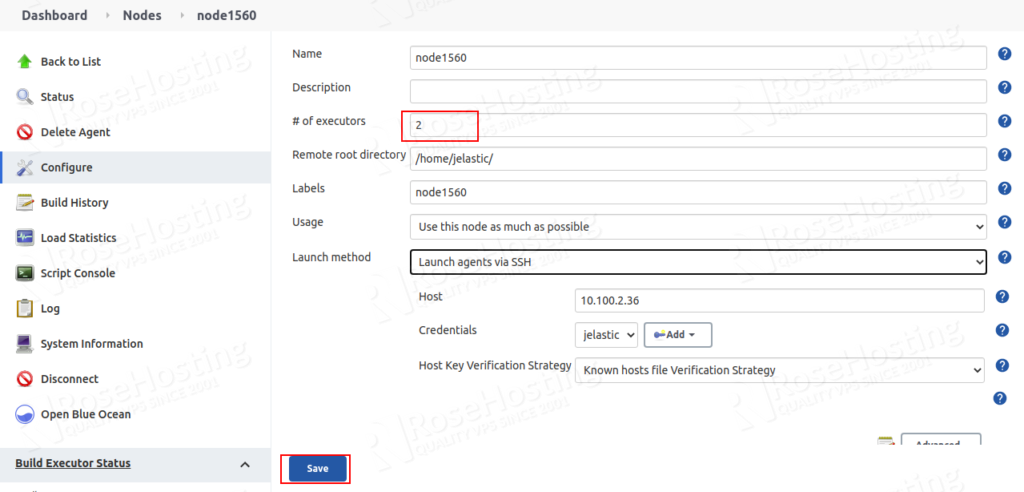
Change the number of executors and click on the Save button to apply the changes.
Next, you will also need to scale the Worker nodes to speed up the project build process. You can achieve this by editing the Environment Topology.
On the Jenkins Environment dashboard, click on the Change Environment Topology button. You should see the following page:
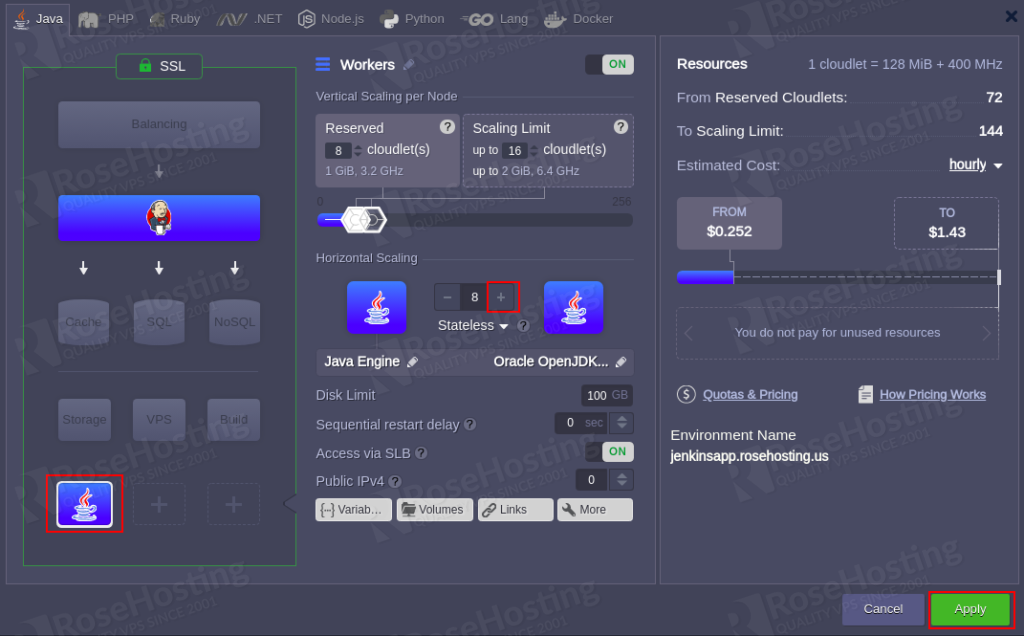
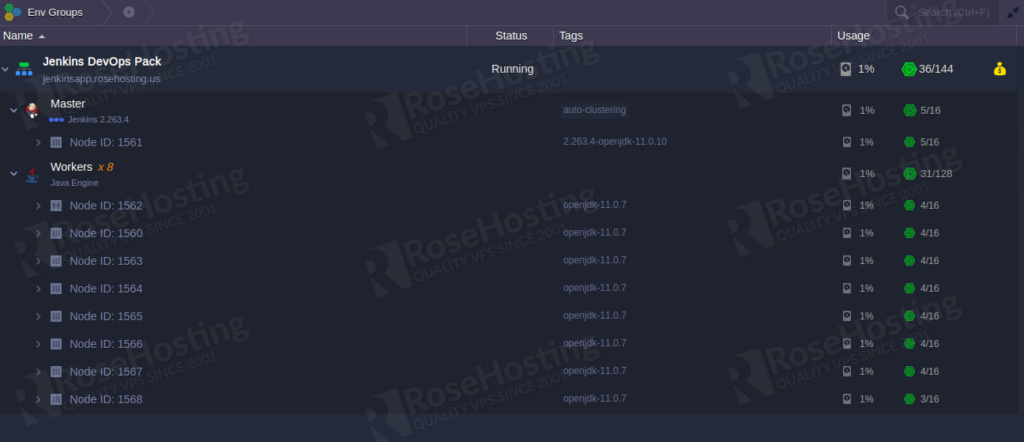
Now, select Workers layer (Java Engine) and add the horizontal scaling to 8 using the + button. Then, click on the Apply button to build the new environment. You should see the following page:
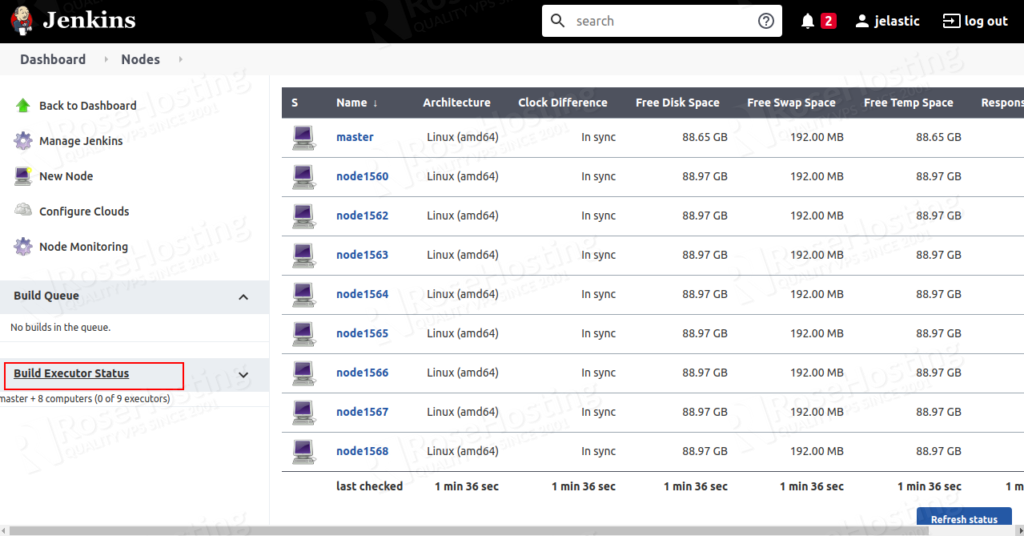
Next, go to the Jenkins Admin panel and click on Build Executor Status. You should see all available Worker nodes in the following page:
Create a New Job through Jenkins Admin Panel
In this section, we will create a new job from the Jenkins admin panel to build and publish a project on the application server hosted on the RoseHosting PaaS. We will use Maven to build the HelloWorld project from GitHub and use the Maven plugin to deploy it on the RoseHosting PaaS.
First, log in to the Jenkins admin panel as shown below:
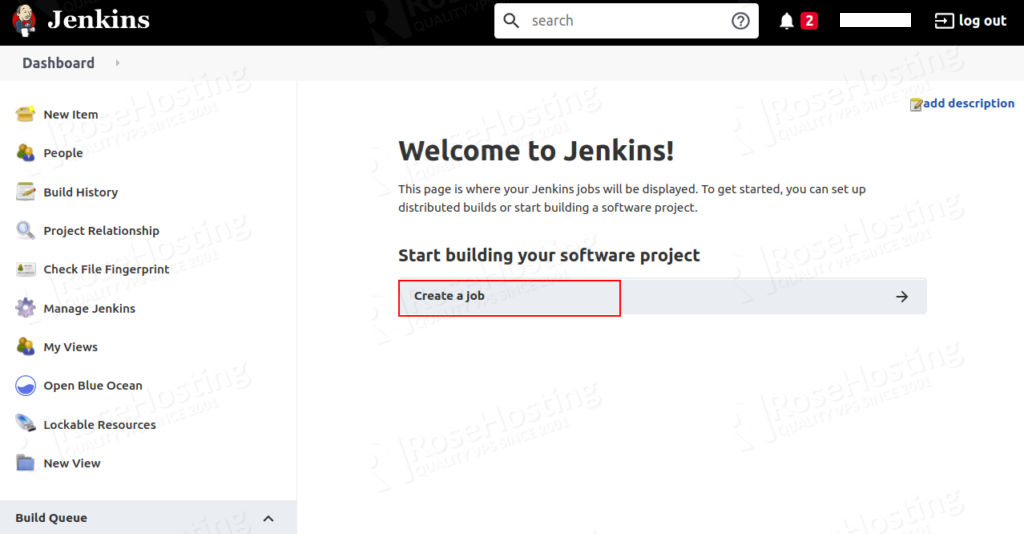
Click on the Create new jobs. You should see the following page:
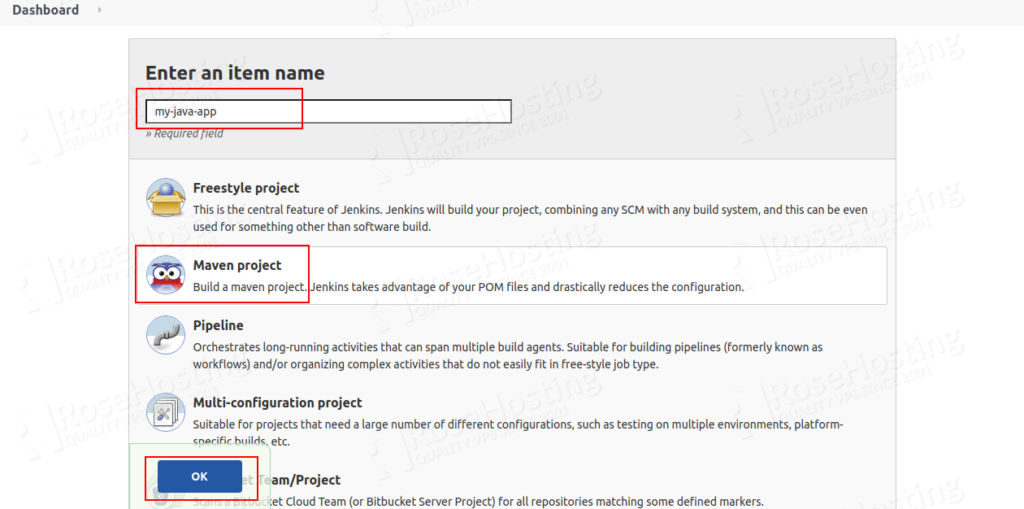
Define your project name, select Maven project, and press OK. You should see the following page:
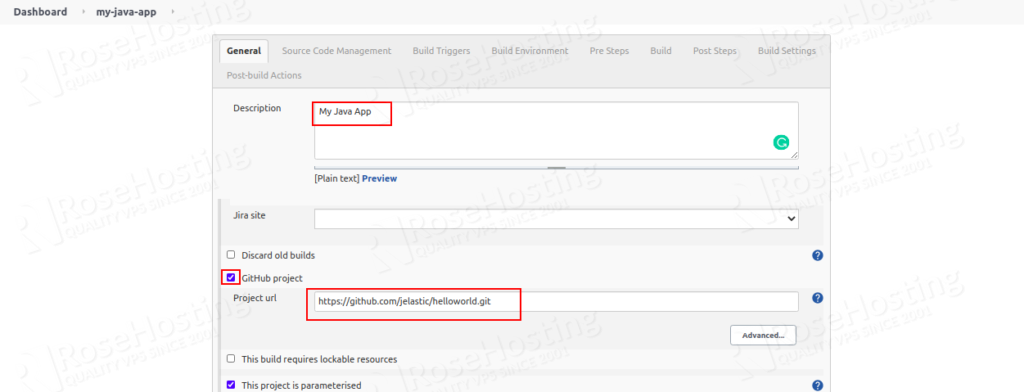
Provide your project description, specify GitHub project URL.
Next, click on the checkbox This project is parameterized and add the first variable clicking on Add Parameter => String Parameter.
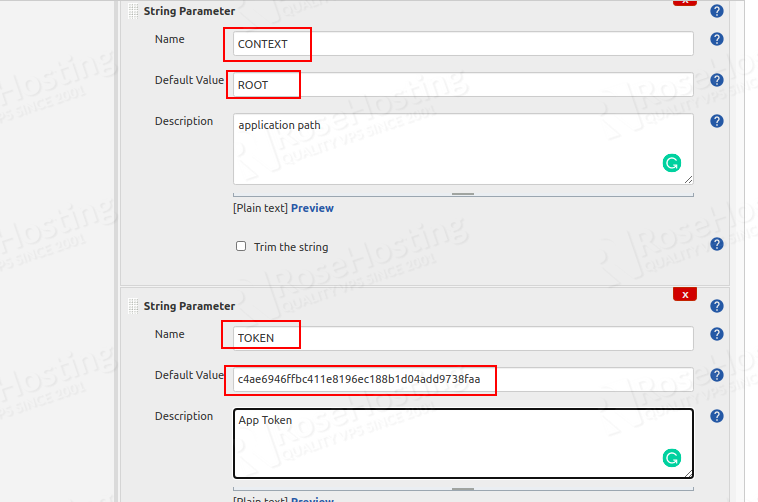
As you can see, we added four String Parameters. A brief explanation of each String Parameter is shown below:
ROSEHOSTING_API_ENDPOINT Specify the hostname of the tomcat application hosted on the RoseHosting.
TARGET_ENV Specify the short domain name of the tomcat application.

TOKEN Specify the access Token of your RoseHosting Environment.
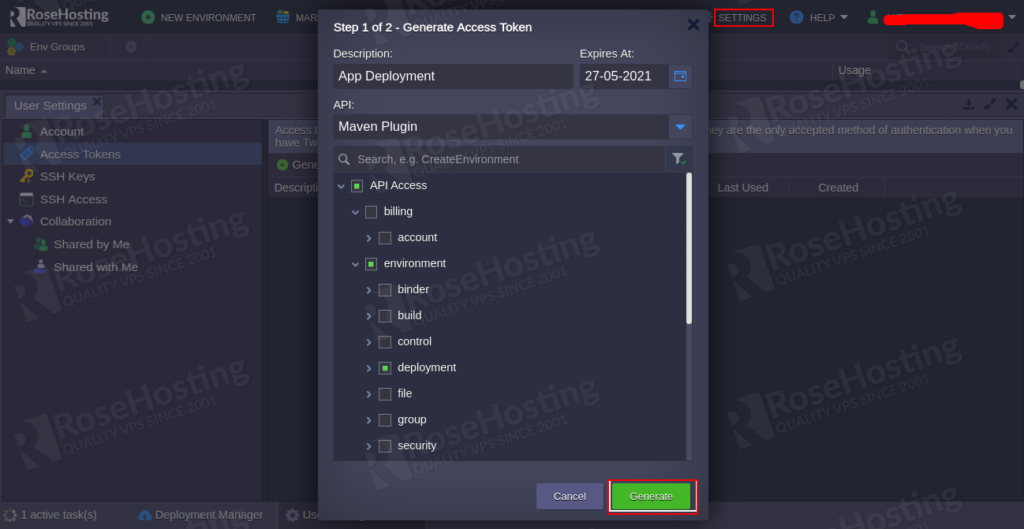
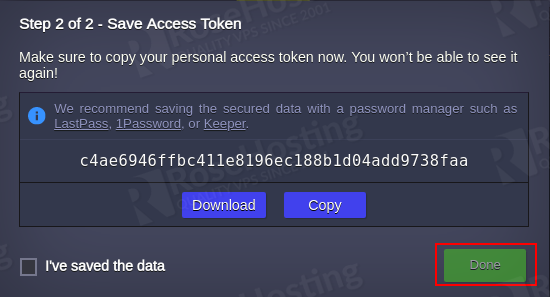
CONTEXT Specify the path of the HelloWorld application.
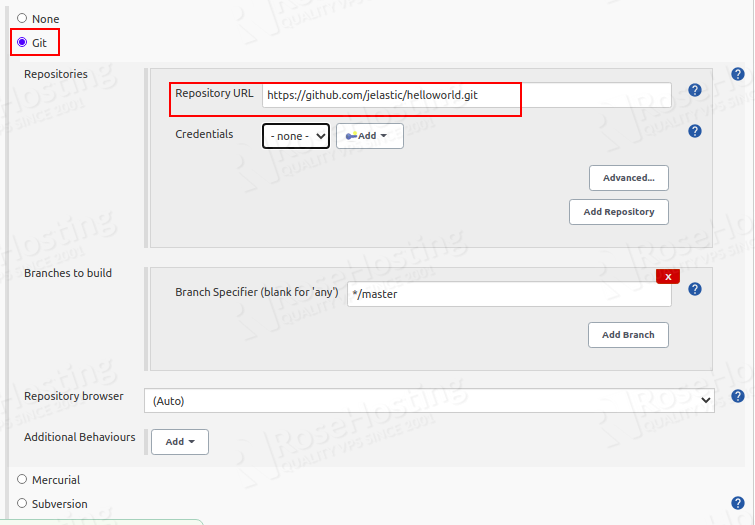
Next, scroll down to the Source Code Management section and specify the Repository URL.
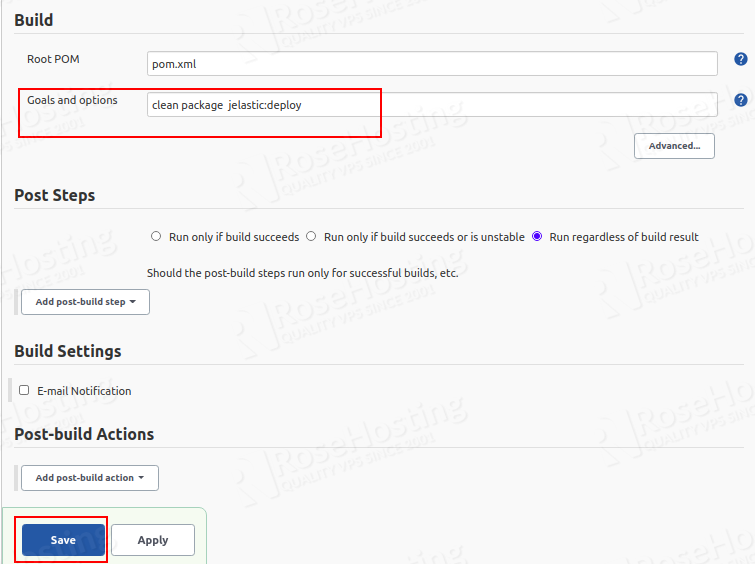
In the Build section, type “clean package jelastic:deploy” in the Goals and options field and click on the Save button.
Build Java Project with Maven Plugin
In this section, we will build the Java project from the Jenkins admin panel.
Go to the Jenkins admin panel and click on the Build with Parameters. You should see the following page:
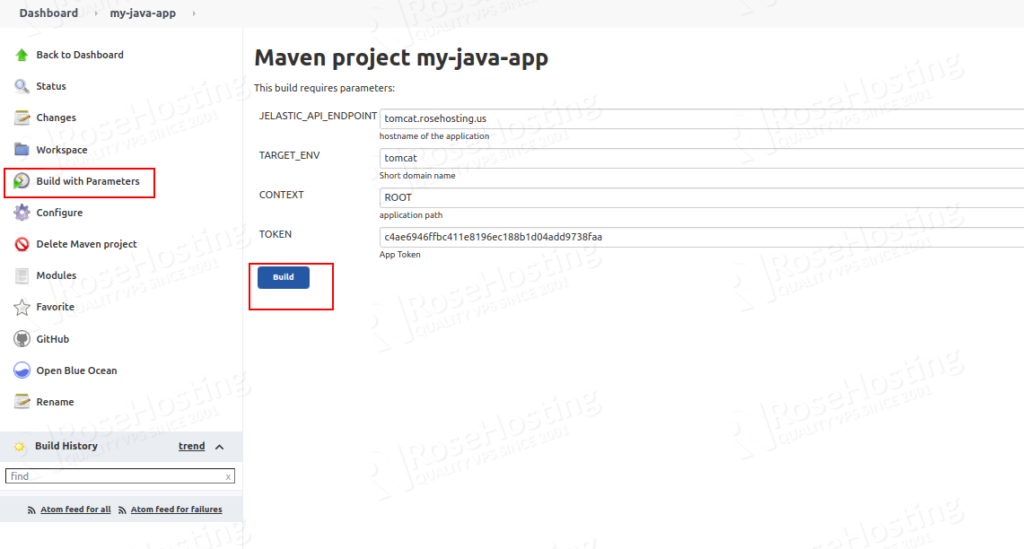
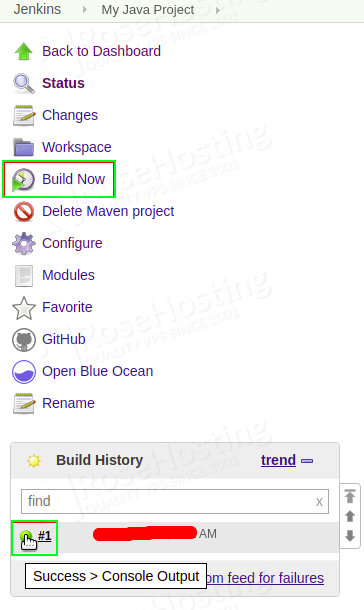
Click on the Build button to start the process. Once the build process has been completed successfully, you should see a green sign next to #1.
At this point, your HelloWorld application has been deployed to the RoseHosting Cloud Platform. You can access it using the URL https://tomcat.rosehosting.us.
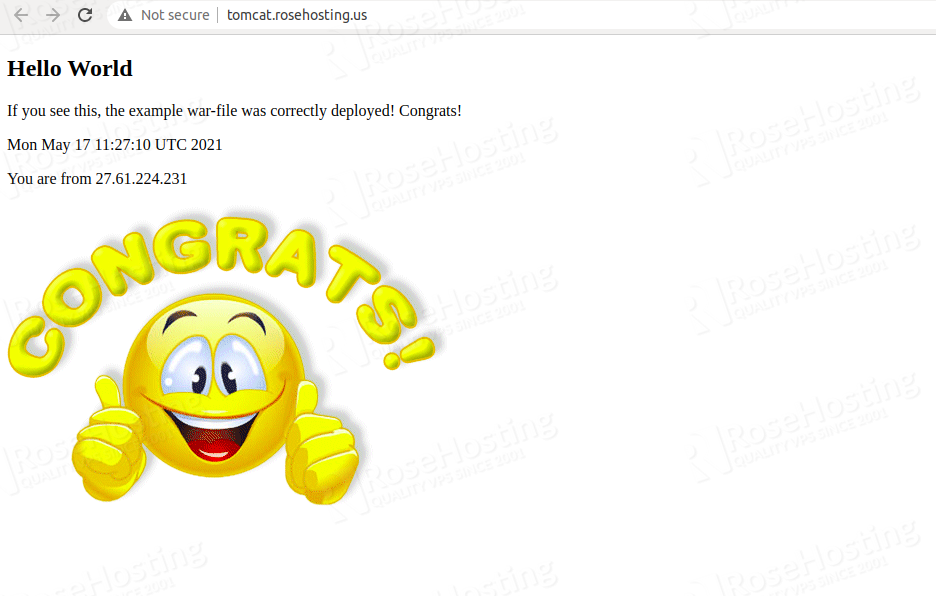
Congratulations! you have successfully deployed the Java project with the Jenkins cluster and CI/CD pipeline on our PaaS Cloud Platform.
You don’t have to configure Jenkins yourself if you use one of our Managed Cloud Paas Hosting, in which case you can ask one of our expert system admins to install and configure it for you. They are available 24/7, 365 days a year, ready to assist with any configuration.
If you liked this post, don’t forget to show us support by sharing it with your friends on social media. Thanks!